Floor – Mayline Mobile Lite User Manual
Page 5
(5)
FLOOR
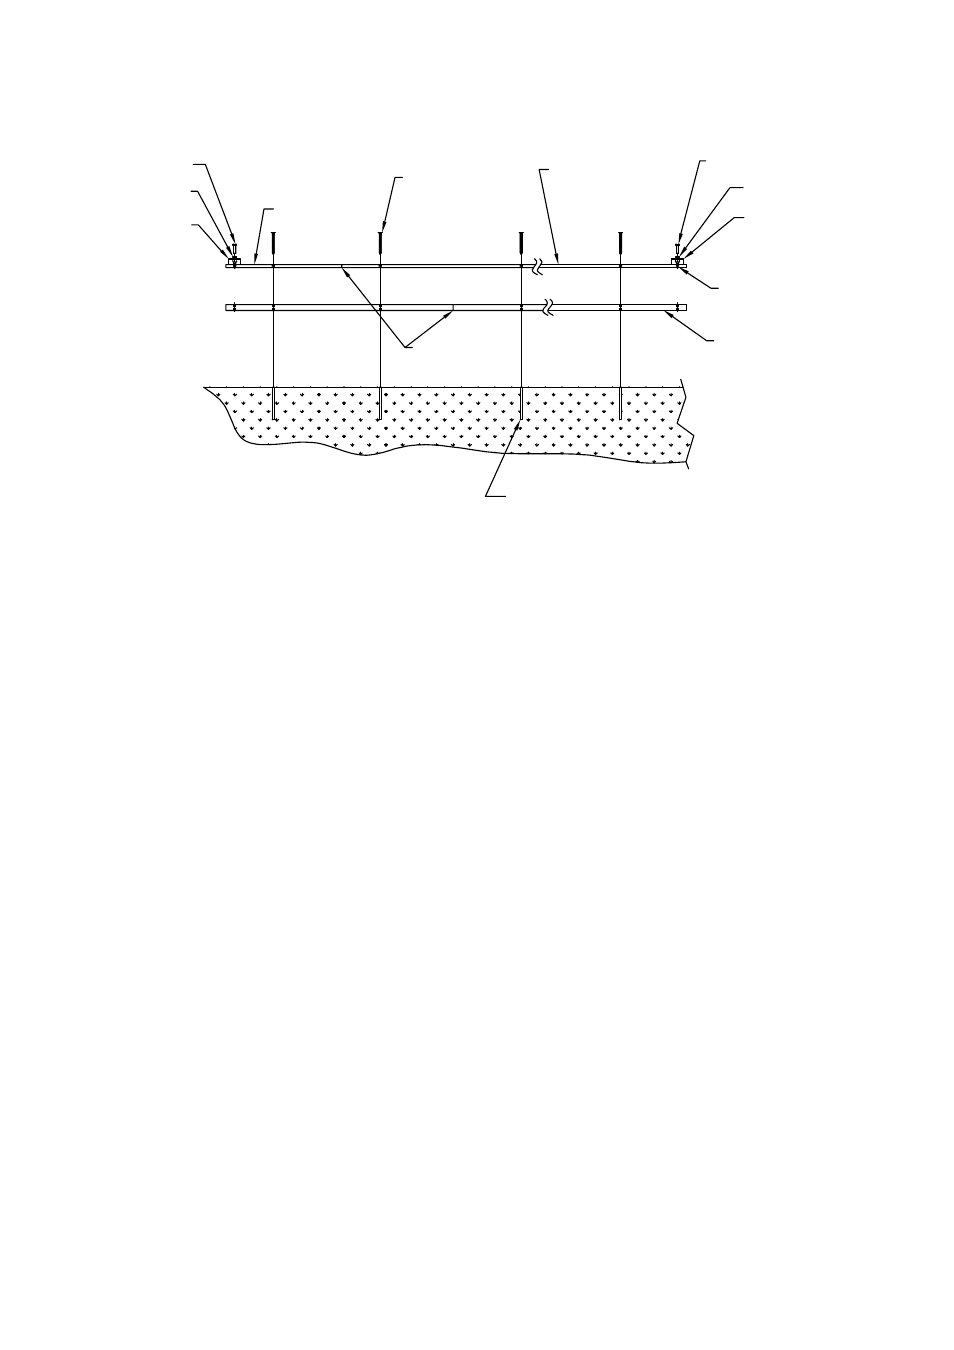
Caution: Steel track insert and Aluminum track splices must stagger.
Note: Track has been pre-assembled and match drilled for ease of assembly.
STEP 5.
Confirm anti-tip track is parallel to the wall. Use
3/8" Hilti drill bit to drill holes in floor for the
anti-tip fastening. Fasteners for the In-Track
Anti-Tip are Hilti TZ's.
STEP 6.
Use the Hilti drill bit (1/4" dia.) for securing track.
The Steel Insert and Aluminum track has been
pre-drilled. Be sure the holes in the steel insert
and the holes in the aluminum track line up.
Using the track as a guide, drill through the steel
and aluminum into the floor. Carefully clean
out the hole. Hammer in the Hilti 1/4" x 2"
Sleeve Anchors and tightened properly.
Note: Heads of screws must be below
running surface of track. File heads of
screws if necessary to ensure smooth
surface.
STEP 7.
Track piece on one end may need to be drilled
out to accommodate 1/4" Hilti II fastener.
STEP 8.
Maintaining careful alignment of the In-Track
Anti-Tip track, drill and install mid-track Hilti
KBTZ 3/8" Anchors in every available anchor
point in the track. The strength of the anti-tip is in
the anchors. Make sure they are tightened
properly.
Note: Hole depth for Hilti Anchor must be
consistent to prevent tripping hazard.
Align Steel to Aluminum track.
Drill 1/4" dia. hole 2 3/4"
minimum depth.
Rubber Bumper
Washer
Hilti II
Steel Insert
Hilti Screw
1/4" x 2"
3/8" x 3/4"
Steel Insert
Rubber Bumper
Washer
Hilti II - 1/4"-20 x 3 1/4"
Aluminum
Track
Hole without
Countersink
Each End Typ.
all Track
Staggered
Joints