Lightforce LED 180 User Manual
Page 2
LIGHTFORCE AUSTRALIA PTY LTD • 28 Orsmond Street, Hindmarsh SA 5007 Australia • www.lightforce.com | email: [email protected]
Australia: Tel: 08 8440 0888 | Fax: 08 8346 0504 • Int’l: Tel: +618 8440 0888 | Fax: +618 8346 0504
All logos and images are subject to relevant trademark and copyright protection LIGHTFORCE Pty Ltd | © June 2014 • Data and specifications contained maybe subject to change without notice.
LIGHTFORCE Australia Pty Ltd shall not be liable for damage, malfunction, failure resulting from accident, misuse, misapplication, unauthorised repair, neglect, modification, unauthorised or non standard replacement parts,
accessories, bulbs, batteries or voltage or operation of the product beyond its technical and or environmental specification.
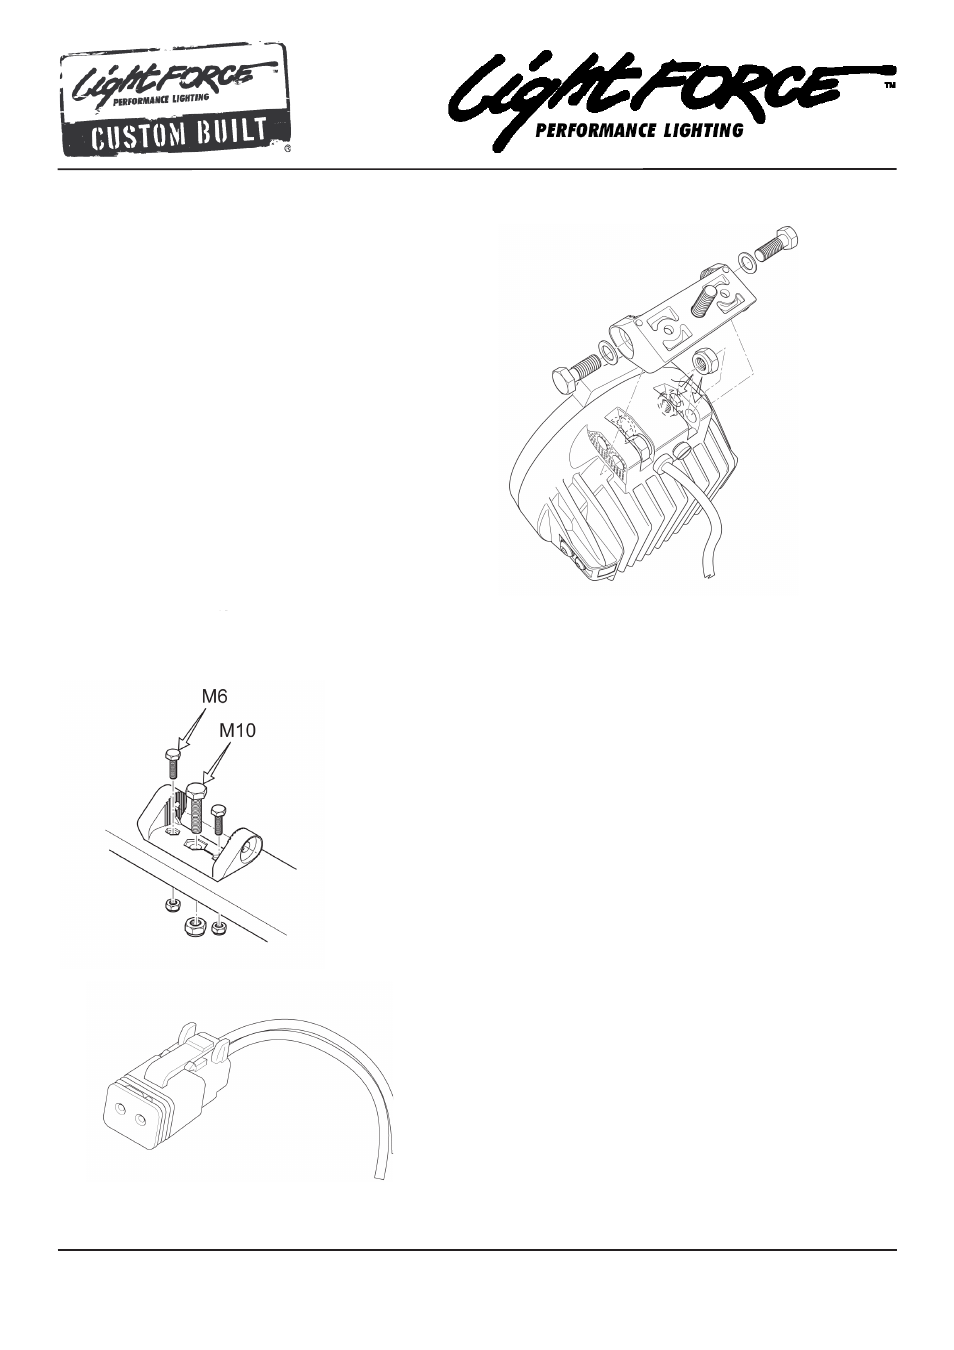
The optimum mounting position for best center of gravity is image 1 with the mount in the forwarded position.
Turn the light upside down to insert the M10 nuts in
the forward or aft position as shown.
IMPORTANT NOTE:
Before fitting the stainless steel
hardware apply a small amount of anti-seize to the
threads of all bolts.
Then slide the mount on aligning the holes of the
mount to the holes on the body of the light that
have the M10 nuts fitted.
Using the supplied M10 x 35mm stainless steel bolts
and small washers insert them through the mount
into the body of the light to engage the bolts.
MOUNTING CONTINUED:
• Fit light into position using the large stainless steel
washer provided then affix the M10 nut to the bolt
until firm.
• Align the light and then tighten all bolts as per
recommended torque specifications
(see specifications section).
NOTE:
Mounting points vary in design and load capacity, ensure the light is within manufactures recommended weight specifications.
NOTE:
M6 Mounting bolts - If extra mounting security is required or you
have a problem with your light rotating, there are two M6 mounting
holes either side of the main M10 mounting bolt. These will accom-
modate any M6 bolt with an 11mm head size.
ELECTRICAL CONNECTIONS:
The LED 180 is fitted with a waterproof electrical connector, included
is the matching connector fitted to a short length of cable for
connection with an existing wiring harness. This harness needs to be
fitted directly to your driving light loom.
•
Red cable to positive supply
•
Black cable to negative supply
Note if you are using a non Lightforce harness the 2 pin connector
on your existing harness may need to be changed
CAUTION:
Improper installation of the connector will affect the reliability and
operation of your lights.
Do not remove waterproof connector from the driving light cable;
this will lead to water ingress and void warranty.