Let's Go Aero ArcHaus Shelter ARC-106-GRN User Manual
Page 2
Model No. ARC-106-GRN
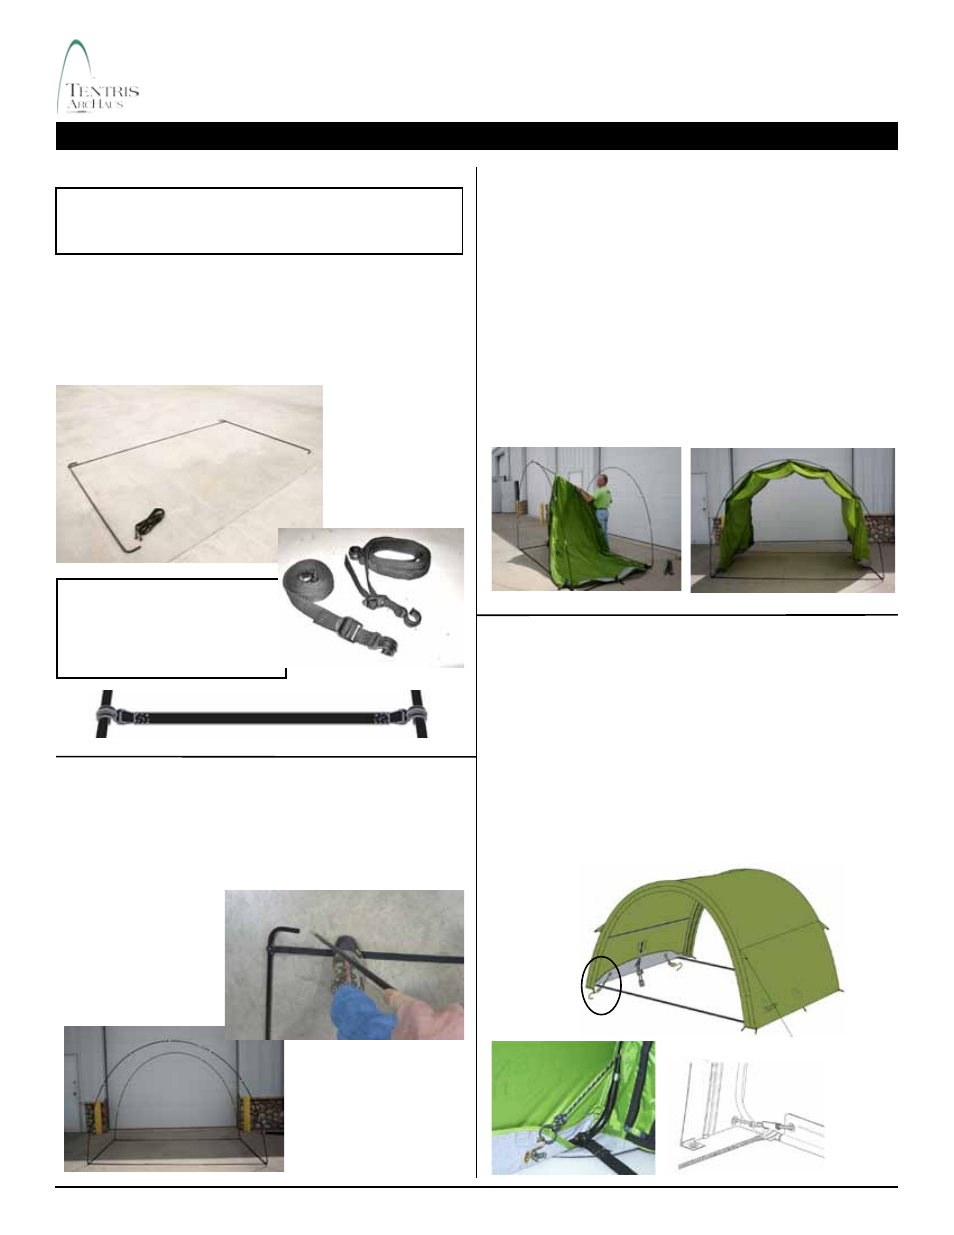
Step 1: Frame Layout
Step 2: Arc Saddle Assembly
Step 3: Cover Install
Step 4: Position Fitted Cover
Proper Frame layout is essential to make to sure
the ArcHaus sets up correctly and to prevent
damage.
Parts
(Qty: 2) Base U-Tube Poles (PBASE-S-106) (Steel
chained-corded base tent pole).
(Qty: 2) Webbing Straps (WEBSTRAP-106)(Webbing
with quick clips attached, length adjustable)
Connect Saddle
Poles to each end of
U-Tubes. Stand on
Webbing Straps while
inserting Saddle Poles.
Parts
(Qty: 2) Saddle Poles, shock-corded (PSADD-F-106)
(Tent Pole with connector ferrules)
- Unzip both door end panels to remove them from the Arc
Cover
- Lay Arc Cover inside Frame perimeter
- Slide Spanner Pole under center of cover, lift cover and
clip center pole onto Saddle tubing.
- Repeat with the remaining four poles.
Parts
(Qty: 5) Spanner Poles, shock-corded (PSPAN-F-106)
(Tent pole with C-Clips).
(Qty: 1) Arc Cover (Tent Body)
- Align Cover seams with Saddle tubing to center cover.
- Position ground fabric and bungee cord under and
around U-Tube ends.
- Align U-Tube corner tubing in the cover’s reinforced
corners
- Connect the cord ring and bungee hook in each
corner. The cord ring must be oriented
to the
inside of the Saddle Poles as shown in diagram below.
Adjust Webbing Straps
length for a tensioned fit for
enhance structural strength
and zipper support.
ASSEMBLY INSTRUCTIONS