6 replacement of uvc lamp, 5 replacement of the fuses, Replacement of uvc lamp – Leica Biosystems CM1850 UV User Manual
Page 46: Replacement of the fuses, Cleaning, disinfection, maintenance
46
Instructions for use V 1.5 – 10/2012
9.
Cleaning, disinfection, maintenance
9.3.5 Replacement of the fuses
Turn the instrument off with the automatic mains fuse and pull the mains plug, before replac-
ing the fuses!
Only use fuses of the same specification! For the required values, please refer Chapter 3
‘Technical Data‘. The use of fuses other than specified by the manufacturer may cause severe
damage to the instrument!
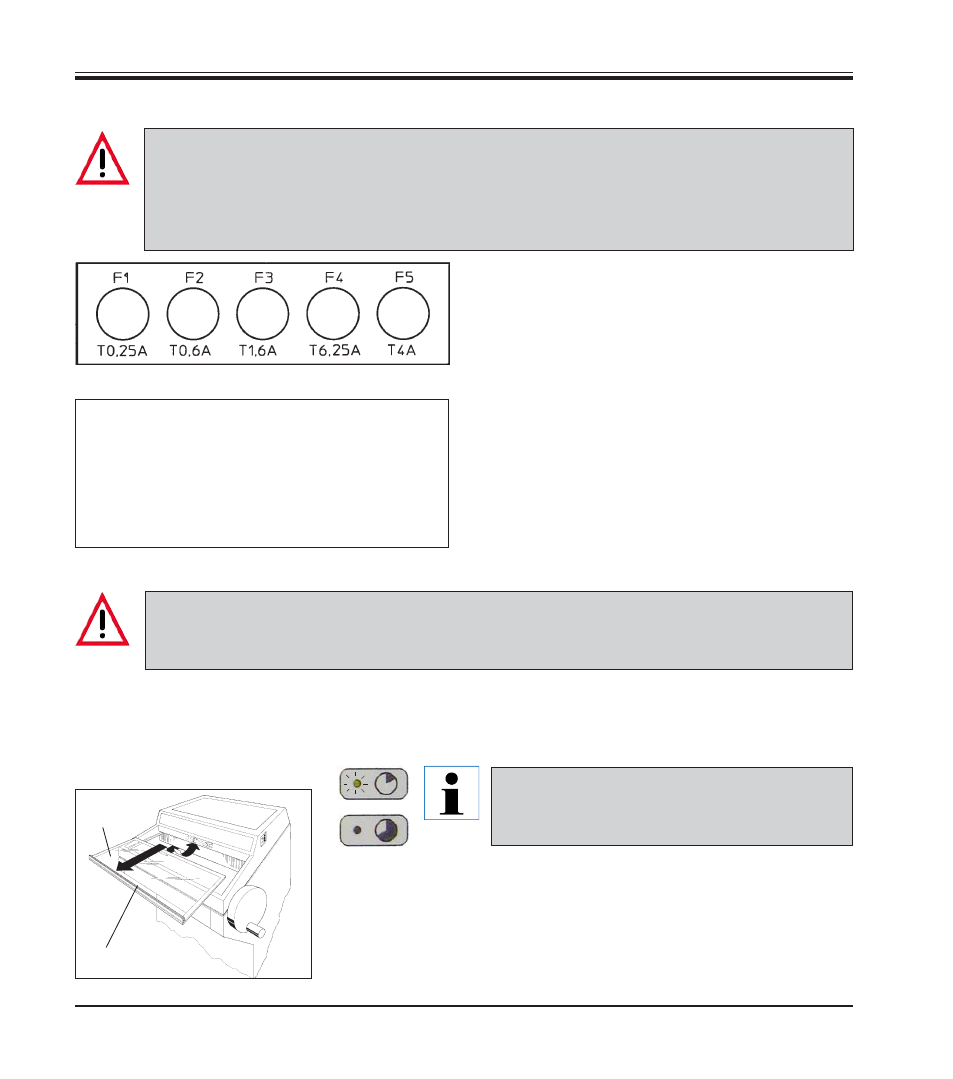
On the back of the instrument there is a fuse box
with 5 fuses:
•
Unscrew the fuse cap with a screwdriver.
•
Remove both fuse cap and fuse.
•
Put the new fuse in the cap and screw the fuse
cap back on.
Fuse
Protection
Type
F1
Display
T 0.25 A
F2
Coarse feed
T 0.6 A
F3
Processor board supply T 1.6 A
F4
Peltier element
T 6.25 A
F5
Heaters
T 4 A
9.3.6 Replacement of UVC lamp
Turn the instrument off with the automatic mains fuse and pull the mains plug, before replacing the lamp!
If the lamp is broken, it must be replaced by the technical service, as the replacement involves a high
risk of injury.
A UVC lamp has an estimated service life of approx. 9,000 hours. Each on/off
switching cycle reduces the lamp life by approx. one hour plus burning time
(30 minutes or 180 minutes respectively).
Fig. 29
1
•
Switch off the instrument at the circuit breaker.
•
Disconnect the power plug.
•
Slightly lift the sliding window (1) using the grip (2)
and pull it out to the front.
2
Fig. 30
When both disinfection indicator lights are
blinking alternately, the UVC lamp must be re-
placed.