Koolance VID-AT1-V06 User Manual
Page 2
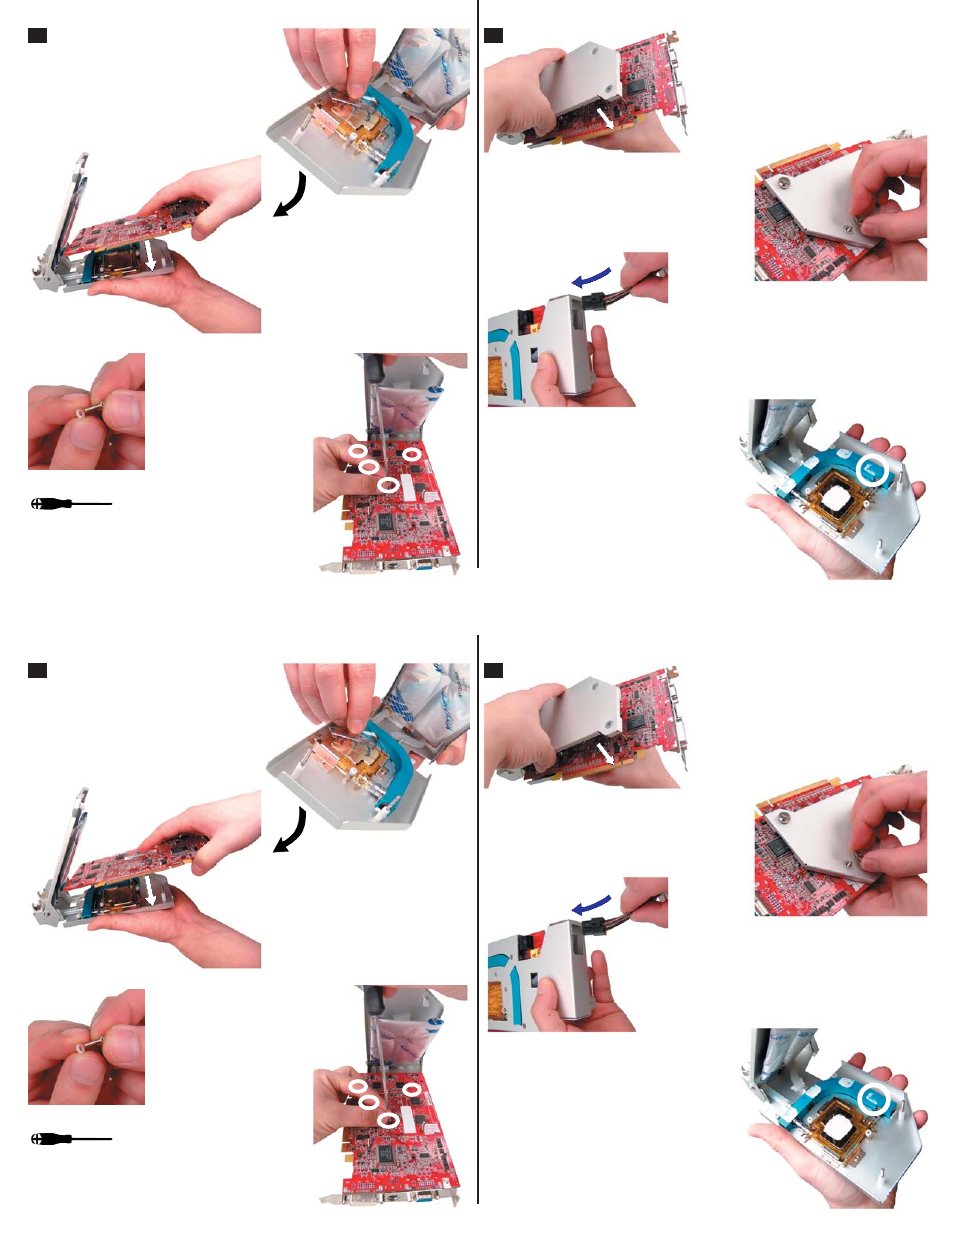
Fold the enclosure closed. The long
screws should fi t through both holes in
the VID-AT1-V06 back plate.
3
4
Open the VID-AT1-V06 enclosure and
remove the protective fi lm from the bottom
of the chipset cooler.
NOTE: Video card RAM chips are not
perfectly fl at with one another. To make sure
your liquid cooler is making the best contact
possible for your card, remove the cooler and
examine the distribution of thermal paste.
A missing or inadequate “spot” might be
corrected by further tightening a mounting
nut or screw (gradually), or applying more
thermal paste to the chip.
Place the video card into the cooling
enclosure. There are 2 long screws
on the enclosure which must be
inserted through the card.
4 small mounting screws
are included with the
VID-AT1-V06. Thread
an insulating washer
onto each of these.
From the card’s back side, insert and tighten each
of the 4 screws into the remaining mounting holes
with a screw driver.
Finally, hand-tighten a nut fi rmly to both primary
screws.
When installing your Radeon card, the power
supply connection can be inserted through the
back of the VID-AT1-V06.