Barbed fittings – KD Scientific Centrifan PE User Manual
Page 20
Chapter 2
2-4
Centrifan
TM
PE Personal Evaporator
b) Gently withdraw each tab attached to the polypropylene splitter disk from the sample
vials. Verify that the knurled retaining nut at the center of the rotor is snugly
tightened to retain the rotor within the fan. Remove the vials from the rotor and the
rotor is now ready to accept your samples.
c) Give the rotor assembly a good spin, tentatively close the lid again and lock the latch.
There should be no visual or audible indication that there is any contact between the
rotor and any internal parts of the enclosure.
d) Locate the large glassware clamp and slide it down on the top of the bar a few inches
and loosely tighten the retaining screw.
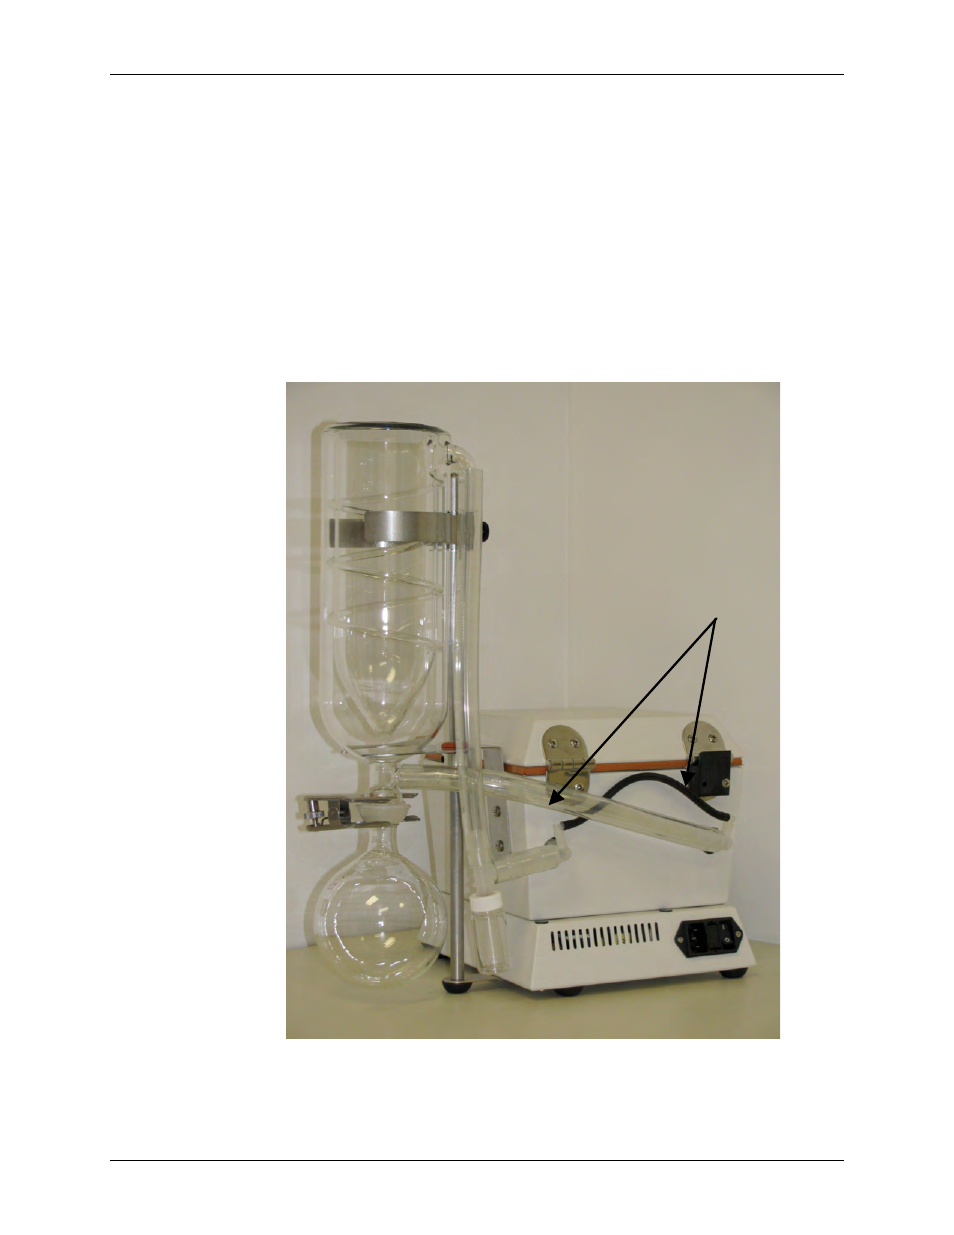
e) Feed the cold trap down through the retaining ring and rest the curved bottom cold
trap glassware in the U-shaped cradle of the bracket as shown in Figure 2-3. Rotate
the cold trap into its final position so that the tubing connection fittings are directed to
the rear of the Centrifan
TM
PE unit.
Figure 2-3: Attaching the Cold Trap Assembly and Associated Tubing
f) Locate the three pieces of ½” ID tubing and make the connections on the back of the
Centrifan
TM
PE unit as shown in Figure 2-3. Twist the plastic fittings as required to
Barbed
Fittings