Inst alla tion instructions, Shower pan – Georgia-Pacific DensShield Tile Backer User Manual
Page 6
INST
ALLA
TION
INSTRUCTIONS
• Fasteners should be spaced 69 (152 mm) o.c. for walls and
ceilings. Drive fasteners flush with coated surface.
Do not
countersink. See Fastener Guide Chart on previous page.
• DensShield
®
Tile Backer has a built-in moisture barrier.
Does not require an additional moisture barrier.
• 29 (51 mm) fiberglass mesh tape–embed in a skim coat of
material used to set tiles on all joints and corners that are
to receive tile; caulk corners and edges prior to addition of
fiberglass mesh tape. Seal penetrations and abutments to
dissimilar materials.
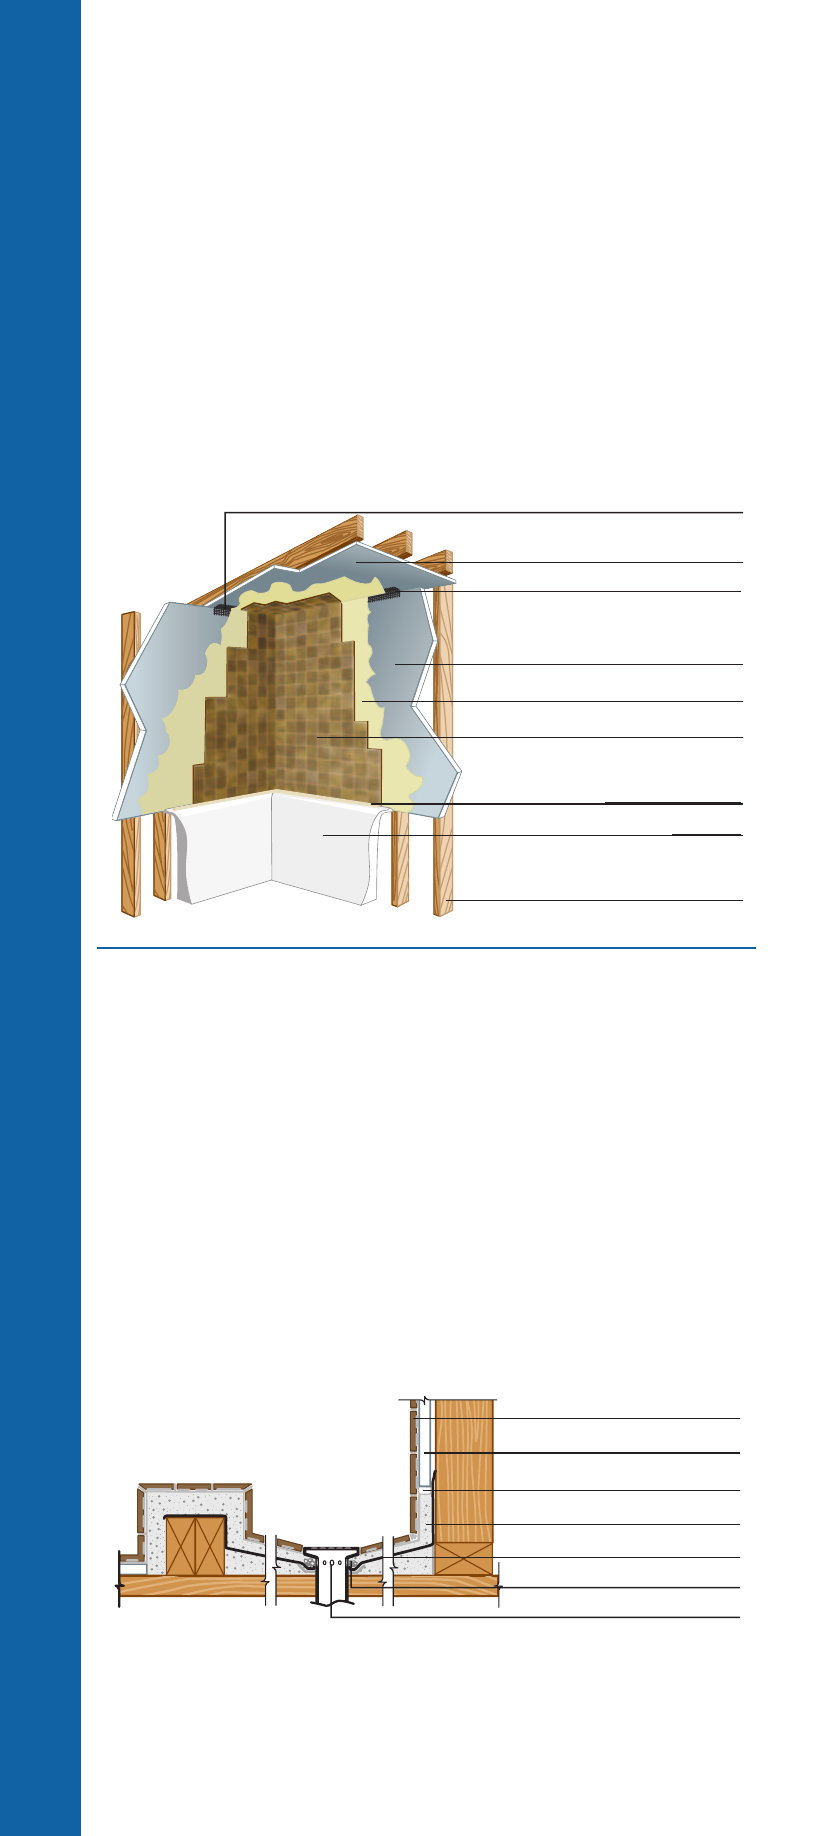
Shower Pan
Install DensShield Tile Backer on walls according to assembly
DS001.
Note: Shower pan or rubber membrane must be adequately
sloped to the open drain or weep hole detail to permit proper
water drainage. Leave a
1
⁄
8
9
(3 mm) gap between DensShield
Tile Backer and the shower pan.
• DensShield Tile Backer is not to be used in shower curbs.
• DensShield Tile Backer panels can be installed in the shower
pan if part of an approved system.
6
DS001
DensShield
®
Tile Backer
DensShield Tile Backer
Tile Mastic or Thin Set
Tiles
Wood or Minimum 20-Gauge
(33 mils) Metal Framing
Fiberglass Mesh Tape
Flexible Sealant
Flexible Sealant
Bathtub
DS002
DensShield
®
Tile Backer
Tiles
Flexible Sealant
Sloped Mortar Bed
Sloped rubber Membrane
Crushed Stone
Weep Holes