Inst alla tion instructions, One coat float tile assembly, Densshield – Georgia-Pacific DensShield Tile Backer User Manual
Page 10: Ds007
INST
ALLA
TION
INSTRUCTIONS
10
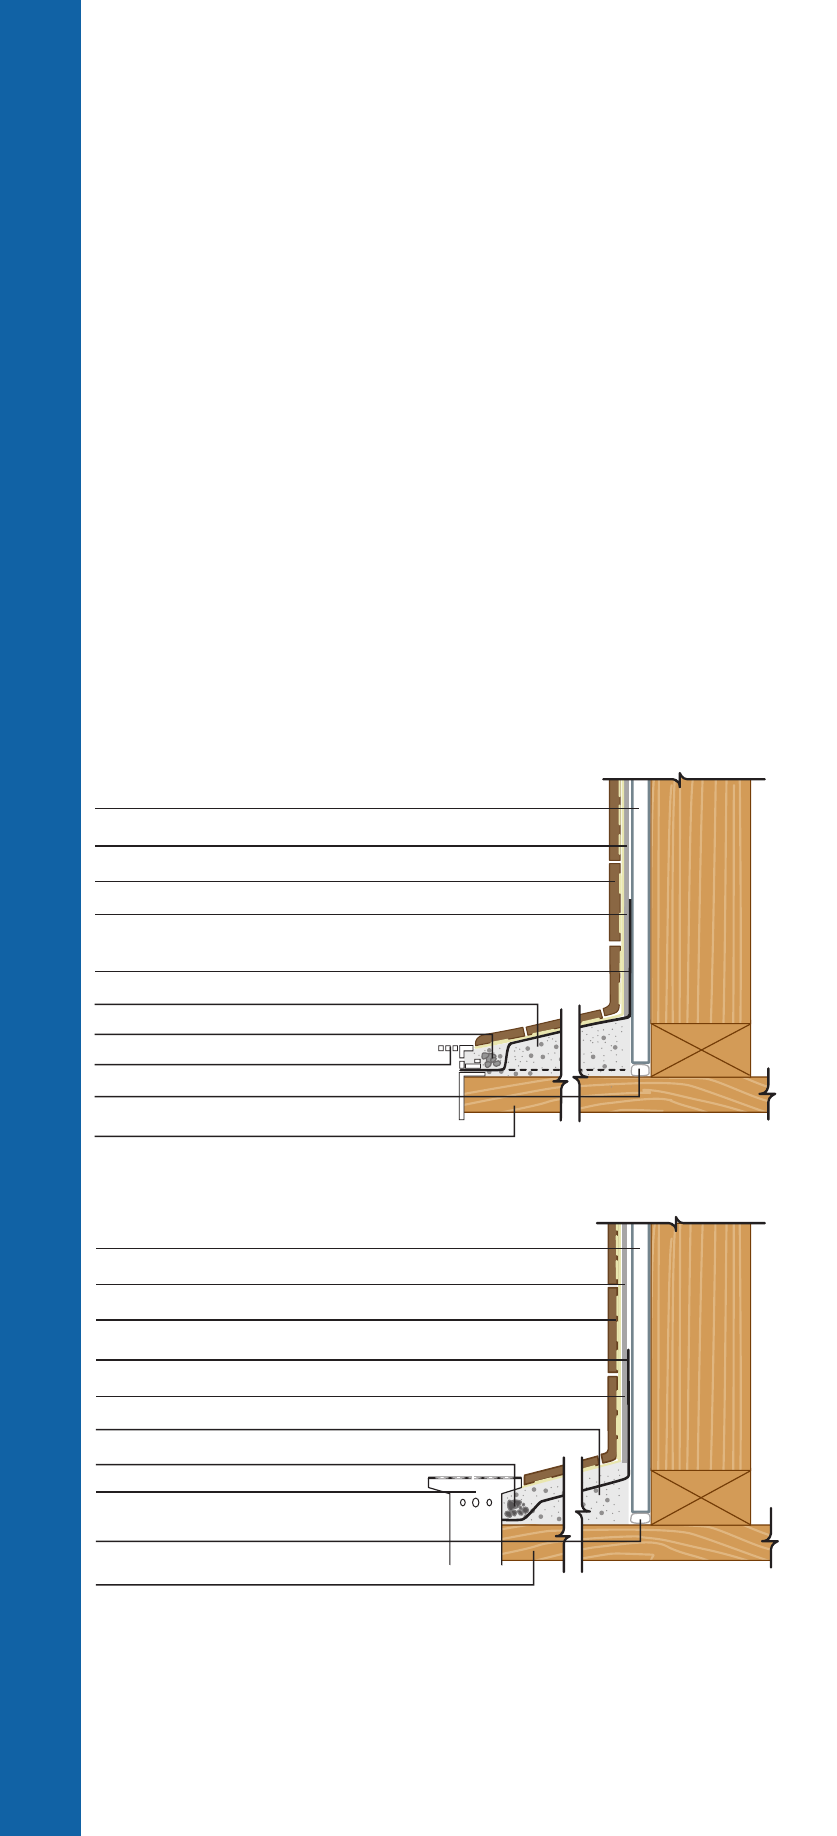
One Coat Float Tile Assembly
DensShield
®
Tile Backer can be installed as a baseboard for a
traditional reinforced floated wall tile system attached to the
framing. DensShield Tile Backer panels may be hung either
vertically or horizontally for wall applications.
• Grey coated side should always face out, away from the studs.
• Framing should be spaced no greater than 169 (406 mm) o.c.
• Attach DensShield Tile Backer panels spacing fasteners 69
(152 mm) o.c. along studs for wood or metal framing.
• For shower pan receptors with membranes, the lath membrane
shall be installed in a weather board fashion over the pan
membrane.
• Attach membrane and lath per lath and membrane manufac-
turers’ guidelines. apply mortar bed per TCNa assembly
W231. Membrane (aNSI a-2.1.8) shall be installed such that
water is continually sloped toward the drain.
Tile adhesive (latex thinset mortar or mastic)
Sloped Underlay Mortar Bed, reinforced
Tile
Shower Pan Liner
Crushed Stone or Tile
Subfloor
Drain
One Coat Float System
1
⁄
4
9
(6 mm) gap & Flexible Sealant
1
⁄
2
9
(12.7 mm) or
5
⁄
8
9
(15.9 mm) DensShield Tile Backer
1
⁄
2
9
(12.7 mm) or
5
⁄
8
9
(15.9 mm) DensShield
®
Tile Backer
Tile adhesive (latex thinset mortar or mastic)
Sloped Underlay Mortar Bed, reinforced
Tile
Crushed Stone or Tile
Drain
One Coat Float System
Hydro-Guard ONe
®
Membrane with
Fabric at 90
o
angle and drain
DS007
Subfloor
1
⁄
4
9
(6 mm) gap & Flexible Sealant