Assembly instructions – Condux Extension Frame User Manual
Page 5
5
Assembly Instructions
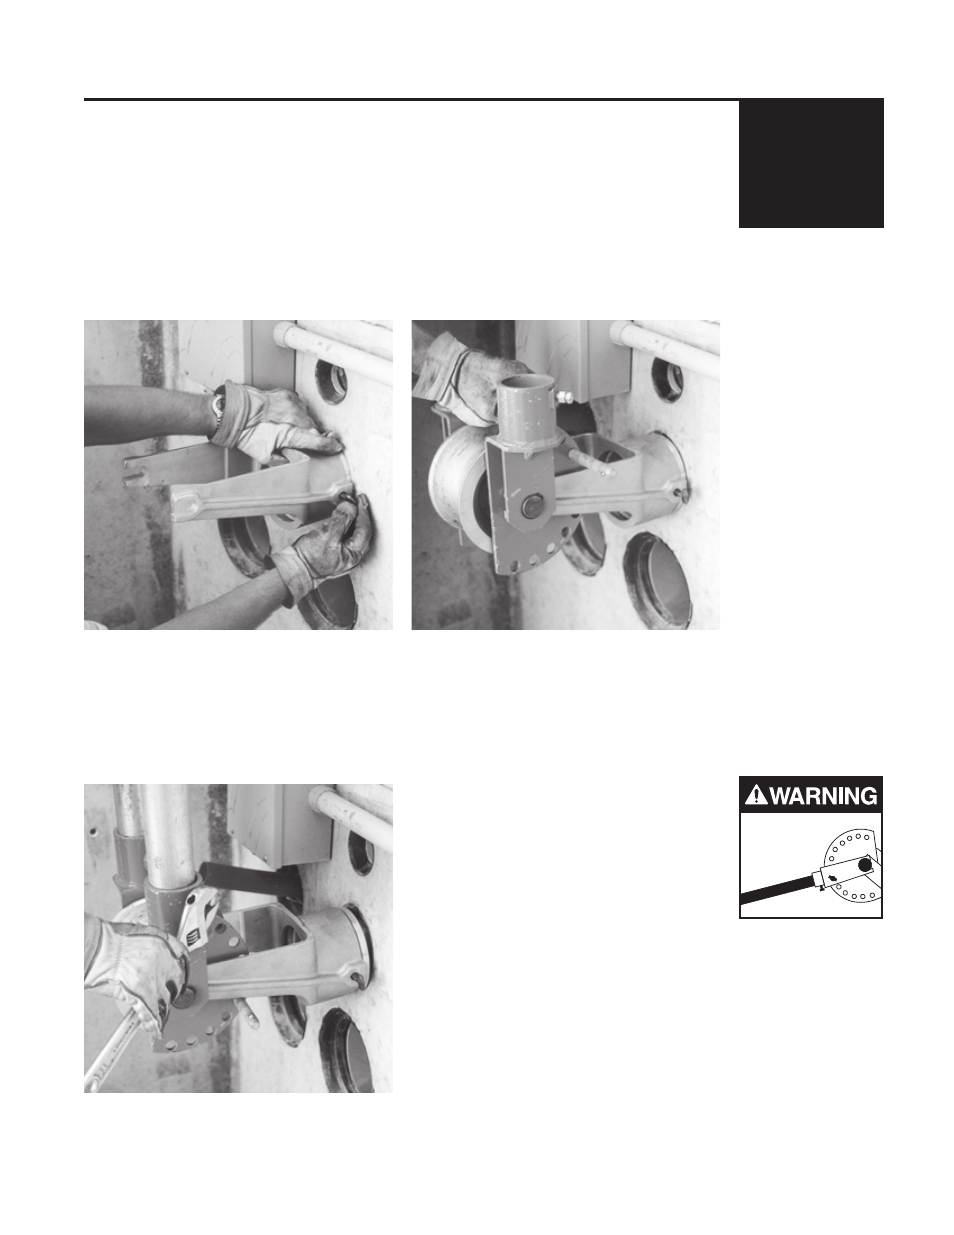
A. PREPARE CONDUIT FOR DUCT END JOINT
Corresponding size
Conduit Adapter fits into Retaining Fork and is secured by tightening
thumb screws. Conduit Adapter is then inserted into conduit (Figure 5). (Conduit Adapters
and Retaining Fork for 2", 3", 3 1/2" and 4" conduit are included with CableGlider Cable
Puller. Larger sizes are available from Condux.)
B. ATTACH DUCT END JOINT TO RETAINING FORK
The Extension Frame
Duct End Joint attaches to the Retaining Fork on milled slots and
is secured with a locking pin. Duct End Joint can be adjusted for specific pull
configurations and is secured with a locking pin (Figure 6).
C. INSERT 2" GRC STEEL DUCT IN DUCT END JOINT
The two pieces of 2" Sch 40 GRC steel duct connect to the Extension Frame
Duct End
Joint in cylindrical duct ports and are secured by tightening cap screws and lock nuts
(Figure 7).
!WARNING: Only use 2" Sch 40
GRC steel duct with Extension
Frame. Thin wall steel duct (EMT)
or PvC duct will not withstand the
loads generated and will bend
and break causing serious
personal injury or death.
4.
Figure 5
Figure 6
Figure 7
Use Only
2" Sch 40
GRC Steel Duct