Transportation instructions, Heavy duty & plus cableglider, Standard duty cableglider – Condux CableGlider Cable Pullers User Manual
Page 13
Transportation Instructions
An object’s stability is determined by its center of gravity–the lower, the
better. When transporting the CableGlider, first perform the following
steps so that its lowest center of gravity is achieved:
!CAUTION:
The CableGlider is heavy. Use care when
removing the height-adjusting pins. Failure to do so could
cause personal injury or property damage.
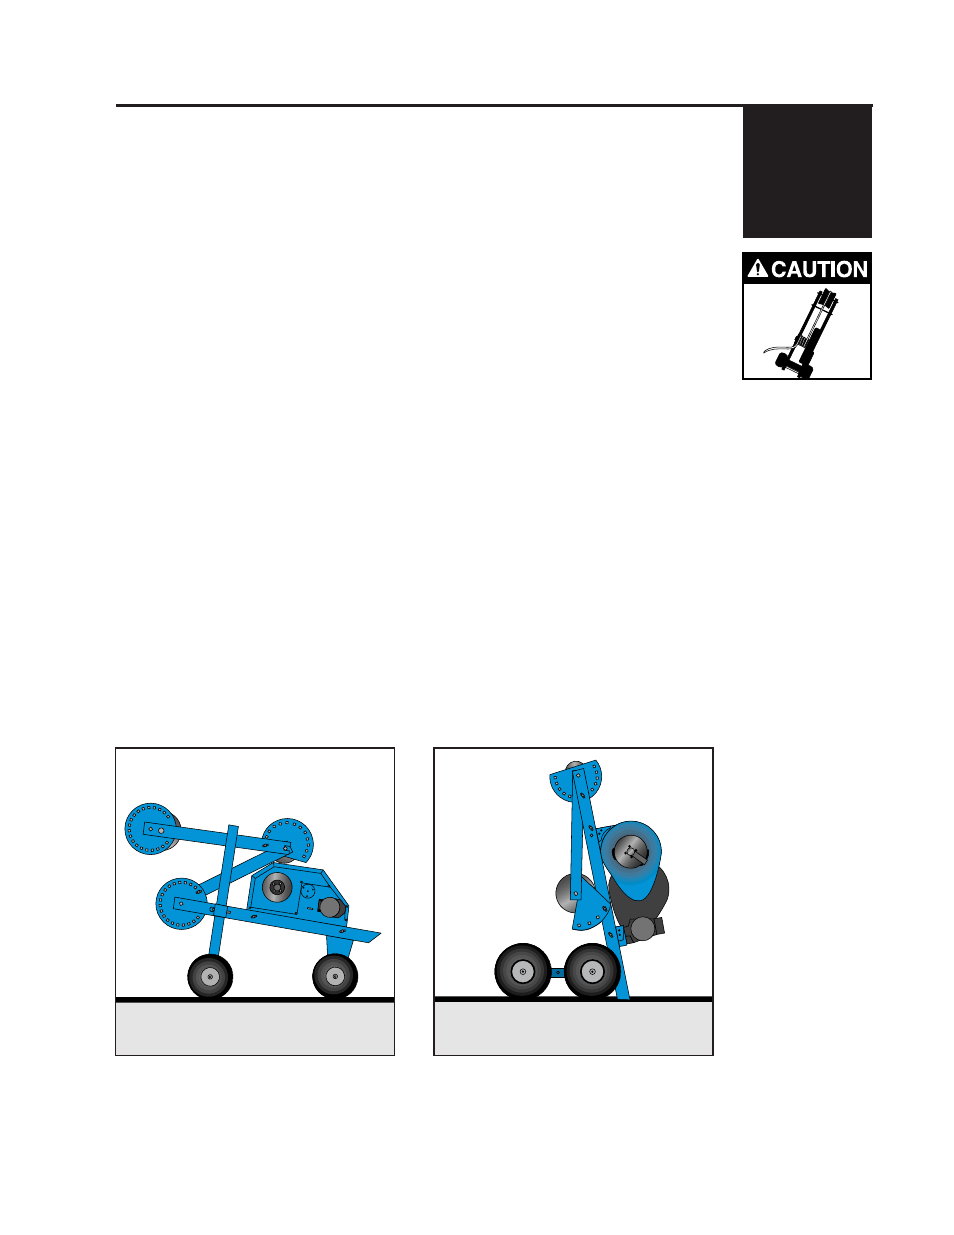
Heavy Duty & Plus CableGlider
1. Remove the two pins that adjust the height of the frame’s base and
lower it until its holes line up with the vertical support’s bottom holes.
Re-insert the two pins. (See Figure 12)
2. Remove the lower arm’s locking pin and move the arm towards the
powerpack until it rests on it. Re-insert the locking pin.
3. Remove the upper arm’s locking pin and lower the arm until it is nearly
horizontal. Re-insert the locking pin.
Standard Duty CableGlider
1. Position the frame’s base so that it is standing upright on the end of the
base tubes. (See Figure 13)
2. Remove the arm’s locking pin and swing the arm beneath the frame’s
base. Re-insert the locking pin through both the frame and the locking
plate.
Figure 12 (HD/Plus CableGlider)
Figure 13 (STD CableGlider)
12
5.