4a 4b 4c – Anchor CENTURY 100 WIDE, ONE-PIECE User Manual
Page 8
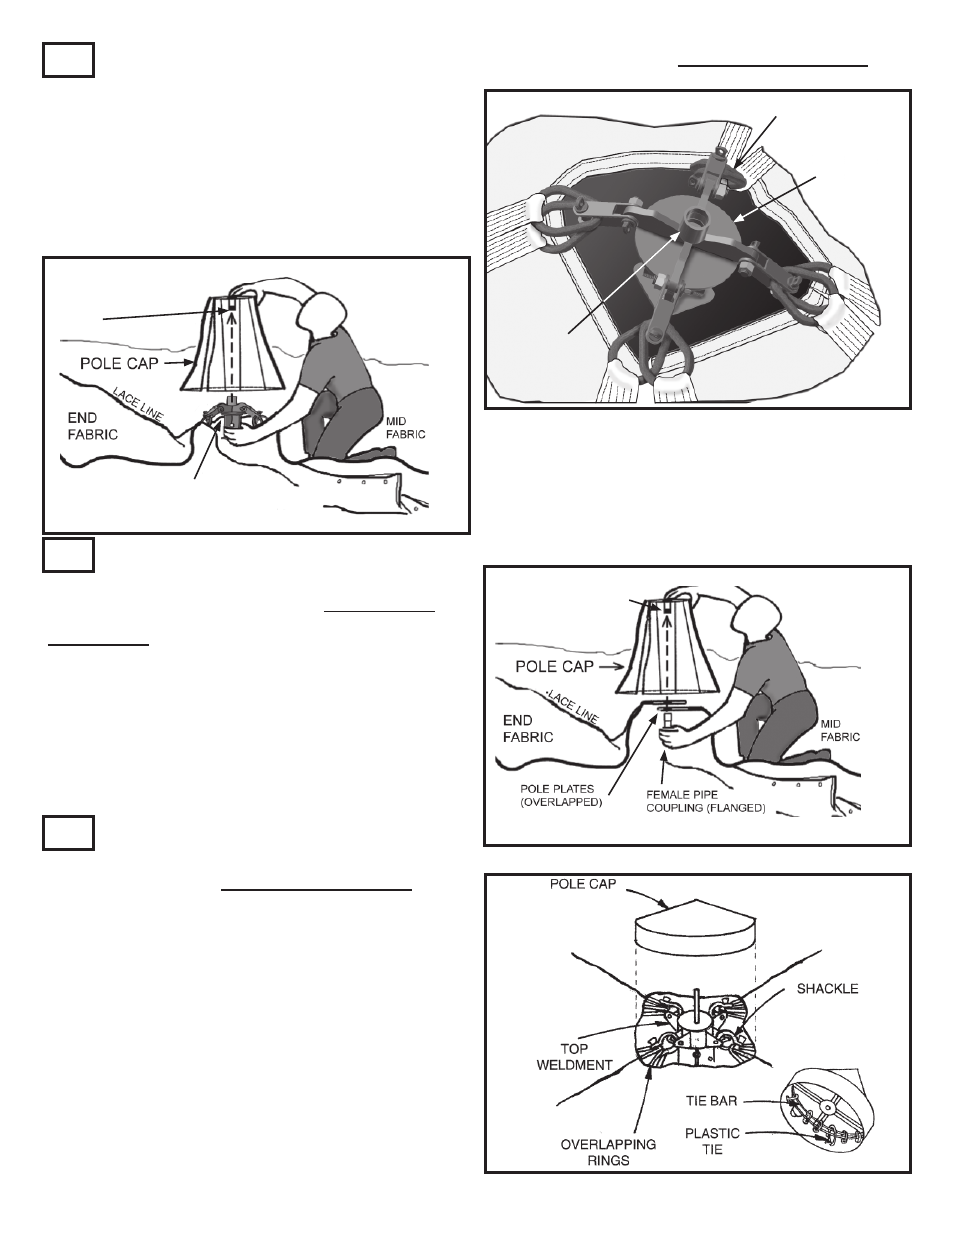
8
Set top weldment in center pole hole and connect to overlap-
ping rings as shown.
Place pole cap over top weldment, and push fabric and weld-
ment up into cap and secure from underneath by threading
the female coupling onto the male pipe fi tting molded to the
inside top of the pole cap.
CENTER POLE TOP WELDMENT FOR “RING STYLE”
CONSTRUCTION
Overlapping
Rings
Top Weld-
ment
Female
Coupling
Top Weldment with
Female coupling on
top.
Molded Cap with male
threaded pipe fi tting
Set top weldment in center pole hole and connect to overlap-
ping rings with shackles provided.
Place assembled pole cap over pipe of top weldment. Attach
hinge pin to pipe extending through top of pole cap. Rotate
pole cap to align holes in pipes.
Note:
Pole cap assembly is illustrated on a separate sheet packed
with fabric top.
OPTIONAL 8” CENTER
POLE FOR “RING STYLE”
CONSTRUCTION
CENTER POLE TOP
WELDMENT FOR “PLATE
STYLE” CONSTRUCTION
Molded Cap with male
threaded pipe fi tting
Pole Cap - Overlap the pole hole plates in the mid and end
fabric lace line. Push fabric and plates up into cap and se-
cure from underneath by threading the female, fl anged pipe
coupling onto the male pipe fi tting molded to the inside top
of the pole cap.
Optional 8” Center.
Pole for Ring Style
Construction.
Plate Style
Construction.
attach
with hitch
pin
4a
4b
4c