Anchor ALL PURPOSE CANOPY TENT 10-20 User Manual
Page 3
Important:
Check guy ropes periodically for tightness and good condition. Store
canopy in a cool, dry area. Never store while wet or damp.
3
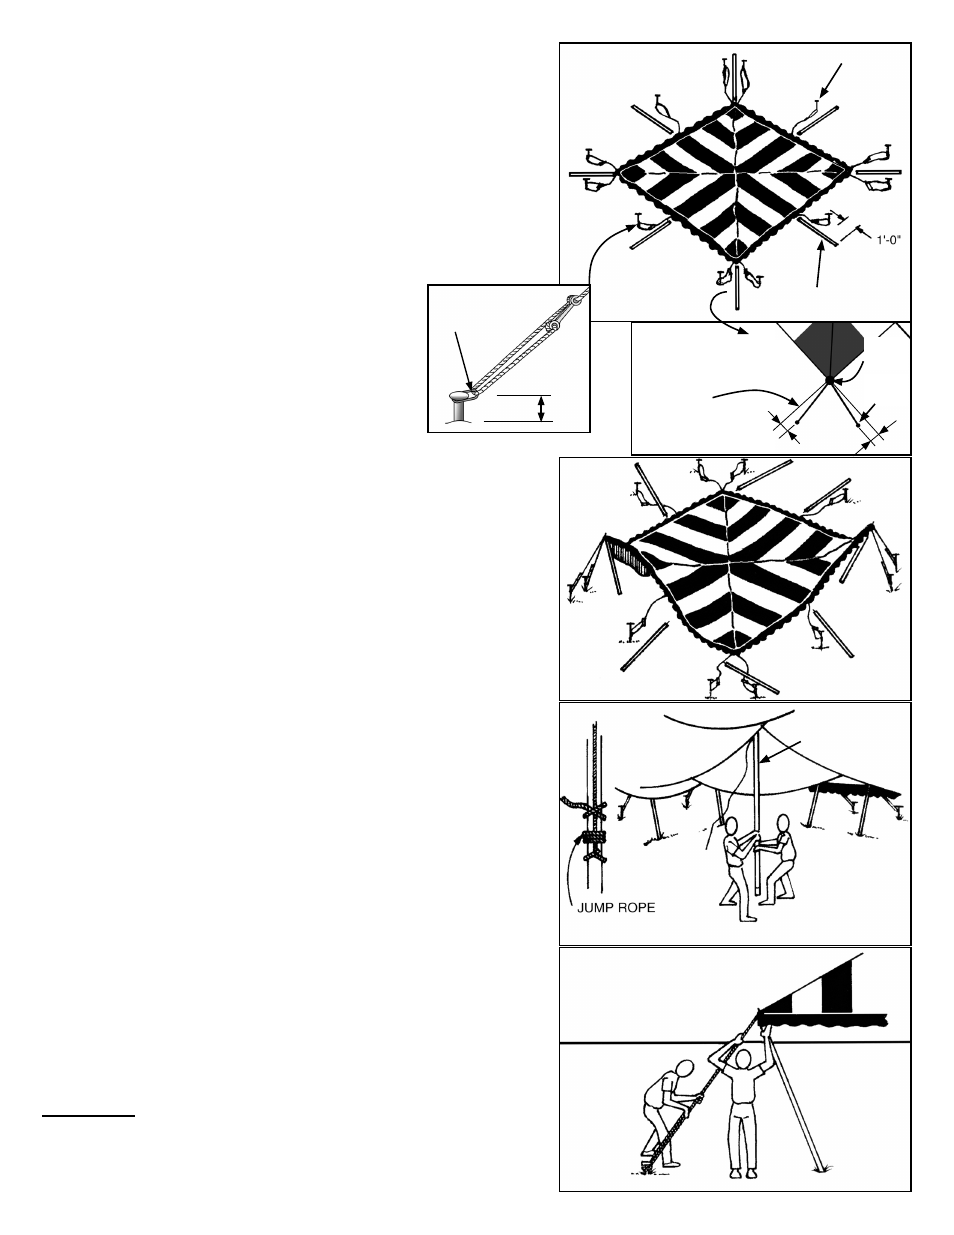
1.
LAYOUT AT SITE
Start at opposite corners.
Insert side poles into pole holes and raise so that bottom of poles
slant toward center of canopy.
Adjust guy rope.
Continue with other two corners and then sides.
2.
RAISE SIDE POLES
Assemble three-piece center pole and insert into center pole hole.
Raise to upright position and tie off jump rope to pole.
3.
RAISE CENTER POLE
Tighten guy ropes and then set side poles to upright position.
Adjust pole positions and guy rope tension to properly pull out
canopy.
Protective covers are recommended for all stakes.
4.
SIDE POLE ADJUSTMENT
Loosen all guy ropes.
Spread drop cloths.
Reverse steps 1 through 4 for disassembly.
5. TAKE
DOWN
20’ x 20’ canopy used as example. Spread drop cloths and unroll
canopy at exact position of desired fi nished assembly. Any sharp ob-
jects which must remain on site under the canopy should be padded and
taped.
Assemble side poles and lay straight out from each pole hole in canopy.
Drive a stake 1’-0” in from the end of each pole. The stake must be
driven through the ring attached to each guy rope as shown.
Side Pole
Stake
Center Pole
2”
5/8” Stake fits
directly through
ring on guy rope.
1’-0”
1’-0”
Corner staking: Set in
1’-0” less than side pole
length and positioned as
shown here.
Stake
(Typ.)
Corner
Pole