Warning, Service & maintenance, 2 removing and sharpening the chipper blades – Echo 74624 Owners Manual v.1 User Manual
Page 23
Page 17
6” Chipper Pro Operator’s Manual
5.2 REMOVING AND SHARPENING
THE CHIPPER BLADES
Service & Maintenance
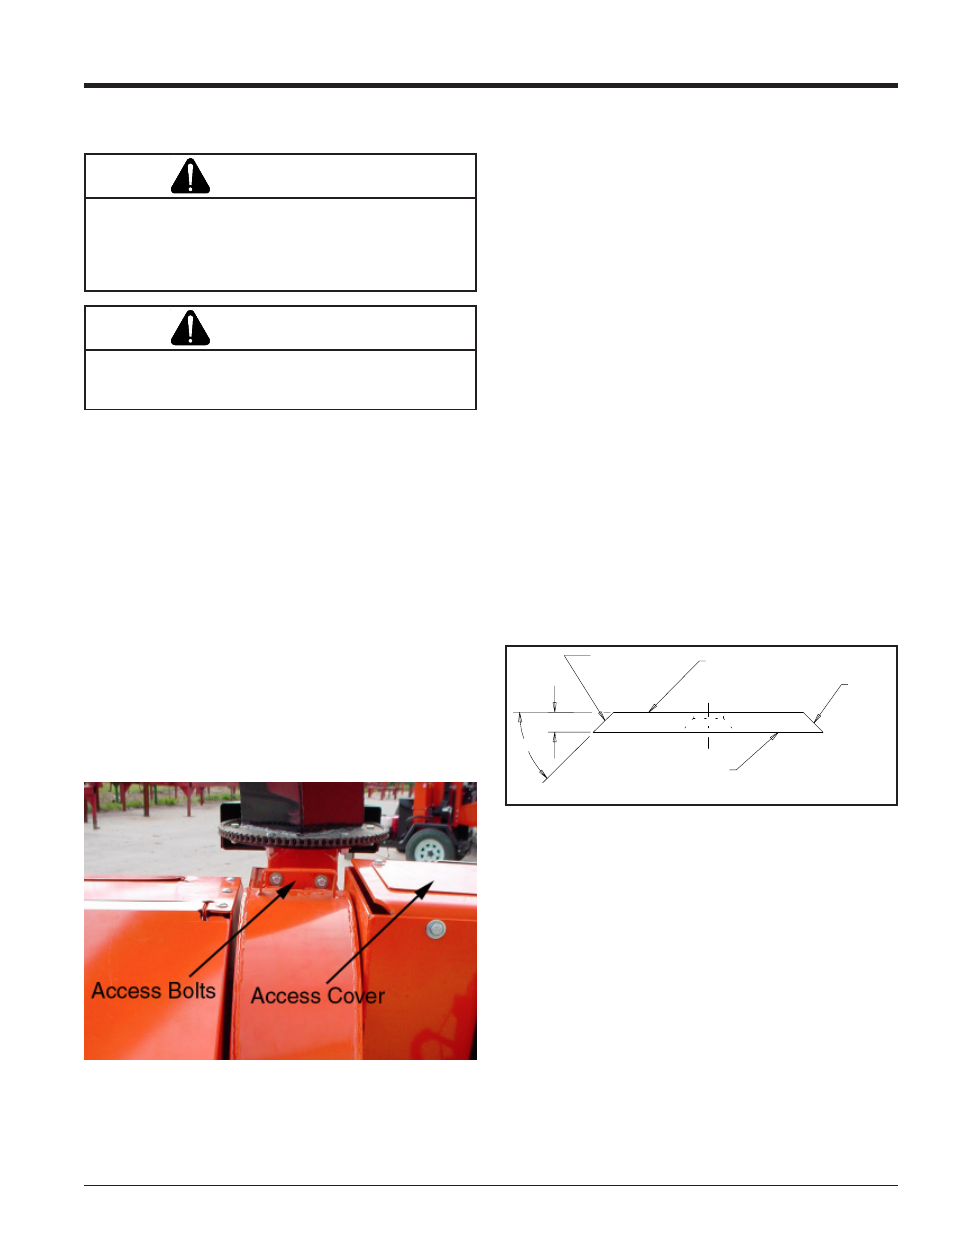
To remove the chipping blades for sharpening:
1. Remove the two 3/8 inch retaining bolts holding access
cover to main frame assembly.
2. Tilt access cover over to allow rotor access. The chipper
will not operate when the cover is open. Rotate the rotor
so that the bolts holding the blades are most accessible.
To remove the inner blade the access cover will need to
be removed from the top of the feed roller.
3. Remove the two allen head bolts holding the blade itself.
Repeat for all four blades. The four chipping blades have
two edges per blade and can be reversed one time each
before sharpening. If one side has not been used, remove
and reverse the chipping blades. Tighten bolts to proper
torque and secure access cover.
To prevent personal injury or property damage: Shut
off engine, remove ignition key and make sure that all
moving parts have come to a complete stop, before,
servicing, adjusting or repairing.
WARNING
The chipping blades are sharp!! Use care when working
on the machine to avoid injury.
WARNING
Sharpening the chipper blades:
Depending on the type of wood fed into the chipper, the
blades will eventually dull, making if difficult to feed material
and produce chips. It is recommended that the blades be
checked for sharpness every 8 hours.
Regrind the angled edge of the chipping blades to 45 de-
grees. (refer to figure below) The blades can be ground on a
bench grinder or by a professional. Make sure some type of
fixture is used to correctly hold the blade at the proper angle.
Be careful when grinding so that the blade does not become
overheated and change color (This will remove the heat-
treated properties). Use short grinding times and cool with
water or some type of liquid coolant. Try to remove an equal
amount off of each blade to maintain rotor balance.
Never sharpen or back grind the flat side of the chipping
blade. This will cause the edge to roll and the chipper blade
will be damaged, resulting in poor chipping performance.
Small imperfections such as nicks, burrs, etc. on the flat
side of the blade will not affect the chipping performance of
the machine.
When completed, replace the chipping blades and tighten
the bolts to 75 ft. lbs. Install all safety screens and guards
and resume chipping.
45°
.38
MOUNTING SURFACE
DO NOT GRIND
MOUNTING SURFACE
DO NOT GRIND
SHARPENED
SURFACE
SHARPENED
SURFACE
Fig. # 21, Sharpening the chipper blades
Fig. # 20, Exposing the chipper blades