Warning, Caution, Operation – Echo 74624 Owners Manual v.1 User Manual
Page 19
Page 13
6” Chipper Pro Operator’s Manual
4.3 STARTING THE DIE-
SEL CHIPPER
1. Reference the Kubota Owners
Manual. Also, make sure cutting
chamber is empty before starting.
2. Before starting, fill engine with oil to
the correct level. See engine manual
for additional starting, operation and
maintenance instructions. Some oil
usage is normal. Check level before
each use.
3. Before starting, fill fuel tank with
fresh and clean diesel fuel. For in-
structions on bleeding the fuel sys-
tem on initial start up or if fuel runs
out, see engine manual.
4. Turn key switch to preheat position
(to the left). Hold in preheat position
for several seconds until glow plug
indicator light switches off.
5. Place throttle control in the idle po-
sition.
6. Make sure the chipper engagement
lever is disengaged.
Allow the machine to come to com-
plete stop before inspection or ser-
vicing.
WARNING
6. Push in and hold the Murphy switch
push-button. Continue to hold
Murphy switch in when cranking
engine until engine is running.
7. Activate the starter. Release the
switch as soon as the engine starts.
Do not crank over for more than 10
seconds. After engine is running;
hold murphy switch until engine has
oil pressure.
Handle fuel with care. It is highly
flammable. Always use an
approved container and fill tank
outdoors.
WARNING
CAUTION
Move machine to a clear, level
area. Do not operate in the vicinity
of bystanders.
NOTE
The Murphy switch system will
shut the engine off if the oil
pressure is too low or if the engine
temperature is too high. If the
engine will not run or shuts off for
these reasons, consult your local
dealer.
Operation
4.4 HYD FEED CON-
TROL
The Bear Cat chipper is equipped with
a pre-programmed hydraulic feed
control. The controller serves a variety
of functions including monitoring
chipper rotor RPM, controlling the feed
roller, and providing routine
maintenance alerts. The controller has
an on/off feature located below the
control panel. If the controller becomes
damaged, the chipper will still run with
the controller shut off, however all of
the controller functions will be disabled.
The feed roller will have to be controlled
with the control arm. The controller is
located under the control panel.
The controller functions are further
detailed below:
1. The first function is that the control-
ler operates is the feed roller. The
controller monitors the RPMs of the
chipper rotor and if it drops below
the preset range the feed roller
stops. When the RPMs are back
up to an acceptable level the feed
roller will reengage.
2. The controller also has a “try again”
feature. The controller monitors the
hydraulic pressure of the feed roller.
If it senses the level is too high (the
feed roller becomes obstructed) the
controller will reverse the feed roller
, removing the material trying to be
chipped. The controller will then
engage the roller into the forward
position and try to feed the material
again. If this cycle continues the
obstruction will have to be removed
manually, or material to be chipped
should be removed, trimmed, and/
or repositioned.
To disable the try again feature dis-
connect the 2 pin connector going
to the pressure switch. It is located
above the feed roller motor on the
SA-1987 assembly.
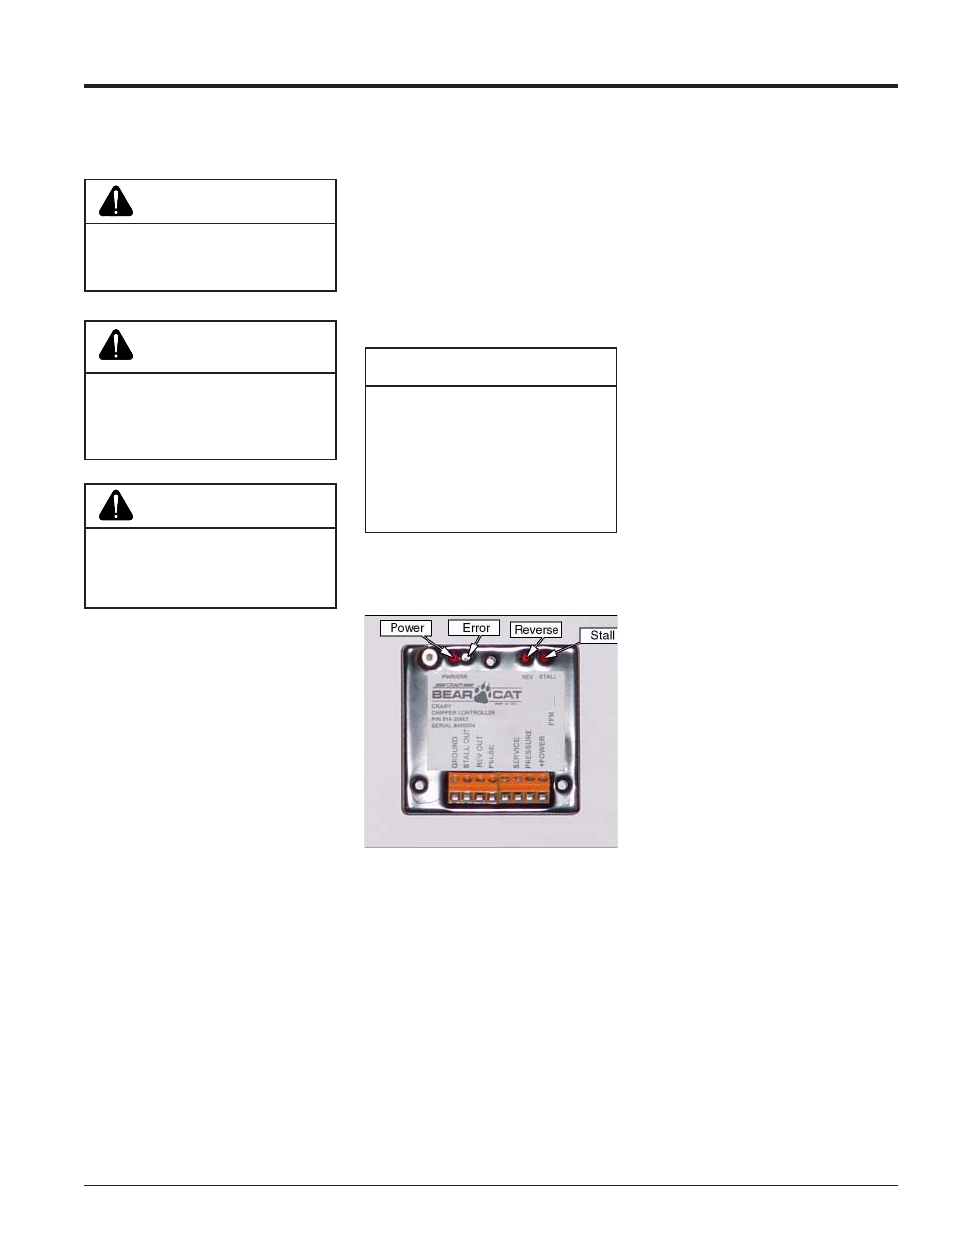
3. The controller will also flash service
alerts when it is started. Every 15
hours it will flash (error light blinks
5 times) for the chipper blades to
be sharpened. Every 100 hours it
will flash (error light blinks 10 times)
for the engine oil to be changed.
NOTE: The RPM sensor on the rotor
must be flashing or the controller won’t
work. Clearance between the sensor
and the bolt must be between 1/32”
and 3/32”.
To reprogram the hydraulic feed
control, software must be purchased.
Contact your distributor or the Bear
Cat factory for more information.
Fig. #17, Controller