Assembly – Echo 76624 Owners Manual v.1 User Manual
Page 10
8
6 INCH CHIPPER
assemblY
Section
2.1 aTTach Trailer Wheels
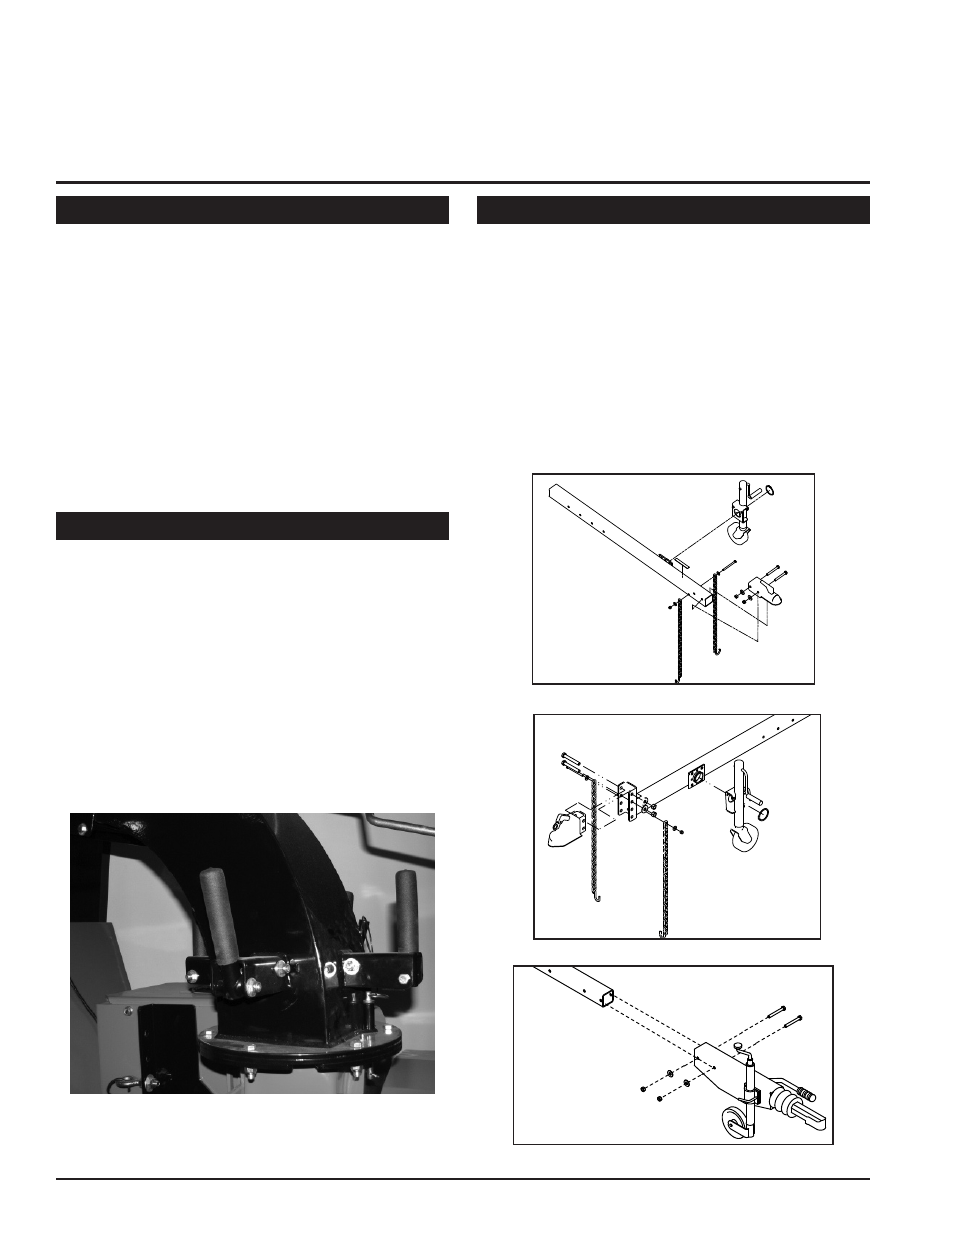
2.2 aTTach Trailer hiTch
2.3 aTTach discharge chuTe
does not apply to F models.
Remove the chipper from its shipping crate. Place the
unit on a level surface before attempting to assemble
it. See the torque chart in the back of the manual for
tightening torque of bolts and screws.
Raise the trailer several inches from the ground with
a hoist or jack. Support the chipper securely.
lift one wheel to a hub and align the wheel lug holes
with the hub lug bolts. thread the lug nuts (found in
the parts kit) onto lug bolts and tighten the lug nuts to
75 ft. lbs. Follow a star pattern when tightening the
lug nuts. Repeat this step for the remaining wheel.
1.
2.
3.
does not apply to F models.
attach the ball coupler to the hitch weldment using
the provided 1/2” x 4” bolts and 1/2” washers and 1/2”
nuts. tighten to proper torque.
Slide the hitch weldment into the chipper trailer, back
to the 1/2” mounting holes.
Connect the hitch weldment to the frame using the
two 1/2” x 4-1/2” bolts, 1/2” washers and 1/2” nuts.
tighten to proper torque.
Check to make sure the tongue jack and safety chains
(domestic only) are installed correctly.
1.
2.
3.
4.
Attach the discharge chute to the mounting flange on
the chipper frame. The square discharge chute will fit
over the round section of the chipper frame.
Place the discharge ring, and discharge retainer
around the base of the mounting flange on the chip-
per frame.
Attach the discharge ring and retainer to the flange
with the provided 3/8” x 1-1/4” bolts and nuts. tighten
to proper torque.
torque all fasteners to proper values.
1.
2.
3.
4.
2
Domestic model hitch through 2006
S model hitch
Domestic model hitch starting 2007