Echo CH123DH Owners Manual v.2 User Manual
Page 24
12 INCH CHIPPER
20
SERVICE & MAINTENANCE
BEFORE INSPECTING OR SERVICING ANY PART OF THIS MACHINE, SHUT OFF POWER SOURCE, REMOVE KEY,
DISCONNECT THE BATTERY CABLES AND MAKE SURE ALL MOVING PARTS HAVE COME TO A COMPLETE STOP.
WARNING
Remove the proximity sensor and brackets and set
10.
aside. (This is so the sensor doesn’t get damaged.)
Remove the 4-5/8” bolts holding the front bearing in
11.
place.
Loosen set screws on the front bearing.
12.
Clean the shaft with emery cloth to help with removal
13.
of the bearings.
Remove the front snap ring and set aside.
14.
Slide the bearing off the shaft and set aside.
15.
Remove the back snap ring.
16.
Loosen and remove the 4-5/8” bolts holding the rear
17.
bearing in place.
Lift the rotor out of the housing and secure.
18.
Remove the rear bearing.
19.
Replace the rear bearing and reinstall.
20.
Put the inside snap ring back on the shaft and make
21.
sure it seats correctly.
Rotate the discharge to the road side of chipper.
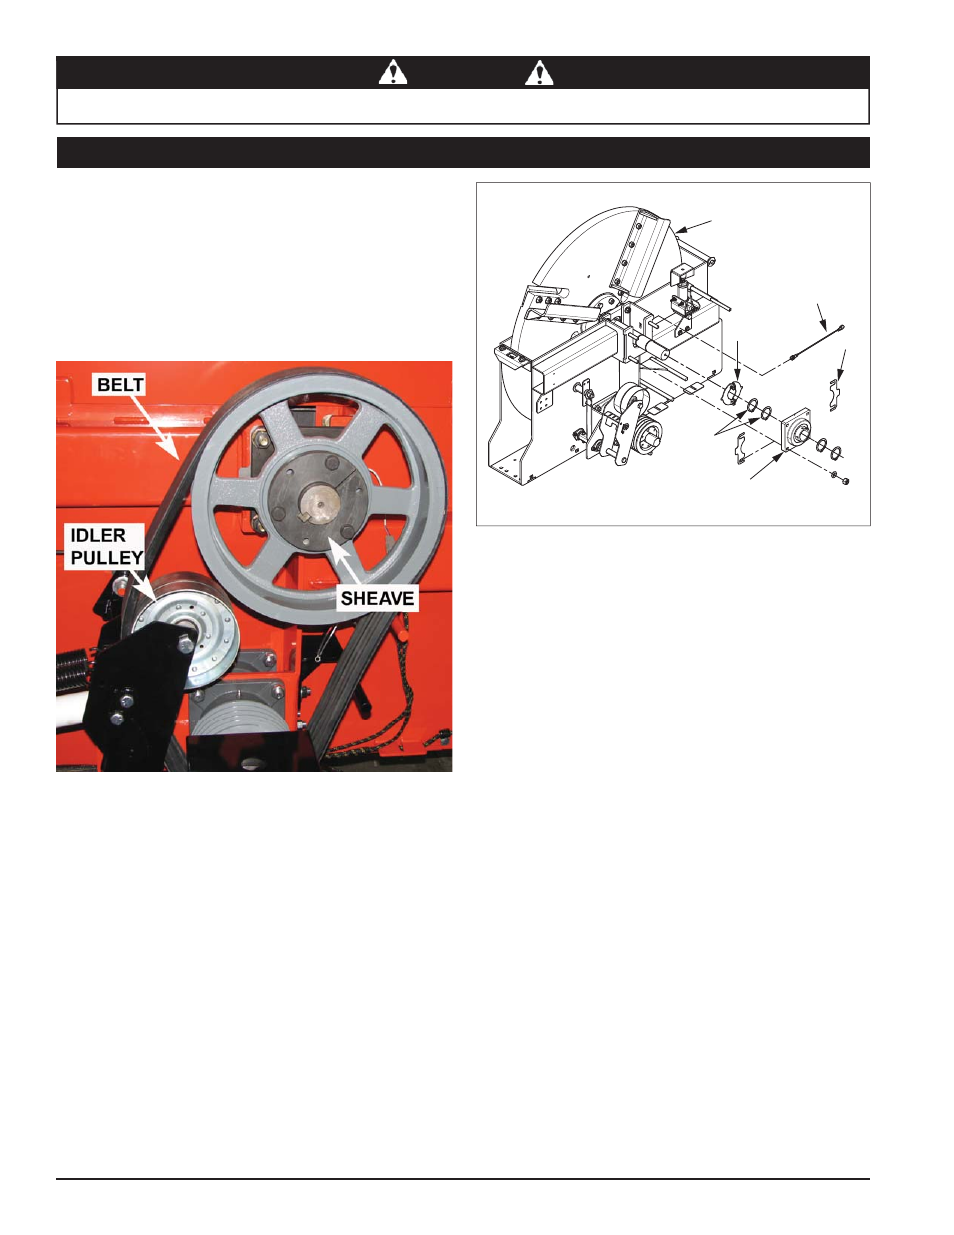
1.
Remove the two ½” bolts holding the rotor cover.
2.
Lift the rotor cover open with hoist far enough so it
3.
rests on the discharge chute and secure. It weighs
approximately 425 lbs (193 kg).
Remove the ½” bolt from the idler pulley and set
4.
aside.
Remove the belt from the top pulley.
5.
Remove the sheave by inserting hardware in the holes
6.
not used when the sheave was installed.
Remove set screw from bushing.
7.
Slide bushing and sheave off the rotor shaft and set
8.
aside.
Secure the rotor in place by putting tension on it
9.
with hoist. It weighs approximately 987 lbs (448 kg)
assembled.
5.13 REPLACING THE BEARINGS
PROXIMITY
SENSOR
BRACKETS
SNAP
RINGS
FRONT
BEARING
ROTOR
SHIM