Operation, 1 starting the chipper, 2 stopping the chipper – Echo CH911DH Owners Manual v.7 User Manual
Page 14: 1 starting the chipper 4.2 stopping the chipper, Warning
9 INCH CHIPPER
10
Section
operaTion
1. Make sure the chipping chamber is empty before
starting.
2. Check levels of gas, oil, and hydraulic fluid and fill if
necessary.
3. Make sure the feed roller control bar is in the Stop
position. The controller will flash red until the bar is in
Stop. See Sec. 6 for a table of all flash codes for the
controller light.
4. Turn key switch to preheat position. Hold in preheat
position for several seconds until glow plug indicator
light switches off.
5. Make sure the throttle is pushed in all the way.
6. Depress belt engagement pedal.
7. Push in and hold Murphy switch push-button.
8. Activate the key switch. Release the switch as soon
as the engine starts. Do not crank for more than 10
seconds. Release Murphy switch after oil pressure
begins to rise. Hold Murphy switch in longer if engine
immediately stalls after releasing.
warninG
4.1 sTarTinG The chipper
noTe
The Murphy switch system will shut the engine off if the
oil pressure is too low or if the engine temperature is
too high. If the engine will not run or shuts off for these
reasons, consult your local dealer.
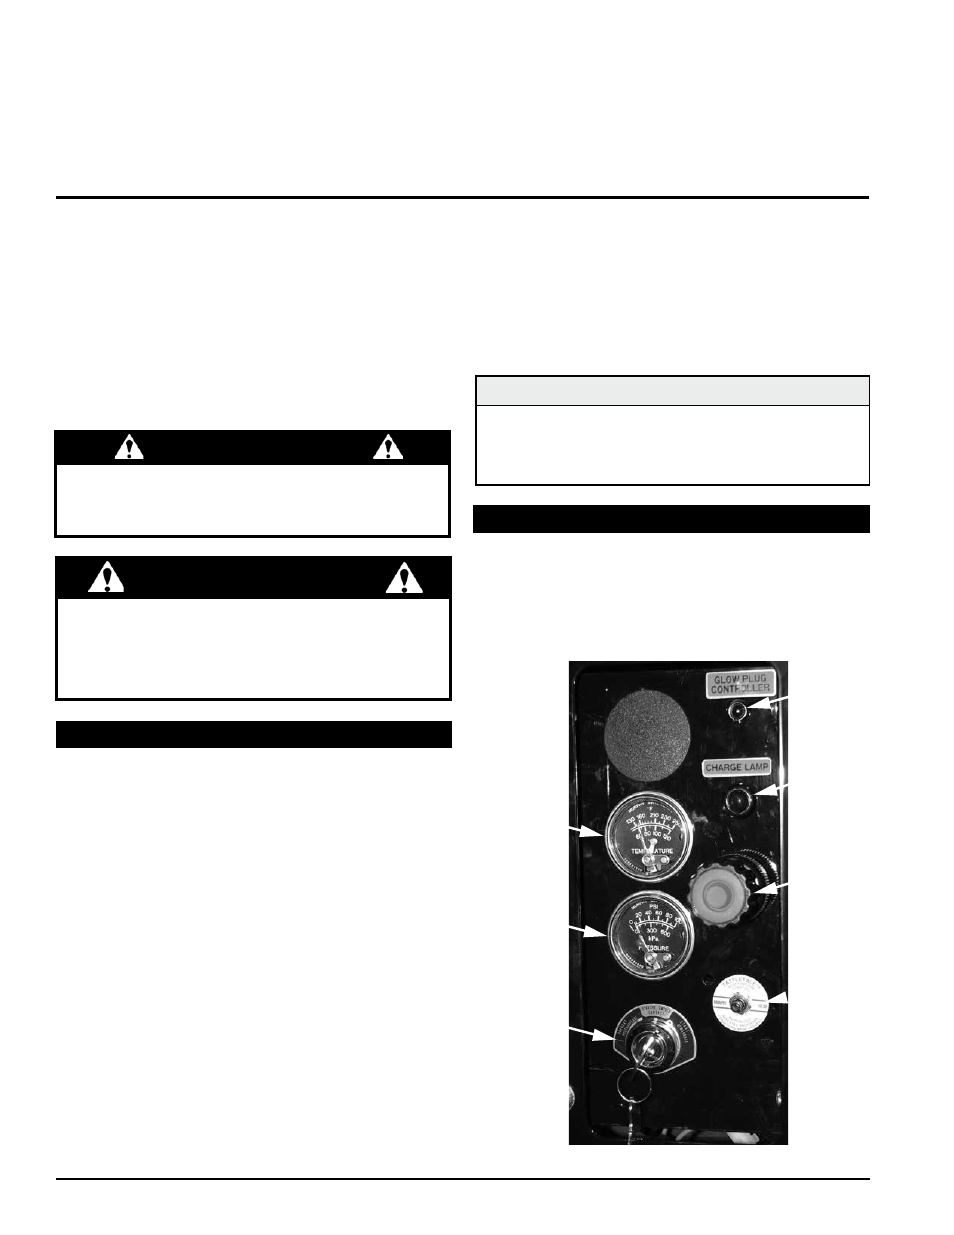
Figure 4.1, Chipper control panel
4
warninG
1. gradually move throttle to slowest position.
2. Turn key switch to off position.
3. Allow machine to come to a complete stop. Release
the belt engagement pedal to help slow the rotor once
the engine has stopped running.
4.2 sToppinG The chipper
Glow Plug
Indicator
Charge
Indicator
Throttle
Switch
Murphy
Temperature
Gauge
Pressure
Gauge
Key Switch
9. Slowly release belt engagement pedal. This will engage
the drive belt, and the rotor will turn. If the engine stalls
when engaging the drive belt, release the pedal more
slowly.
10. Push center throttle button in while turning and then
pulling the throttle knob out to increase RPM until the
controller light on the feed chute is showing a steady
green light.
As with any other piece of outdoor equipment, getting the
feel for how your machine operates and getting to know
the best techniques for particular jobs are important to
overall good performance.
chippinG operaTion
The chipping operation takes place on the front of the
machine, where hardened steel chipper blades are
mounted on a rotating disk assembly. Material fed into the
chipper chute is sliced into small chips and propelled out
through a discharge tube
Move machine to a clear, level area outdoors before
starting. Do not operate in the vicinity of bystanders.
Make sure cutting chamber is empty before starting.
Before operating your machine, be sure you read and
understand all safety, controls and operating instructions
in this owner’s manual and on your machine. Failure to
follow these instructions can result in serious injury or
property damage.