English – Echo CH9540H Owners Manual v.5 User Manual
Page 11
PTO CHIPPERS
7
ENGLISH
ASSEMBLY
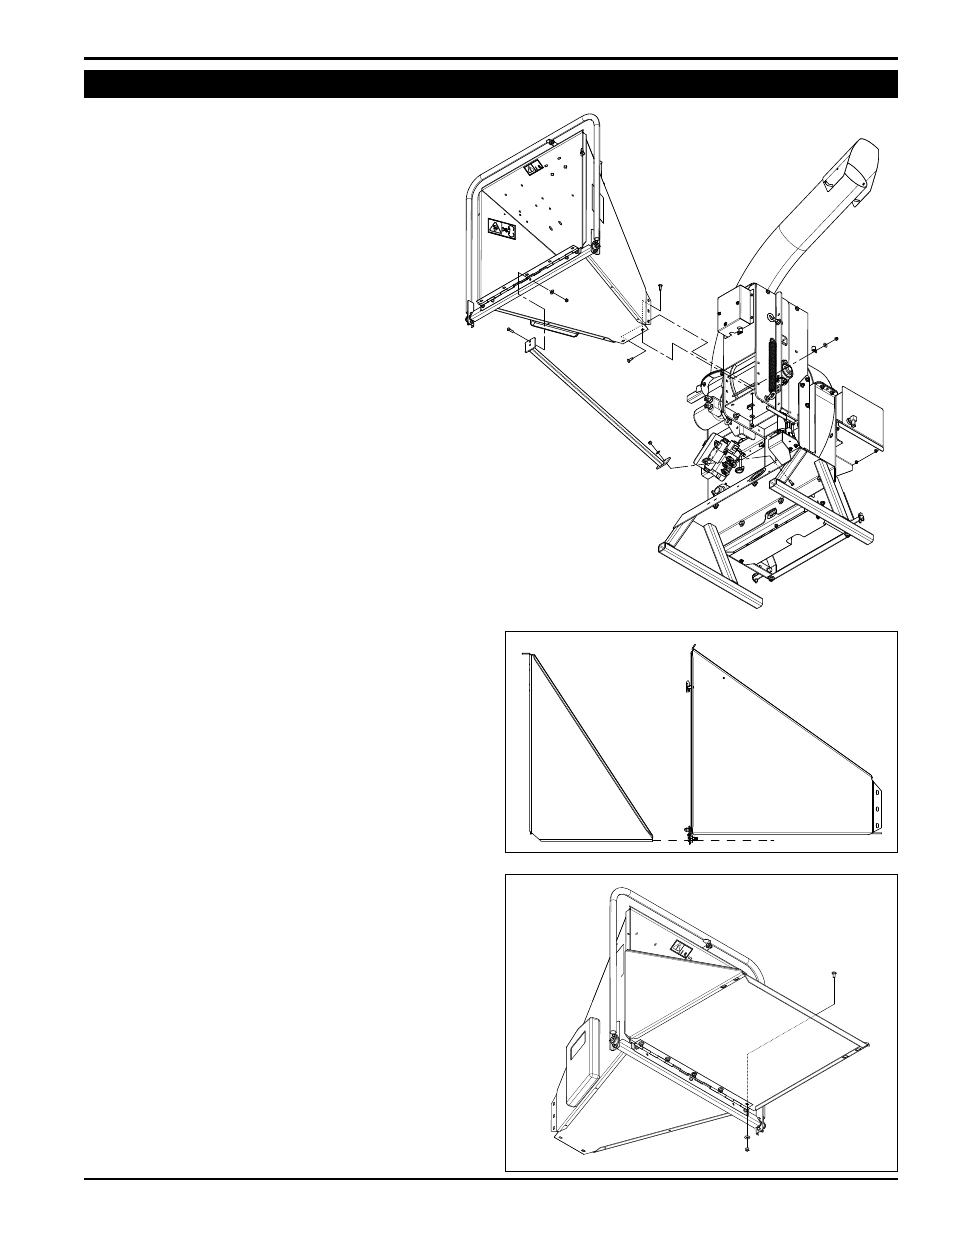
2.3 aTTaCH CHuTE - HYdRauLIC FEEd modELS WITHouT SaFETY baR
Remove chipper from shipping crate. Place unit
1.
on a level surface before assembling. See the
Torque chart in Section 7 for the recommended
torque for tightening bolts and screws.
Attach the chute support to the front side of the
2.
chipper base with one (1) 3/8" x 1" hex bolt,
washer and nut.
Attach the chipper chute to the feed roller with
3.
eight (8) 3/8" x 1-1/2" carriage bolts, washers,
and nuts. Thread the bolts from inside the chute.
do not tighten completely at this time.
Attach the chute support to the chute through the
4.
middle hole on the extension tray hinge using
existing hardware.
Tip the extension tray up and slide it over the
5.
chipper chute as shown here. Make sure to
position the lip on the extension tray behind the
lip on the chipper chute.
Insert five (5) 3/8" x 1" carriage bolts through
6.
the five outside holes on the extension tray and
hinge. Adjust so the tray can be locked in upright
postion with the lock pin on the chute. Secure the
bolts with washers and nuts.
Tighten the eight bolts holding the chute in
7.
place.
connect the three wires coming from the
8.
feed chute to the connectors that are located
underneath the feed roller, matching ziptie
colors.