I.R.I.S. IRIScan Pro 3 Cloud User Manual
Page 5
English English
Tips
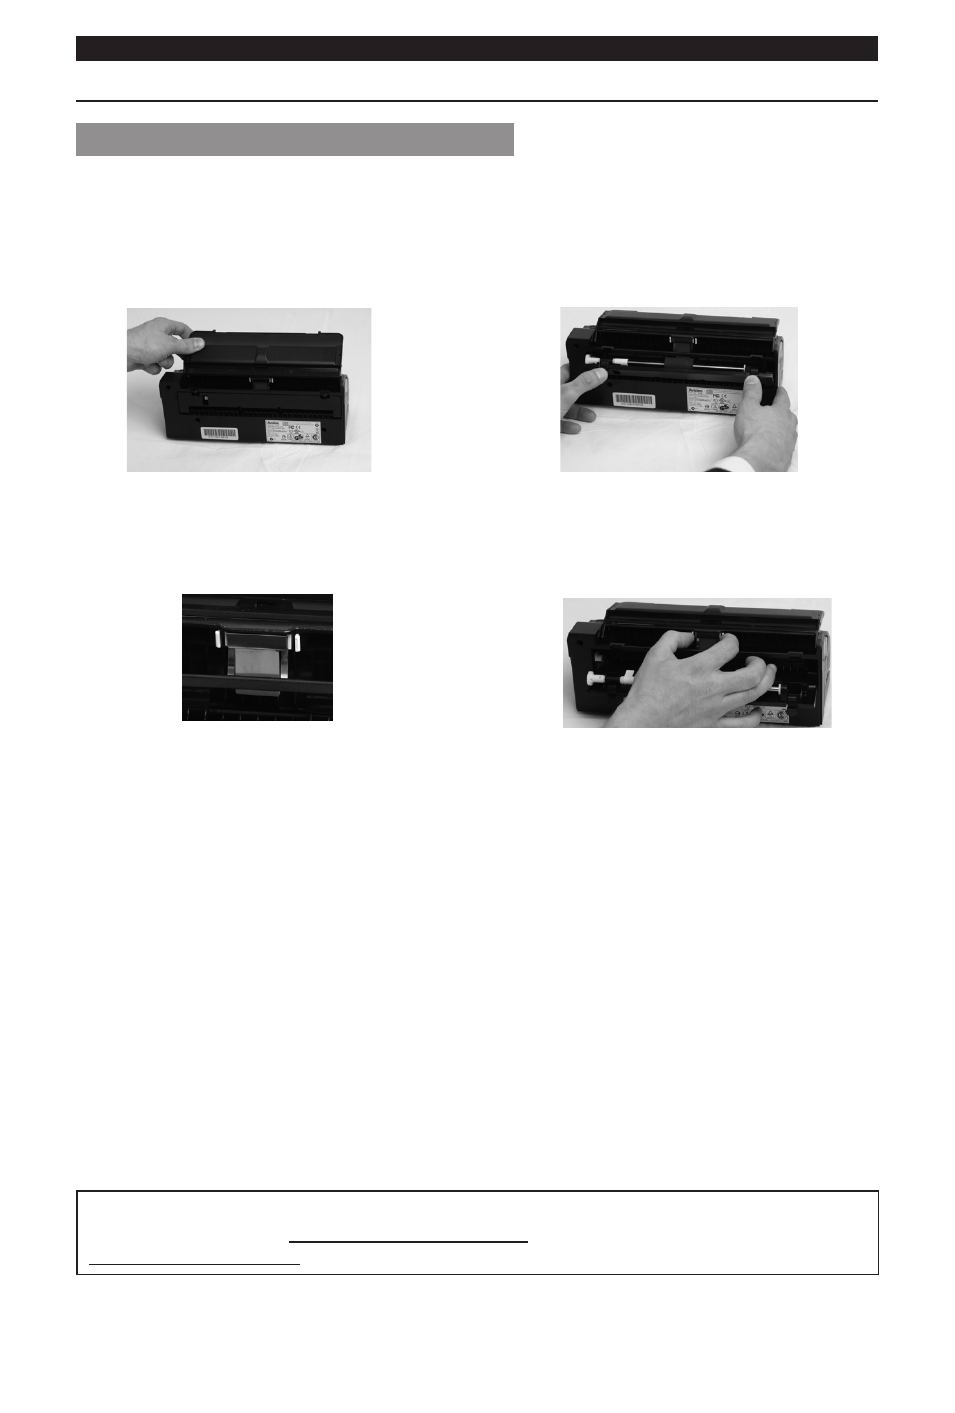
Checking and replacing the ADF pad assembly
Check if the ADF (automatic document feeder) pad assembly is mounted correctly at the back of the
scanner:
1. Retract the scanner.
2. Press down the 2 latches at the back of the
document feeder to open the rear cover.
3. The rubber part of the pad assembly should be
inserted in the slot.
4. If that is not the case, use your fingers to press
and hold the two sides of the pad assembly to
remove it.
5. Insert the rubber part into the slot and
re-attach the pad assembly.
Note: you find an extra pad assembly in the IRIScan™ package, should the current one need replacing
(recommended after 20,000 scans or in case of repeated paper jams).
Should you experience issues when using IRIScan™ Pro 3 Cloud, consult the Frequently Asked
Questions on our website www.irislink.com/support/faq or contact Technical Support at
www.irislink.com/support.
- Readiris 14 for Windows User Guide (157 pages)
- Readiris 14 for Windows for Mac Quick Start (71 pages)
- Readiris 14 for Windows for Windows Quick Start (85 pages)
- Readiris 14 for Mac User Guide (139 pages)
- Readiris Pro 12 for Windows User Guide (103 pages)
- Readiris Pro 12 for Windows Quick Start (74 pages)
- Readiris Pro 12 for Mac Quick Start (25 pages)
- Readiris Corporate 12 for Windows User Guide (130 pages)
- Readiris Corporate 12 for Mac User Guide (106 pages)
- IRISCan Book 3 (201 pages)
- IRISCan Book Executive (312 pages)
- IScan Book 2 (53 pages)
- IRISCan Book 2 Executive Hardware (61 pages)
- IRISCan Book 2 Executive (6 pages)
- IRIScan Anywhere 3 Wi-Fi (11 pages)
- IRIScan Anywhere 2 Hardware (20 pages)
- IRIScan Anywhere 3 User Guide (26 pages)
- IRIScan Anywhere 3 Quick Start (12 pages)
- IRIScan Anywhere 2 Quick Start (98 pages)
- IRISCan Express 3 (4 pages)
- IRIScan Express 2 for Windows Quick Start (10 pages)
- IRIScan Executive 2 for Mac Quick Start (5 pages)
- IRIScan Executive 2 for Windows Quick Start (10 pages)
- IRIScan 2 for Mac (3 pages)
- IRIScan 2 for Windows (3 pages)
- IRISCan Mouse (64 pages)
- IRISCan Mouse 2 (10 pages)
- IRISCan Mouse Executive (10 pages)
- IRIScan Pro 3 Wi-Fi User Guide (85 pages)
- IRIScan Pro 3 Wi-Fi Quick Start (166 pages)
- IRIScan Pro 3 Cloud Button Manager (49 pages)
- IRISNotes 1 (3 pages)
- IRISNotes Executive 1 (7 pages)
- IRISNotes Express 2 (56 pages)
- IRISNotes Executive 2 (92 pages)
- IRISPen Express 7 (4 pages)
- IRISPen Executive 7 (14 pages)
- IRISPen Mini 6 (50 pages)
- IRISPen Express 6 for Mac (43 pages)
- IRISPen Express 6 for Windows (58 pages)
- IRISPen Translator 6 (66 pages)
- IRISPen Executive 6 for Mac (58 pages)
- IRISPen Executive 6 for Windows (88 pages)
- Cardiris Pro 5 (119 pages)