Step 3: connect the scanner to the computer, Step 4: power on the scanner, Step 5: scanning documents – I.R.I.S. IRIScan Pro 3 Cloud User Manual
Page 2
English English
Mac OS
1. Insert the IRIScan™ disc in the DVD-ROM drive of the computer.
2. Click the IRIScan™ Pro 3 Cloud icon that appears on the Desktop.
3. Open the IRIScan™ Pro 3 Cloud Driver folder, and run the installer.
Follow the on-screen instructions.
4. Return to the DVD-ROM content and install the other software applications.
Note: all license numbers required to activate the software can be found on the license sheet included in the box.
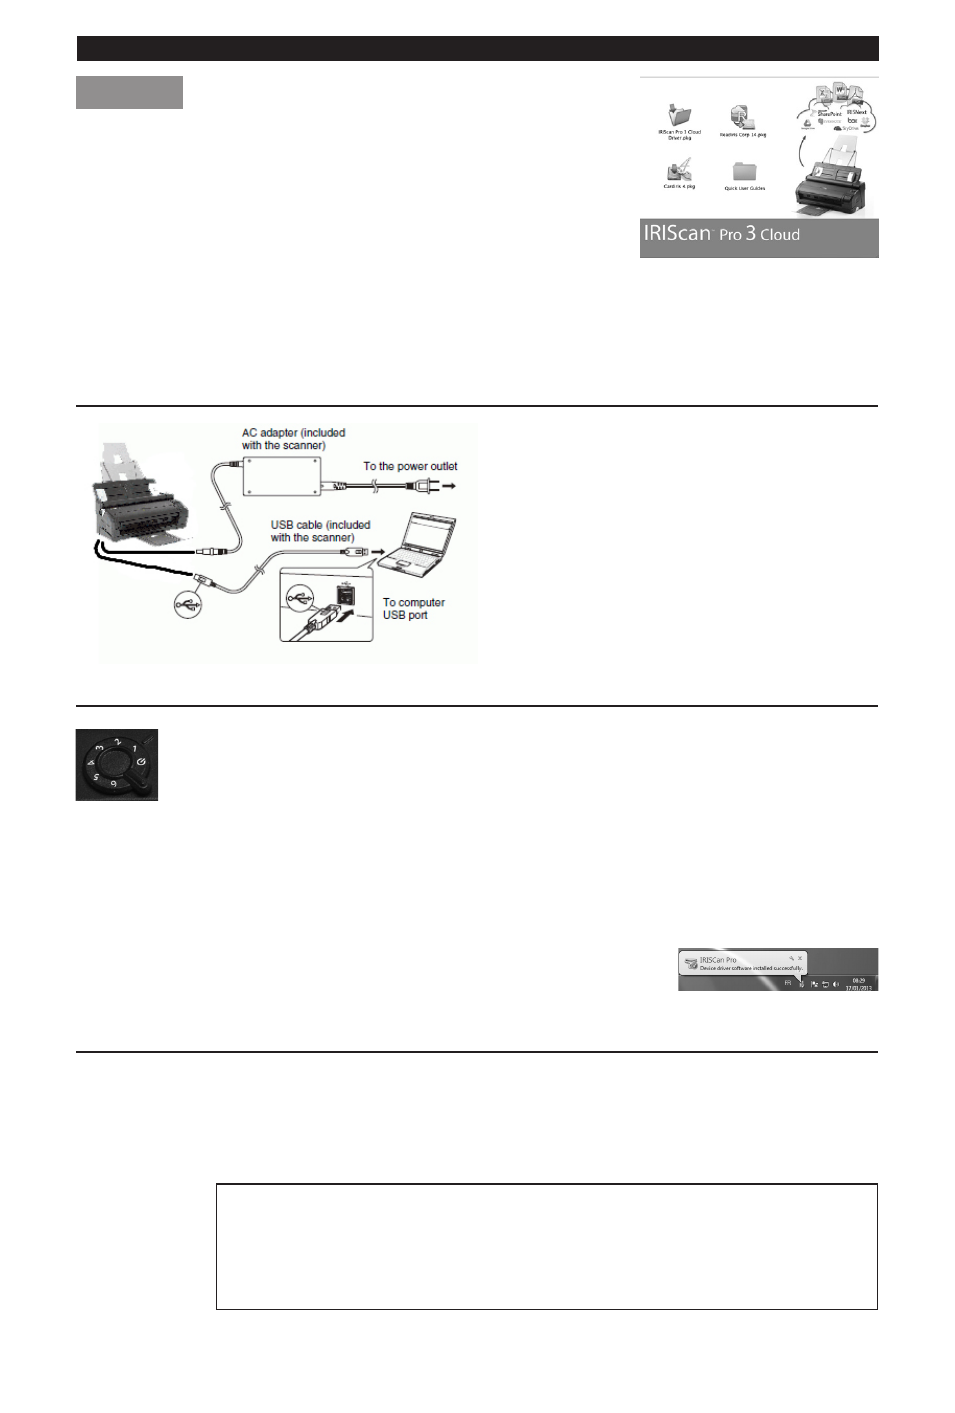
Step 3: Connect the Scanner to the Computer
Notes:
•
Make sure the scanner power is OFF
before connecting it.
•
Instead of the regular power cable, you
can also use the USB power cable.
Step 4: Power ON the Scanner
• Turn the power knob clockwise to any of the numbers.
• The LED will light up red, and then turn green.
Note: if the LED stays red while the scanner is connected to your computer, this means a
problem occurred. Refer to our website www.irislink.com/support for help.
Note: on Mac OS, the LED does not turn green automatically. You need to select the
IRIScan™ as scan source inside a scanning application first.
• If the driver is installed successfully, a balloon message appears on the task bar
(in Windows).
Step 5: Scanning Documents
The IRIScan™ Pro 3 Cloud can scan documents of different sizes, ranging from business cards to
A4/Legal.
You can use it to scan stacks of documents using the document feeder, or scan sheets separately using
the detachable base unit.
IMPORTANT: the scanner must be used from within scanning applications, such as
Readiris™ and Cardiris™. Pushing the Scan button as such does not work, unless
the Button Manager (PC only) is installed and configured correctly. Refer to the
Readiris™ and Cardiris™ Quick User Guides on the DVD-ROM to learn how to use
these applications with the scanner.