I.R.I.S. IRIScan Pro 3 Cloud User Manual
Page 4
English English
Notice that the first 3 buttons are preconfigured. Right-click them to view their properties. You can
configure up to 9 buttons to scan your documents to your favourite output formats and applications. By
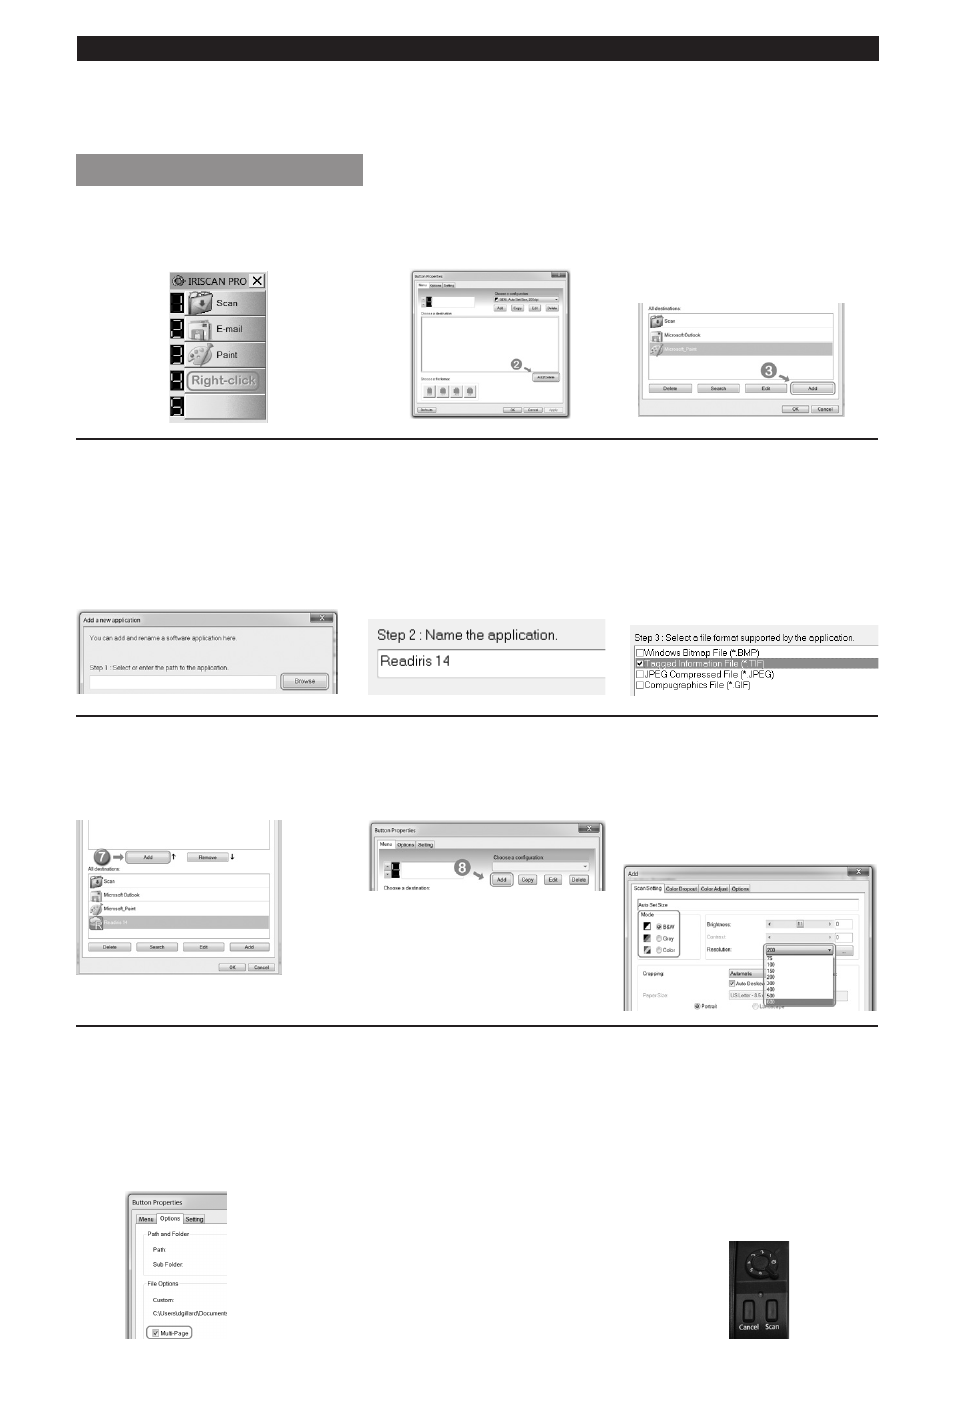
means of example, we configure a blank button to scan to Readiris™ 14.
Configuring a scanner button
1. Right-click a blank button.
2. In the Button Properties
window, click Add/Delete.
3. In the new window, click the
Add button at the bottom.
4. Click Browse to browse and
select the Readiris™ application.
By default you find it in
C:\Program Files\Readiris Corporate 14.
5. Name the application.
6. Select a file format supported
by the application, then
click OK.
IMPORTANT:
to scan multiple
pages into a single file, select
Tagged Information File (.TIF)
7. Select Readiris, and click the
Add button in the middle of the
window.
8. Add a configuration.
9. Select a color mode and
resolution, and click OK.
TIP: a resolution between 300 and
600 dpi is recommended.
10. IMPORTANT:
To scan multiple pages to a single
file, click the Options tab. Then
select Multi-page.
(Only available when you selected
.TIF as file format).
11. Click Apply to save
the settings.
12. The configured button is
ready for use.
- Click it to scan to Readiris™.
- Or turn the power knob to
number 4. Then press Scan on
the scanner to scan directly to
Readiris™.