Aries Automotive 202017-2 User Manual
Aries Automotive For the car
SIDEBAR WITH BENT ENDS
2010 TOYOTA 4RUNNER WITH ROCKER COVERS
SR5 AND LIMITED MODELS
Page 1 of 3
1/18/010 (DP)
PARTS LIST:
1 Driver/Left Sidebar
4 1/2” Lock Washers
1 Passenger/Right Sidebar
4 1/2” ID x 1-1/2” OD x 1/8” Flat Washers
1 Driver/Left Front Mounting Bracket
2 10-1.50mm x 25mm Hex Head Bolts
1 Passenger/Right Front Mounting Bracket
2 10mm Lock Washers
1 Driver/Left Rear Mounting Bracket
4 10mm ID x 20mm OD x 2mm Flat Washers
1 Passenger/Right Rear Mounting Bracket
2 10mm Hex Nuts
1 Driver/Left Rear Support Bracket
4 8-1.25mm x 25mm Hex Head Bolts
1 Passenger/Right Rear Support Bracket
4 8mm Lock Washers
4 1/2” x 2” Hex Head Bolts
4 8mm ID x 16mm OD x 1.6mm Flat Washers
PROCEDURE:
1. REMOVE CONTENTS FROM BOX. VERIFY ALL PARTS ARE PRESENT. READ
INSTRUCTIONS CAREFULLY BEFORE STARTING INSTALLATION.
2. Remove driver side front body mount nut and washer located underside of vehicle. NOTE: Use
a wrench to hold the center bolt as you loosen the nut, (Figure 1). The center bolt and rubber
mount will remain on the vehicle and are not removed for Sidebar installation.
3. Loosely attach the front driver side Mounting Bracket using the factory nut and washer. NOTE:
Keep factory rubber bushing and other factory body mount components in place, (Figure 2).
Line up the center bolt with the middle of the mounting slot in the Mounting Bracket. Do not
tighten hardware at this time. Repeat Steps 2 & 3 for driver side rear Mounting Bracket
installation, (Figure 3).
4. Locate and remove the two factory hex bolts used to secure the rear of the rocker panel cover
to the vehicle. Gently pull the factory bracket down and slide the driver side rear Support
Bracket, (Figure 4A & 4B), between the factory bracket and the body panel. Line up the
mounting holes and secure with the supplied (2) 8mm x 25mm Hex Bolts, (2) 8mm Lock
Washers and (2) 8mm Flat Washers, (Figure 4B). Do not tighten hardware at this time. Line
up the hole in the lower mounting location on the Support Bracket with the previously installed
rear Mounting Bracket. Attach the Support Bracket to the Mounting Bracket with (1) 10mm x
25mm Hex Bolt, (2) 10mm Flat Washers, (1) 10mm Lock Washer and (1) 10mm Hex Nut,
(Figure 4B & 5). Do not tighten hardware at this time.
5. To provide extra clearance for the Sidebar, remove the plastic deflector attached to the bottom
of the rocker panel cover in front of the rear tire, (Figures 3, 4B & 5). Attach the driver Sidebar
to the front and rear Mounting Brackets using the included (2) 1/2” x 2” Hex Bolts, (2) 1/2” Lock
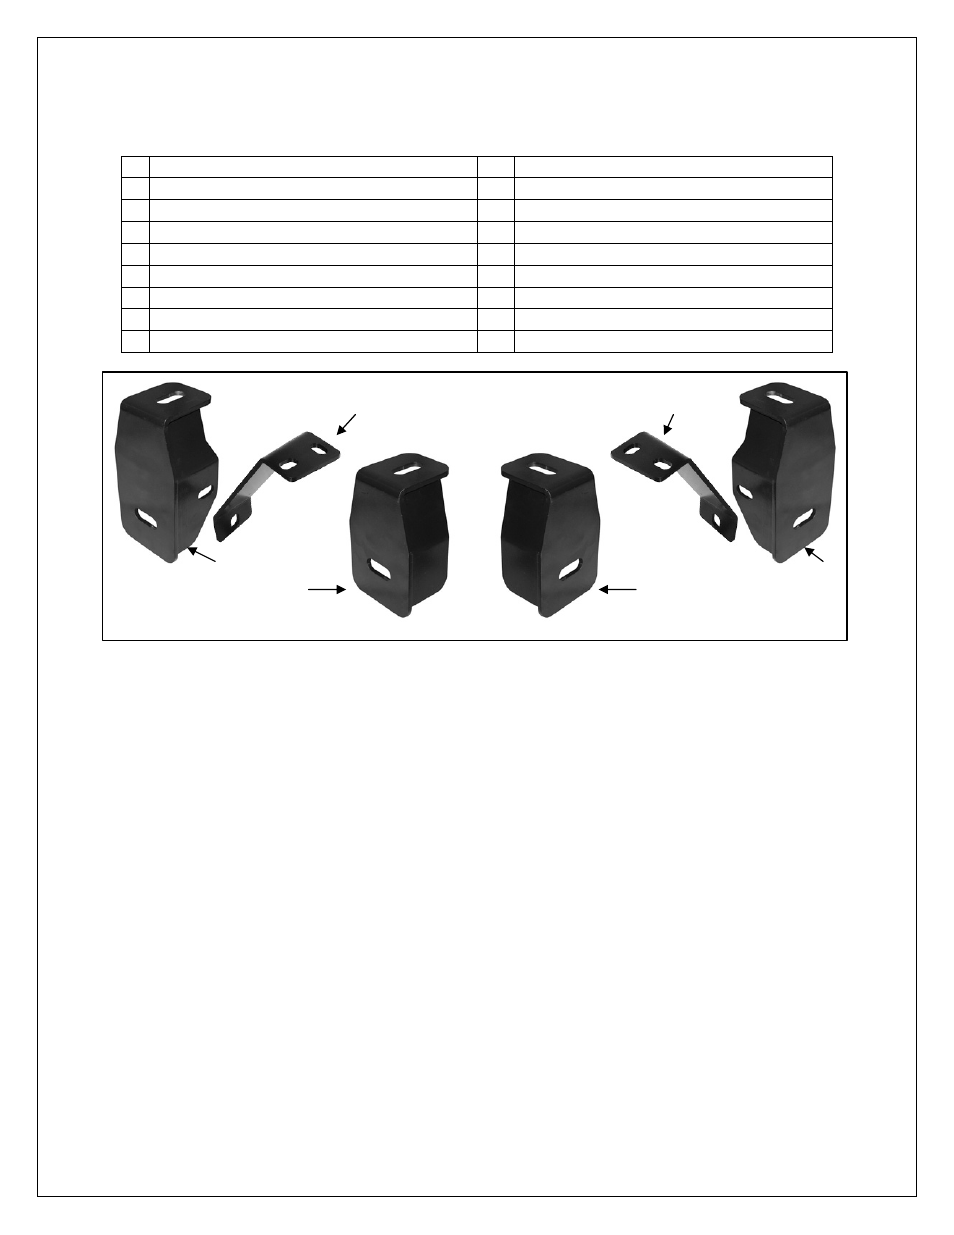
Passenger side
rear Mounting
Bracket
Passenger side
rear Support
Bracket
Passenger
side front
Mounting
Bracket
Driver side
front
Mounting
Bracket
Driver side
rear Mounting
Bracket
Driver side
rear Support
Bracket