Aries Automotive B35-5005 User Manual
Page 3
Do not bolt the front of the Support Bracket to the inside of the Lower Mounting Bracket at this
time. Repeat this step for the passenger side Support Bracket. Snug but do not tighten all
hardware at this time.
10. Reinstall the Bull Bar described in Step # 5, (Fig 9). NOTE: For models with tow hooks-Attach
the front of the Support Bracket to the rear oval hole in the Lower Mounting Bracket for the Bull
Bar using the same 12mm x 35mm Hex Bolts securing the Bull Bar.
11. Level and adjust the Bull Bar and tighten all hardware.
12. Do periodic inspections to the installation to make sure that all hardware is secure and tight.
To protect your investment, wax this product after installing. Regular waxing is recommended to
add a protective layer over the finish. Do not use any type of polish or wax that may contain abrasives
that could damage the finish.
For stainless steel: Aluminum polish may be used to polish small scratches and scuffs on the finish.
Mild soap may be used also to clean the Products.
For gloss black finishes: Mild soap may be used to clean the products.
Driver Side Installation Pictured
Page 3 of 5
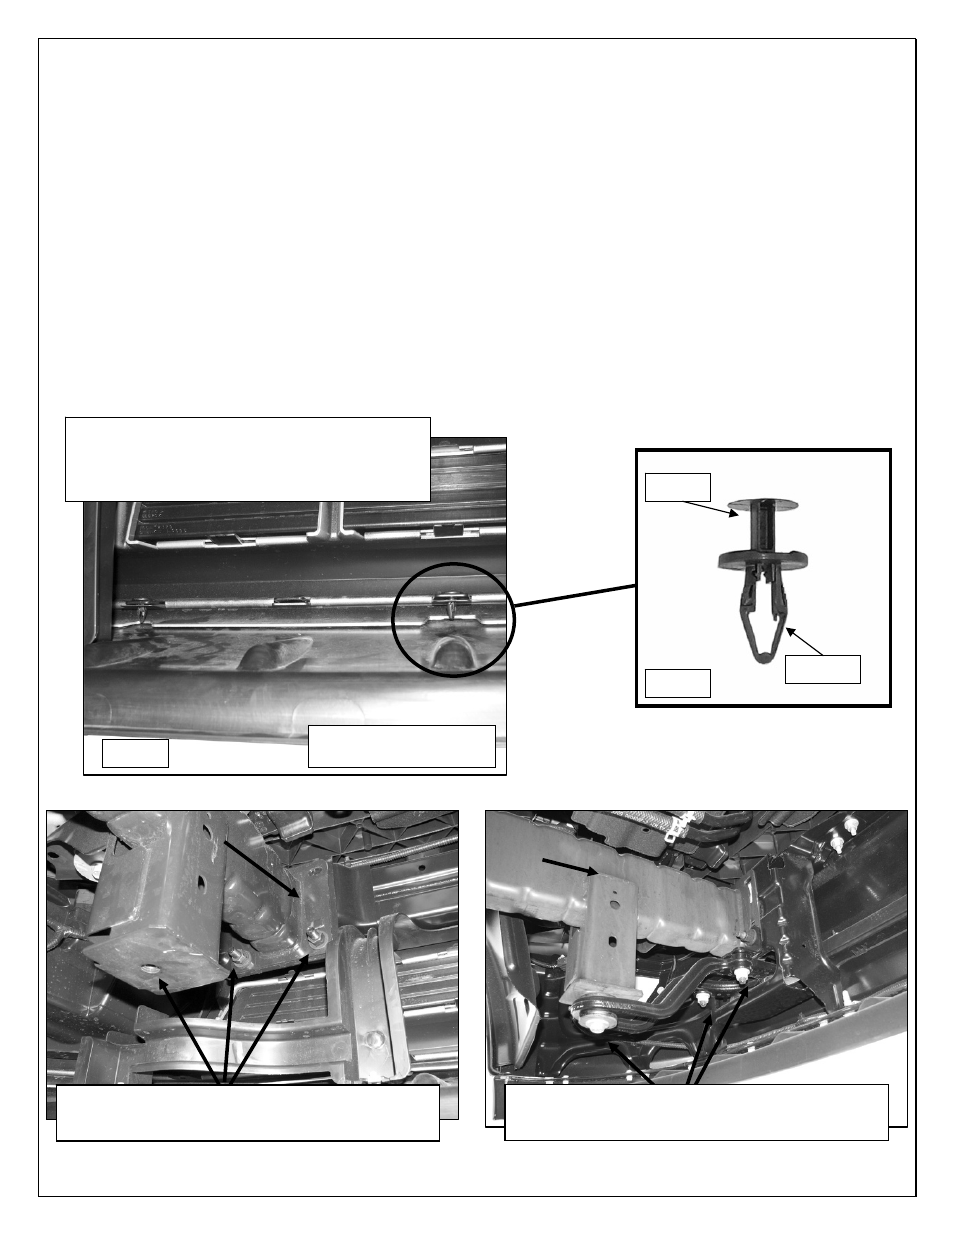
Fig 1A
Pry up the center pin on the clip to remove the
complete fastener. If the center pin comes out,
remove the housing then push the pin back into
the housing as per Fig 1B to reinstall.
Viewed from behind the
center of the bumper
Fig 1B
Pin
Housing
(Fig 2A)
Driver side mounting locations viewed from
behind the bumper (non tow hook equipped models)
Front
(Fig 2B)
Driver side mounting locations viewed from
behind the bumper (tow hook equipped models)
Front