Spyclops SPY-DVR Kit (ALL KITS) User Manual User Manual
Page 9
9
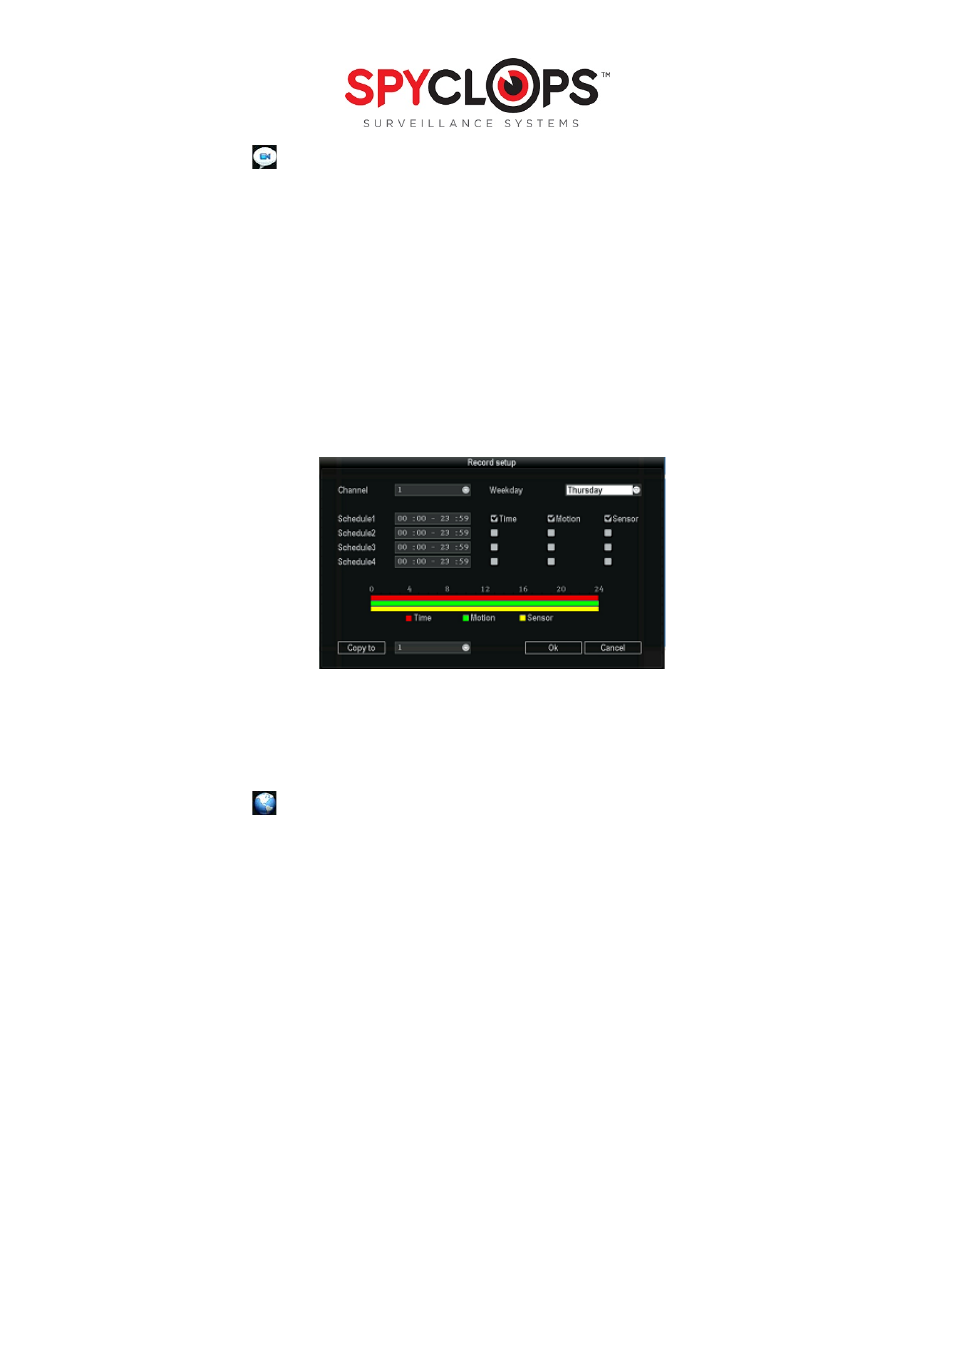
3.4 Record Setup:
Use your mouse and click the right button to select “Setup” key, select “System setup”, and select “Record Setup”
•
Channel: Pick the camera view you want to record
•
Weekday: Choose the day you would like to set up, or you can choose “Everyday” if you want everyday
to be recorded at the same times/settings.
•
Modes: “
Manual
” is when you have manually specified the recording, and it is in
blue.
“
Time
” will give a
constant recording according to what time you have selected, and is shown in
red
on the time bar,
“
Motion
” will only record when motion is detected and is shown in
green
on the time bar and “
Sensor
”
will record if you have a sensor connected to the back of the DVR to record when the sensor is activated
and is shown in
yellow
on the time bar. The time bar will display which recording option is running for
the full 24 hour day
*Note: “
Motion
” is recommended in order to save disk space
•
Copy to: Select the target channel on the right. Then select “Copy to” and “OK”. The system will set the
current channel setup information to other channels selected or “all”
*Note: Make sure before configuring network settings that you have an Ethernet cable connected from your DVR
to your router
3.5 Network Setup:
•
DHCP: When first setting up for network access, check the “DHCP” box and “OK” then right click twice to
save. Go back into “Network setup” and unclick the “DHCP” so the DVR will not change it again
•
ESee: if UPnP (Universal Plug and Play) is enabled in your router, you will see an ESee id number in which
you will use to log into the phone app E-See to remotely view from an iphone or Android
•
IP address: This is the unique address assigned to your DVR and will be used locally (within your network)
in a web browser to view your DVR recording. This is also the address you will use if you need to port
forward (for assistance with port forwarding, you can go to portforward.com for instructions according to
your router model).
*Note: you will need to allow Active X to install on your browser to view remotely
•
Subnet mask: Subnet for the network segment
•
Gateway: This will be your router address
•
MAC address: The physical address of the DVR
•
Web port: This will need to be updated to the new port number if port forwarding is done through
another port besides 80 (ports 6000-9000 are set aside for surveillance systems and will work best for
port forwarding, we suggest 8082)
•
Preferred DNS: This is the address for routing web access. Not to be confused with DDNS.