Step 1, Step 2 – Road Armor 2008-2011 GMC Front Bumper User Manual
Page 2
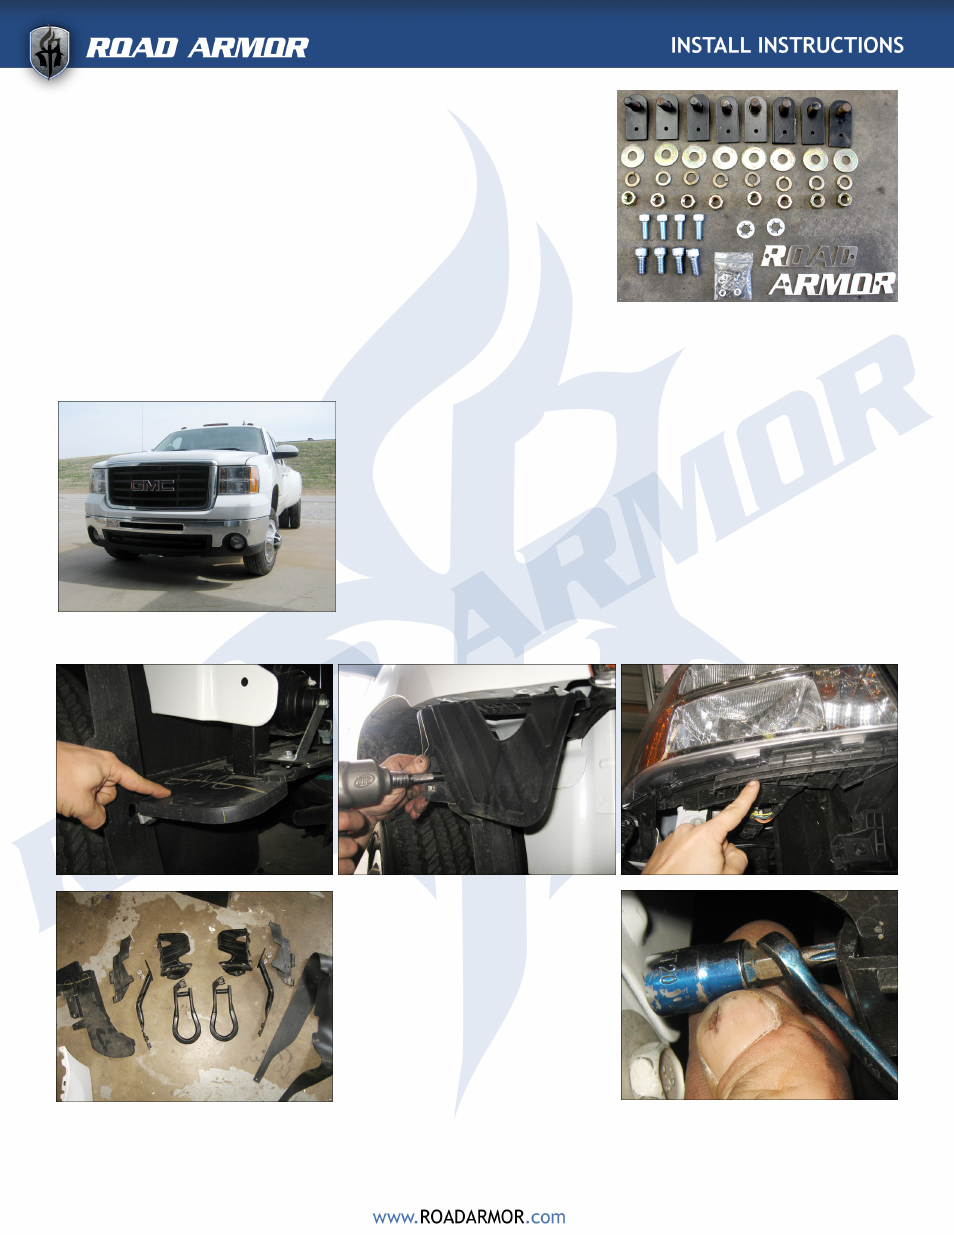
STEP 1 :
Make sure you have all necessary tools and hardware.
Hardware Kit Includes : ( all Grade 8 )
( 8 ) .5” x 1.5” Bolts
(16) .5” Washers
( 8 ) .5” Lock Washers
( 8 ) .5” Nuts
( 2 ) .5” Retainer Clips
( 8 ) Allen Head bolt (Winch Hardware)
( 1 ) Package of Road Armor Logo Hardware
STEP 2:
• Park on level surface and Disconnect Positive Battery
Terminal.
• Disconnect Factory Fog Lights and Remove OEM Bumper.
• Once OEM bumper is removed, pull off color matched
plastic trim piece (front fascia) and the grille. If you need
further information on how to remove these parts, refer
to page 3.
• Remove additional parts shown below.
• For piece below Headlight use a T20 star bit and either a
wrench and / or pliers to remove both bolts on backside
of headlight.
• You will need to trim the grille. Refer to page 3 and 4 for
further instruction.
The image on the left shows all
parts that must be removed to
fit Road Armor bumper :
2 Tow hooks, 2 bumper stiffen-
ers, 5 Hard Plastic Pieces and
Floppy piece of rubber.