Timeline – Apple GarageBand At A Glance User Manual
Page 3
GarageBand at a Glance
3
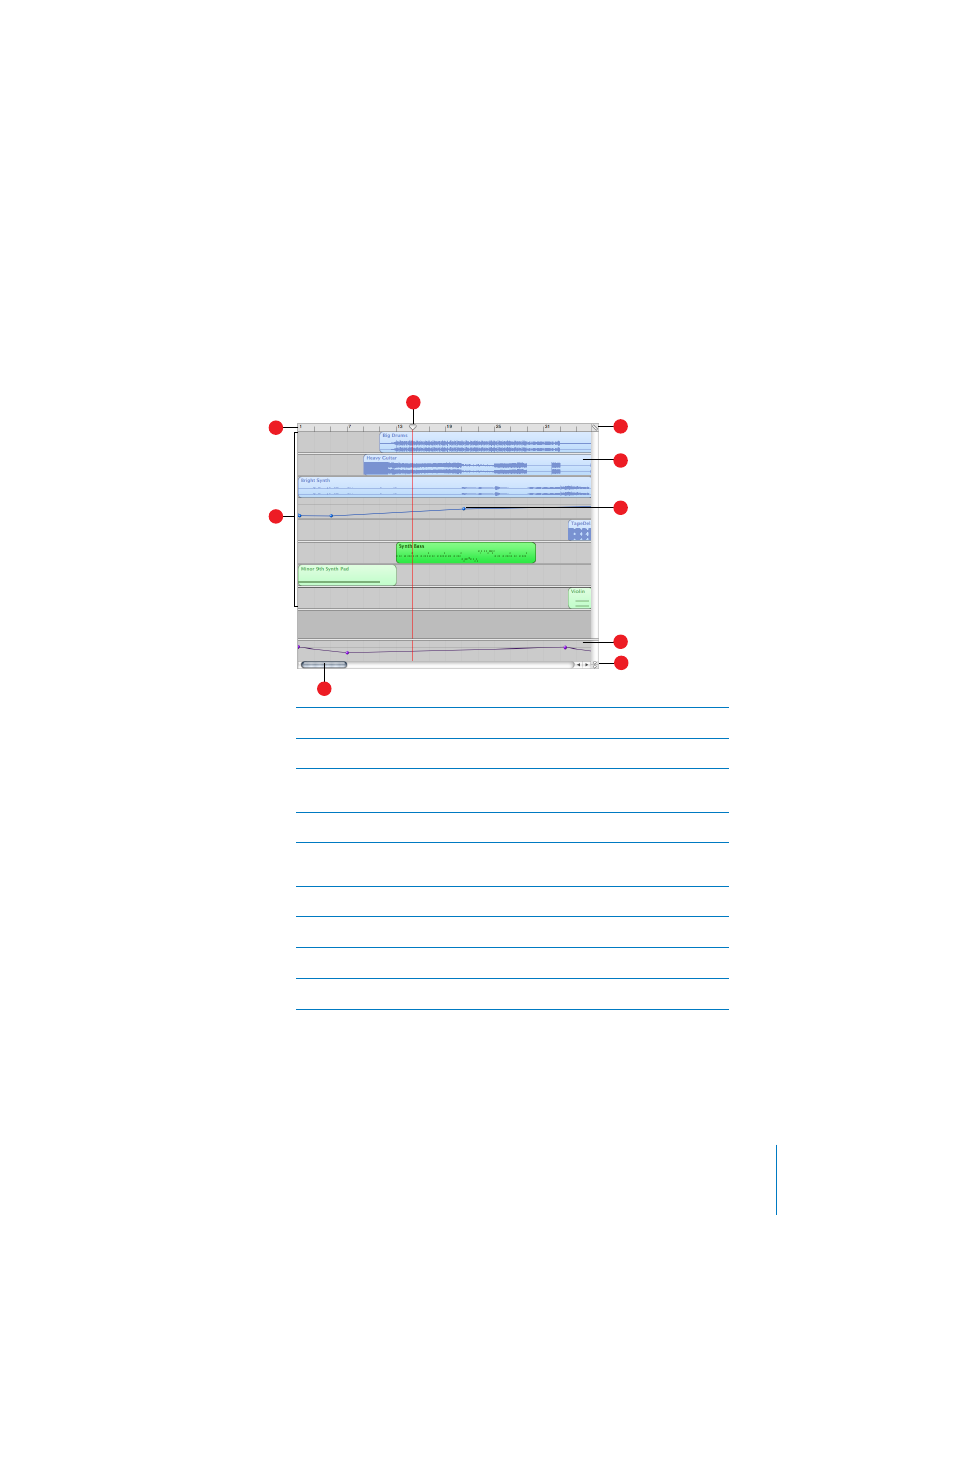
Timeline
The timeline contains the tracks where you record Real and Software Instruments, add loops, and
arrange regions.
A
Beat ruler:
Shows beats and measures, the units of musical time in the timeline. You can click the
beat ruler to move the playhead to a precise beat or measure.
B
Tracks:
You record Real and Software Instruments in tracks, and drag loops to tracks to add them
to a song. You arrange the song by working with loops and regions in tracks in the timeline.
C
Playhead:
Shows the point in the song currently playing, or the point where playback starts
when you click the Play button. Also shows where cut and copied items are pasted in the
timeline. You can move the playhead to change what part of the song is playing.
D
Timeline grid button:
Choose a note value for the timeline grid, or choose Automatic to have the
value change when you zoom in or out.
E
Regions:
When you record a Real Instrument or Software Instrument, or add a loop, you create a
region in the timeline. You can cut, copy, and paste regions, resize and move them, transpose
them, and make other changes to build the arrangement of the song.
F
Volume curves:
Add a volume curve to a track, then add and adjust control points on the volume
curve to add dynamic changes to different parts of a song.
G
Master track:
You can change the sound of the overall song by adding effects or a volume curve
to the master track.
H
Playhead lock button:
Click to unlock the playheads in the timeline and the track editor, so that
the you can see a different part of the song in the track editor than in the timeline.
I
Scroll bars:
Drag the horizontal scroll bar to move to a different part of a song. Drag the vertical
scroll bar to see tracks not currently visible.
A
C
D
E
F
G
B
I
H