Double-click the install shake 3 icon – Apple Shake 3.0 User Manual
Page 12
12
To install Shake Qmaster on a service node or cluster controller computer:
1
Double-click the Install Shake 3 icon.
2
Follow the onscreen instructions until you get to the Easy Install window. In the Easy Install
window, click Customize.
3
Select Shake Qmaster Services Tools, then continue following the onscreen instructions.
Note: When Shake Qmaster Services Tools are installed, the Shake Qmaster icon appears in
the “Other” group of the System Preferences.
On service nodes, you need to install the application that will process batches submitted to
Shake Qmaster. For Shake clusters, install Shake 3 and the render license on the service
nodes, since the only component of Shake that you need in a service node is the rendering
capability. See “Installing and Licensing Shake 3 for Render-Only Workstations” on page 9
for
more information.
Important
All computers in a cluster need Read and Write access to any computers (or
storage devices) that will be specified as output destinations for files.
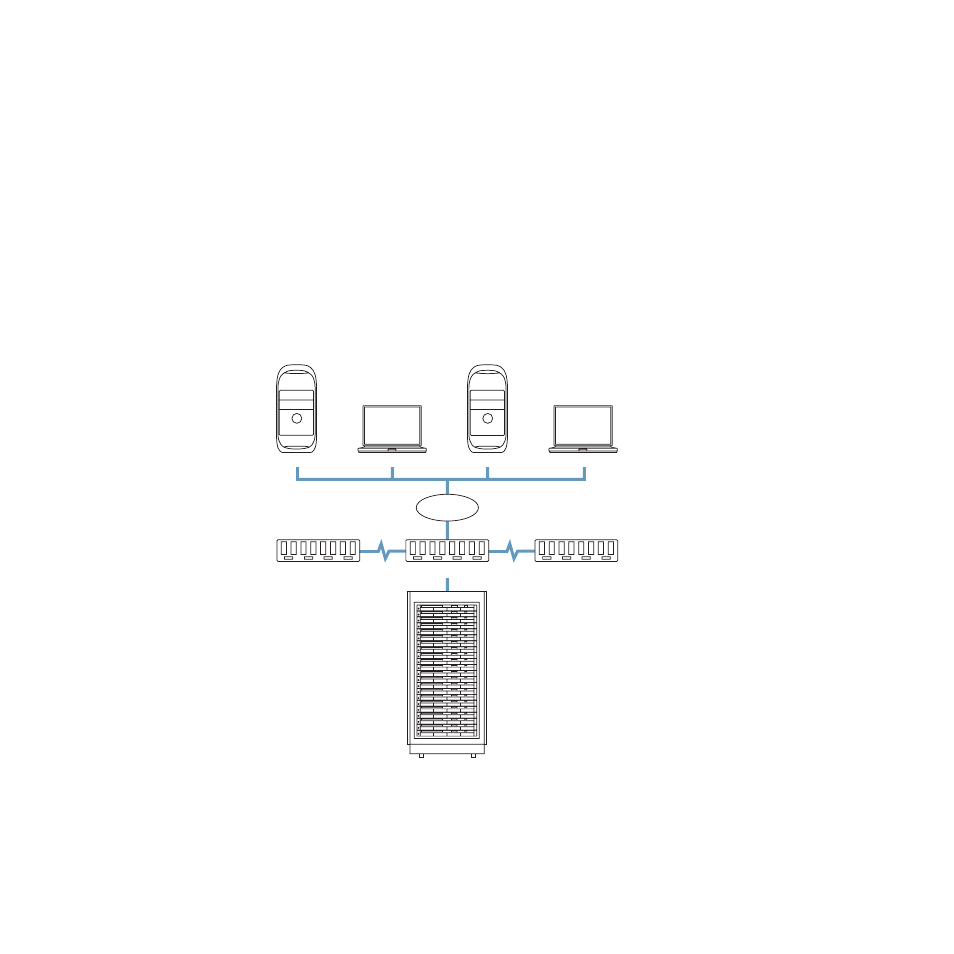
Client
Client
Client
Client
Example of a network setup for distributed rendering
Highspeed switches (chained together)
Rack of servers containing
cluster controller and render-only Shake service nodes,
plus rackmounted shared storage device.
LAN
Client
Client
Client
Client
Example of a network setup for distributed rendering
Highspeed switches (chained together)
Rack of servers containing
cluster controller and render-only Shake service nodes,
plus rackmounted shared storage device.
LAN