Rock-Slide Engineering JK2 SLIDER User Manual
Page 2
6. From the center of the pilot hole, step up the hole size using a 17/32” bit to create a
finish hole that will be used to install the nutserts.
7. Install 6 nutserts per side in the holes that were just drilled into the body of the Jeep.
a. We suggest using a crimping tool to optimize the integrity of the nutserts to
support the slider.
b. If no crimping tool is available, follow these instructions.
i. Install by using a 5/16’’x1.125’’ minimum length bolt with a 3/8’’ nut
ii. Put a small amount of grease on the bolt to reduce friction
iii. Hold the nut steady with an end wrench so the flange of the insert is
flush against the body panel
iv. Tighten the bolt against the nut to crimp the nutsert into place
v. If the nutsert is rotating, place a star-lock washer between the 3/8’’ nut
and nutsert
vi. Once the nutsert is crimped into place completely back out the bolt
vii. If the nutsert ever breaks loose and spins, repeat the process and crimp
it tighter to prevent spinning
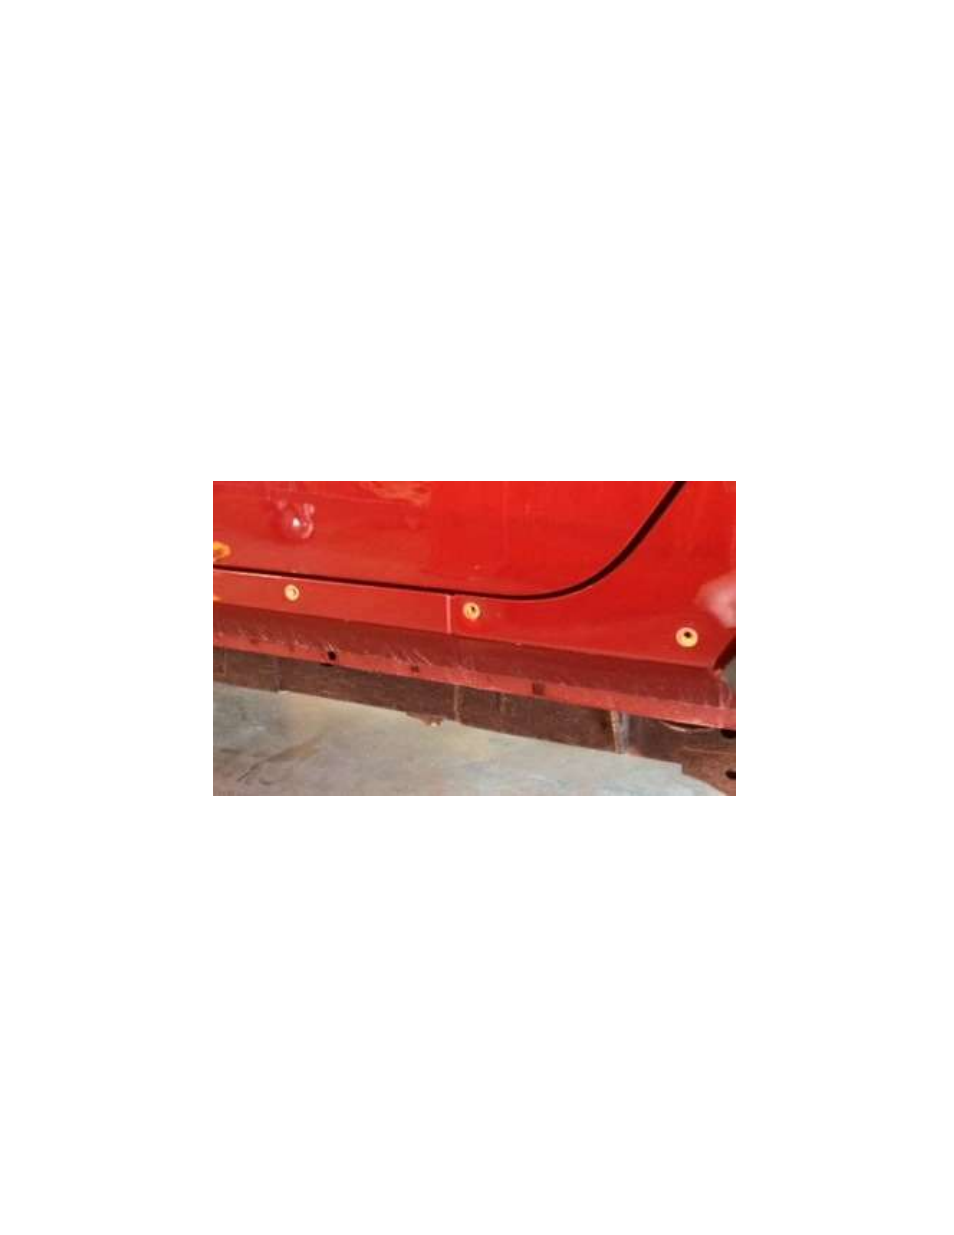
(Nutserts that have been installed correctly)
8. Lift the slider back into position and attach it to the Jeep using the 5/16” button head
bolts and 5/16” washers.
a. You will be using 6 bolts/washers per side
b. Apply a small amount of anti-seize to the threads of each bolt upon installation
9. On the inside of Jeep remove the necessary plastic side panels and pull back the carpet
along the door sides of the Jeep to expose the bottom tub.
10. From the bottom of the Jeep drill a 7/32” pilot hole up into the tub at the indicated holes
on the bottom of the slider to attach the 3.5” anchoring bolts.
a. You will be using 2 bolts, 4 washers, and 2 nuts per side
11. From the center of the pilot hole, step up the hole size using a ½” bit to create a finish hole
that will be used to install the 3.5” anchoring bolts.
12. Install the 3.5” bolts through the bottom of the slider into the tub of the Jeep putting a
7/16” washer on the outside and inside of the Jeep with a 7/16” nut on the Jeep’s inside.