Installing the blow-off valves – GFB Deceptor Pro II Blow-off Valve (part T9505) User Manual
Page 3
venting), full travel of the dial will now move the valve from full recirc to 50% atmosphere-venting only.
Every time the button is pushed, the position of the dial will determine the maximum venting bias of your Deceptor
Pro II. To re-set the controller to allow the full range again, simply turn the dial fully clockwise and hold the button.
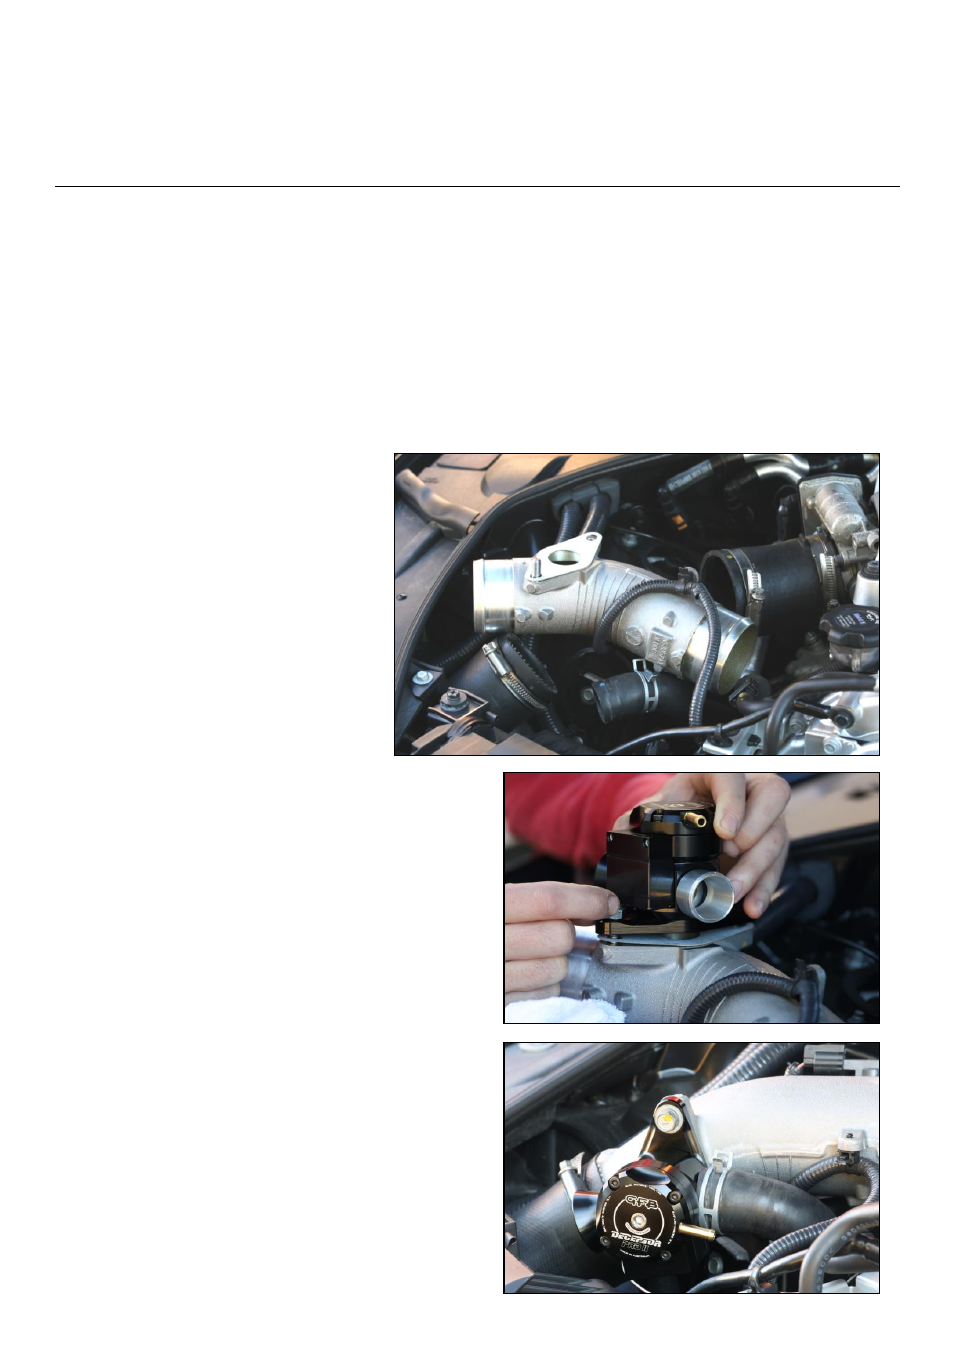
Installing the blow-off valves
Make sure to fit the valves on the correct side of the engine bay. The trumpet and servo motor should
point downwards in both cases when installed. If the trumpet and servo point upwards, swap the valves
to the opposite side.
Follow the procedure below on one side, then repeat for the opposite side.
1)
Open the clamp and remove both the recirc hose and the vacuum hose from the factory valve
2)
Using a 12mm socket or wrench, undo the two bolts and remove the factory valve from the
intercooler pipe – take care not to drop the gasket
3)
To make the next step easier,
loosen the hose clamps on either end of
the metal section of intercooler pipe, then
remove or rotate the pipe to gain access
to the flange – it’s a good idea to stuff a
rag into the open end of the intercooler to
prevent anything falling in whilst you
work
4)
Screw the short end of the
supplied threaded stud into the lower hole
of the valve mounting flange as shown
opposite. Put the supplied gasket on the
threaded stud
5)
Position the Deceptor Pro II onto the flange,
then lift it off the flange just far enough to slip the
supplied nut under the servo motor, then begin screwing
it onto the end of the threaded stud. Just do it up finger
tight at this point.
6)
Now thread one of the factory bolts into the
upper hole (making sure the gasket is correctly
positioned in between), then tighten both fasteners fully
7)
Re-fit the section of intercooler pipe, and tighten
both hose clamps.
8)
Push the recirc and vacuum hoses onto the
Deceptor Pro II, then re-fit both the hose clamps
9)
Connect the servo motor plug to the wiring loom
from the controller, and make sure the cable is securely
routed through the engine bay away from exhaust or
turbo parts
10)
Repeat on the other side