Installing the deceptor pro ii blow-off valve – GFB Deceptor Pro II Blow-off Valve (part T9503) User Manual
Page 3
Installing the Deceptor Pro II blow-off valve
On Impreza models without an electronic throttle, it is necessary to move the intercooler to gain access to the hose
clamp under the factory valve. It does not need to be removed completely; it just needs to slide back far enough to
reach under. These instructions take you through it step-by-step.
For Impreza models with an electronic throttle and also Forester XT models, it is usually possible to access the clamp
without shifting the intercooler. In this case, simply ignore the steps 1, 3, 4 & 5.
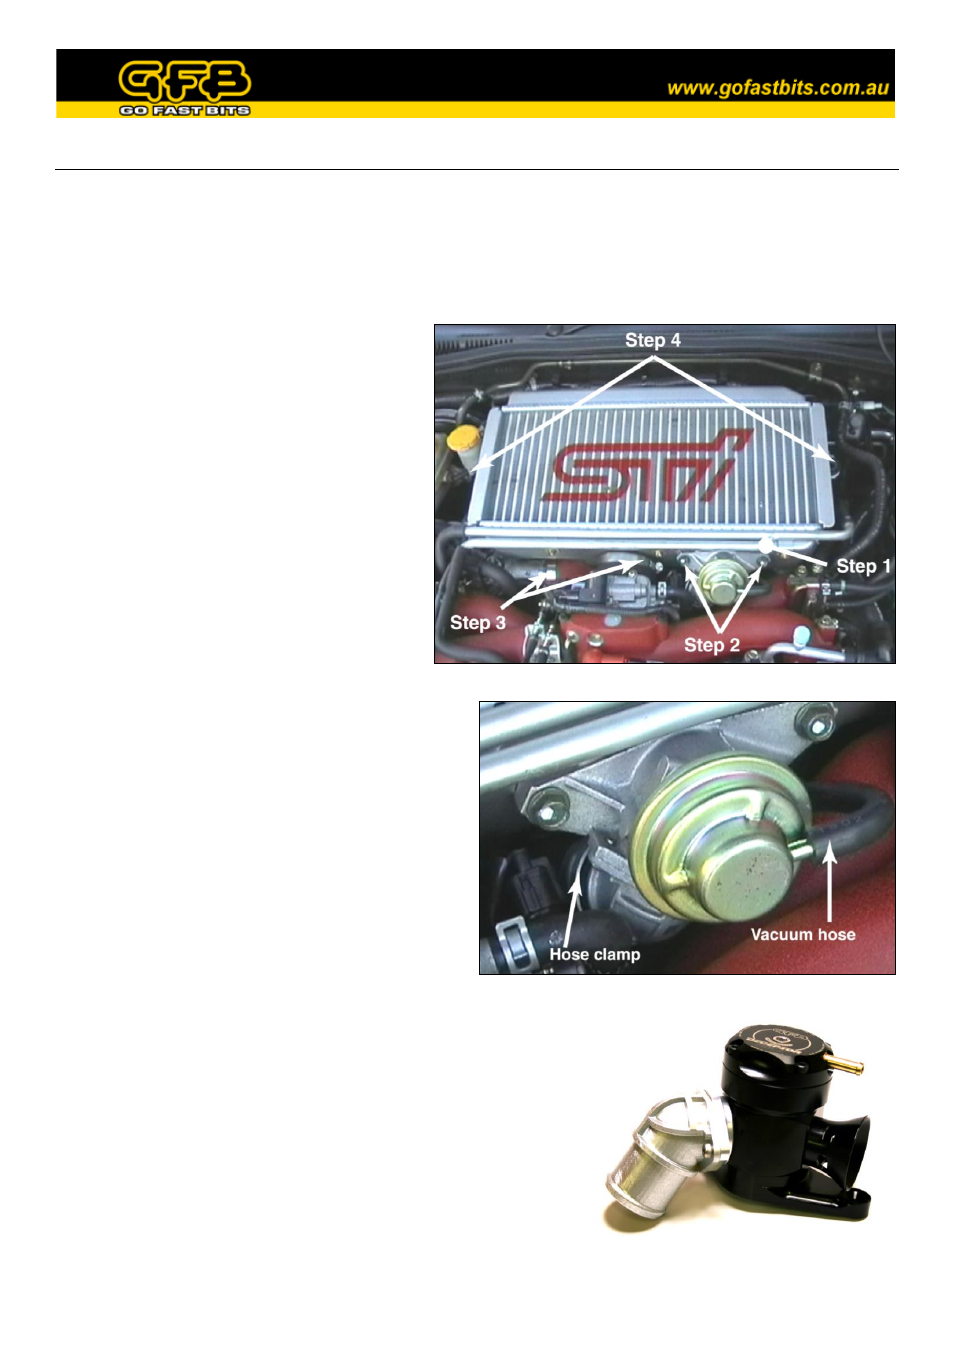
1)
Pull the hoses from aluminium tubes that run
across the front of the intercooler (there are
two on the left and 1 on the right. See figure
1, step 1).
2)
Using a 12mm spanner (wrench), undo the
bolts that hold the factory bypass valve and
remove, leaving it supported by the hose.
Take care not to drop the bolts or gasket
from behind the valve (figure 1, step 2).
3)
On the short hose section between the
intercooler and throttle body, loosen the
hose clamp closest to the intercooler.
Loosen the clamp holding the hose onto the
outlet of the turbo (figure 1, step 3)
Figure 1
4)
Undo and remove the two mounting bolts (again
using the 12mm spanner) that hold the intercooler
in place (figure 1, step 4).
5)
Carefully slide the intercooler back just enough to
access the hose clamp under the valve (figure 2).
Take care when handling the intercooler since the
cooling fins are very fragile, and also take care not
to bend the plastic hose from the turbo too much.
6)
Take note of the position of factory valve and then
use pliers to open the recirculation hose clamp
(figure 2). Remove the valve from the recirculation
hose and vacuum hose.
Figure 2
7)
The Deceptor Pro II comes supplied with a new gasket that must
be used in place of the existing factory gasket. If the factory
gasket is stuck to the intercooler, use a knife blade or similar to
free one end, then carefully peel it off. Make sure there is a clean,
flat surface left for the o-ring to seal on, remove any remnants of
the gasket before proceeding.
8)
Now unscrew and remove the return nozzle from the factory
valve. Fit the return nozzle to the outlet of the Deceptor Pro II as
shown in figure 3, using the screws and the o-ring from the
factory valve.
Figure 3