Installing the blow-off valve, Spring adjustment – GFB Deceptor Pro II (part T9501) User Manual
Page 2
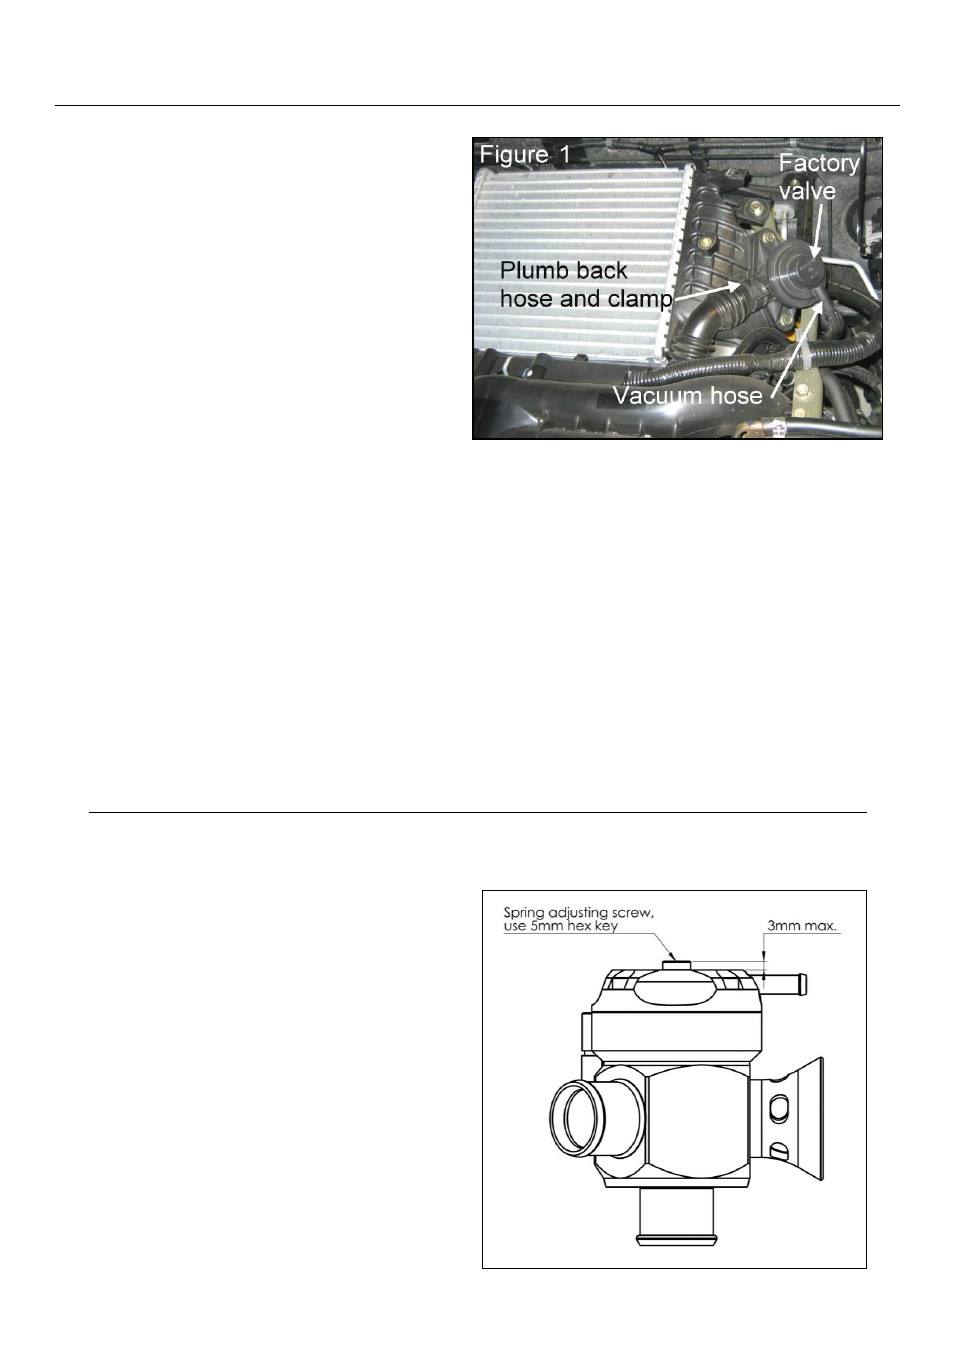
Installing the blow-off valve
Covered vehicles:
WRX MY08-on
GT Liberty/Legacy MY03-10
XT Forester MY09-on
1)
Remove the screws that hold the plastic
engine cover (GT Liberty/Legacy only).
Lift the engine cover off and set aside.
2)
Using a 10mm socket, remove the two
bolts holding the factory bypass valve to
the intercooler, then open the hose clamp
to remove the plumb back hose (fig. 1).
3)
Pull the vacuum hose off and remove the factory valve.
4)
Unscrew the trumpet from the GFB Deceptor Pro II, then position it on the intercooler
flange with the supplied gasket in between.
5)
Replace the two bolts and tighten firmly, then push the vacuum hose onto the nipple on
top of the GFB valve and re-fit the trumpet.
6)
Spread the hose clamp and push the plumb back hose onto the Respons’s outlet, then
ensure the hose clamp is secured.
7)
Connect the servo motor plug to the wiring loom from the controller, and make sure the
cable is securely routed through the engine bay away from exhaust or turbo parts.
Spring Adjustment
Contrary to popular belief, the spring pre-load DOES NOT need to be adjusted to suit different
boost levels. The valve will stay shut under full throttle conditions regardless of boost pressure or
spring pre-load.
Rather, the spring pre-load affects how easily
the valve opens when you lift the throttle, and
how long it stays open when it vents. Adjusting
the spring is a simple matter of ensuring the
valve opens enough to release the air, but not
long enough to cause idling problems. The guide
below will walk you through the steps involved.
The screw in the centre of the head is the spring
adjuster (shown opposite). Use the supplied
5mm hex key for this screw.
The softest spring setting is achieved when the
top of the adjustment screw is 3mm above the
head of the valve. Do not set the screw more
than 3mm above the head.