Maintenance – GFB DV+ TMS Diverter Valve (part T9301) User Manual
Page 4
Maintenance
Disassembly:
•
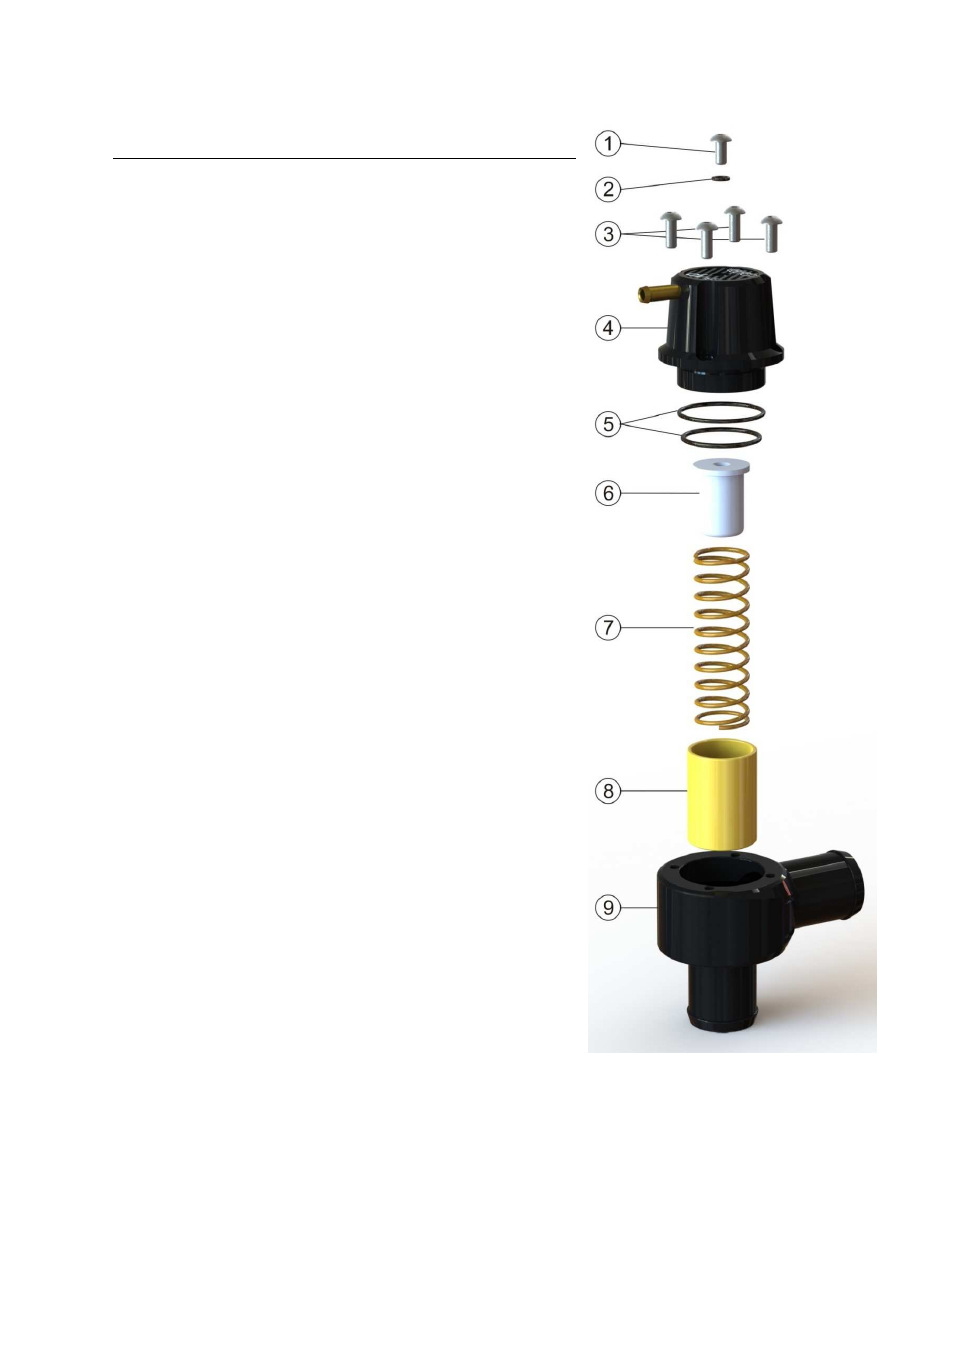
Using a 2.5mm hex key, remove the 4 cap screws (3) whilst
holding the cap (4) to prevent it from popping off – the
spring force is relatively small, but if it pops off
unexpectedly, the internal parts can be easily lost. Note
that the friction from the o-ring (5) may hold the cap on
even after the screws are removed. If this is the case,
simply twist the cap and pull at the same to remove it.
•
Remove the spring cap (6), spring (7) and piston (8) from
the body (9). The o-rings (5) will remain attached to the
cap.
Reassembly:
•
Fit the spring cap (6), spring (7) and piston (8) into the cap
(4), then slide the cap into the body (9).
•
Twist the cap so the vacuum nipple points in the desired
direction, then re-install the cap screws (3).
Lubrication:
There is no set specific re-lube interval, as the dv+ does not rely
on lubrication in order to function correctly. Whereas other
brands use the internal o-rings to actually guide and support
the piston, the dv+ instead uses precision tolerances between
the piston and bore for support and the majority of sealing
duties, and the internal o-ring simply acts as a final “wiping”
seal.
This arrangement means the o-ring lasts much longer (almost
indefinitely) instead of requiring frequent “re-building”, does
not rely on a set lubrication schedule to work properly, and
friction is kept to a minimum for optimum performance.
Oil vapour passing through with the vented air in most cases is
sufficient to keep the valve lubricated, but the amount of oil vapour varies from car to car and
sometimes it is necessary to clean and lube the internals. Typically, if the venting sound changes
over time, this is typically an indication that there may be a build-up of carbon that needs to be
cleaned out.
When disassembled, wipe everything clean with a rag, then apply light grease or engine oil to the
piston, inside the bore, and on the o-rings (5), then reassemble.