GFB Short Shift Kit for MY08-on WRX (part 4005) User Manual
Page 2
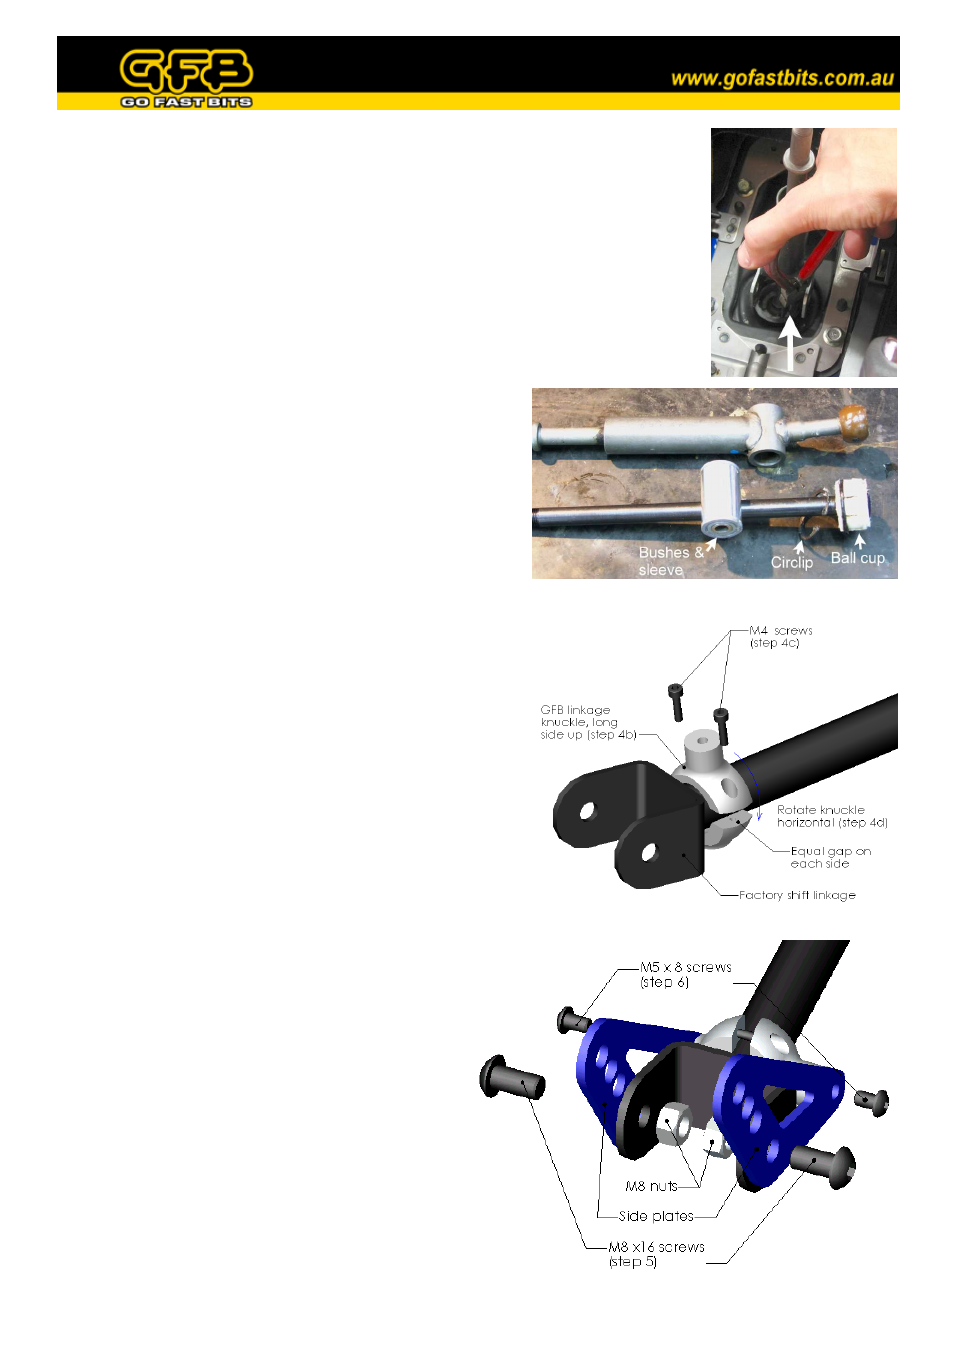
2.
Undo and remove the bolt that holds the linkage to the shift stick. Use the
circlip (or needle-nose) pliers to remove the circlip retaining the gearstick ball
cup. Pull up on the gearstick as you close the circlip, it should lift out once
the circlip clears its groove.
3.
Transfer the ball cup and circlip to the GFB gearstick
(the ball cup spreads apart easily to allow this), making
sure there is sufficient grease in the cup. Remove the
steel sleeve and bushes from the factory gearstick (you
may need to press the bushes out using the long bolt
from step 2 – take care not to damage the holes in the
bushes as you do this) and fit them to the GFB
gearstick (fig. 10). Slip the steel sleeve back into the
bushings in the GFB gearstick, again ensuring there is
a smear of grease on the sleeve.
4.
Before re-installing the gearstick, fit the linkage clamp as follows:
a) Separate the linkage clamp into two parts.
b) Fit the two parts around the shift linkage with the
long side facing up as shown.
c) Place the two M4 screws into the holes and screw
them in lightly, making sure there is an equal gap
between both sides of the two parts.
d) Loosen the left screw just enough to allow the
knuckle to be rotated horizontal, but DO NOT
tighten it back up just yet.
5.
Fix the two side plates to the shift linkage by
first inserting an M8 screw through the plate
and then through the hole in the linkage fork.
Thread an M8 nut partially on, but DO NOT
tighten yet. Repeat on both sides (figure 5).
6.
On both side plates, insert an M5 screw
through the matching 5mm hole and thread it
into the linkage knuckle. Now tighten all
screws and nuts. As long as the lower M4
screw on the linkage knuckle was set to the
right distance as per step 4d, you should only
have to tighten the top screw to clamp it tight.