Rubicon Express RE7364 User Manual
Page 5
RI73547364 Page 5 of 11
Front bump stops and coil springs
A. Remove stock coils.
b. Place the front bump stop on the center of the lower spring mount on the axle tube. Insert a center punch thru the center and
mark the hole to be drilled. Drill the marked hole to 5/16”, use the supplied self-tapping bolt to secure the bump stop to the lower
spring cup.
C. Raise the small diameter end of the coil into the upper spring bucket and over the lower spring cup and bump stop. Then raise
the axle to seat the upper mount and rotate the coil to properly index in the lower mounts.
NOTE:
If the axle cannot be dropped far enough from the frame due to brake line or ABS wire length to install the coil springs
remove the bump stop and insert it into the coil. Then slide the coil over the stock axle mount and re-install the bump
stop bolts. (photo 7)
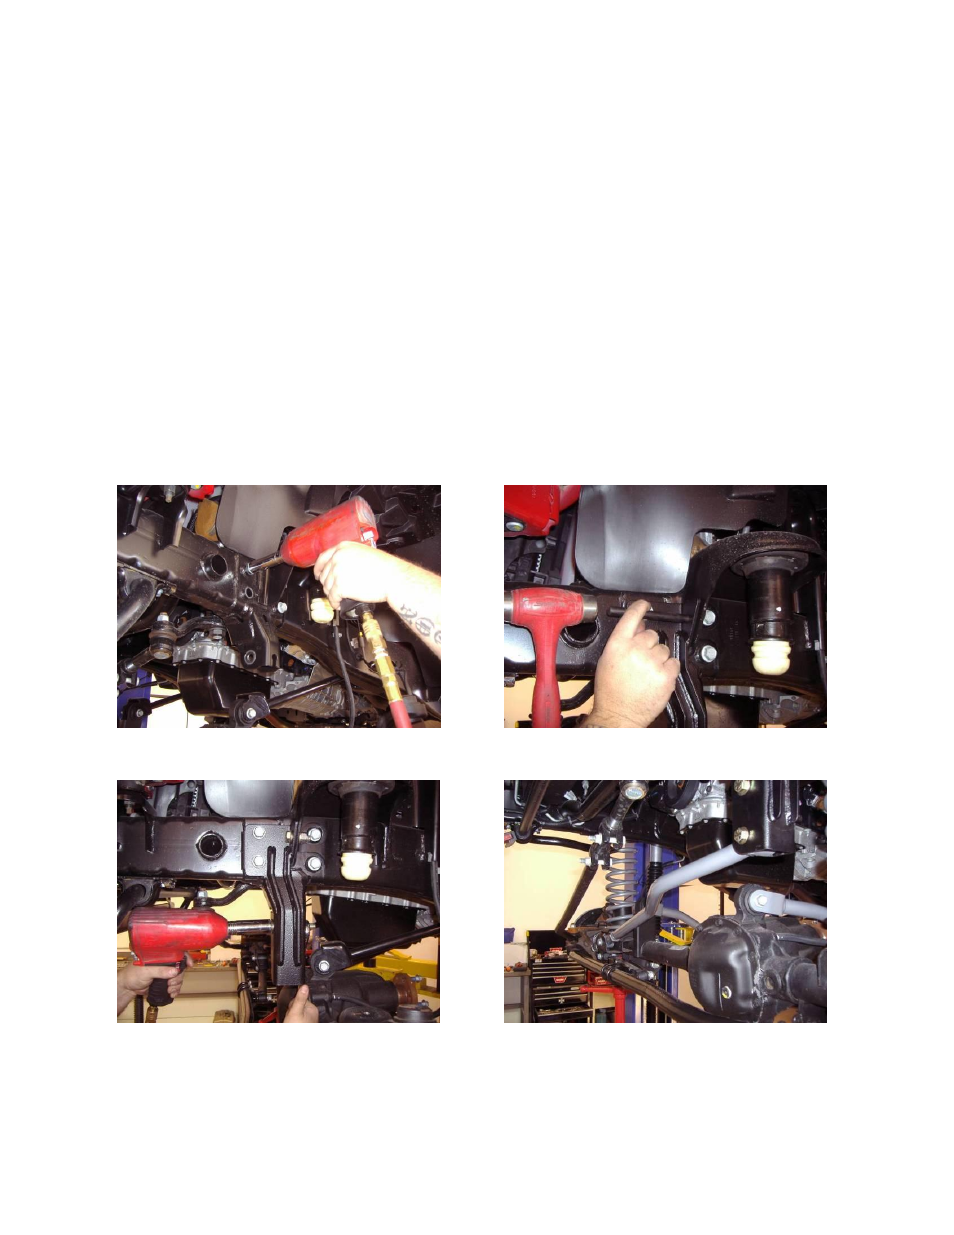
Front track bar bracket
A. Remove the forward two factory steering box bolts, place the new drop bracket over the factory track bar bracket and reinstall
the two factory steering box bolts. (photo 8)
B. With the steering box bolts tight, mark the ½” hole on the coil spring tower. Remove the steering box bolts and bracket and drill
the marked hole to ½”. (Photo 9)
C. Reinstall the track bar bracket with the steering box bolts. Use the supplied ½” hardware to bolt thru the coil spring tower and
track bar bracket and the 9/16” bolt with sleeve thru the stock track bar location. Torque the steering box bolts then the 9/16”
bolt, both to 80 ft/lbs. Torque the ½” bolt to 65ft/lbs. (photo 10)
Photo # 8
Photo # 9
Photo # 10
Photo # 11
Front Track bar
A. Set the track bar at an initial setting of 32 5/8” center to center.