JVC DLA-HD2KU User Manual
Page 30
1-30 (No.PA019)
4.4.7 FRAME adjustment
PREPARATION
(1) Connect the PC and Projector with an RS-232C cable. Turn the Projector ON and boot the PSA software.
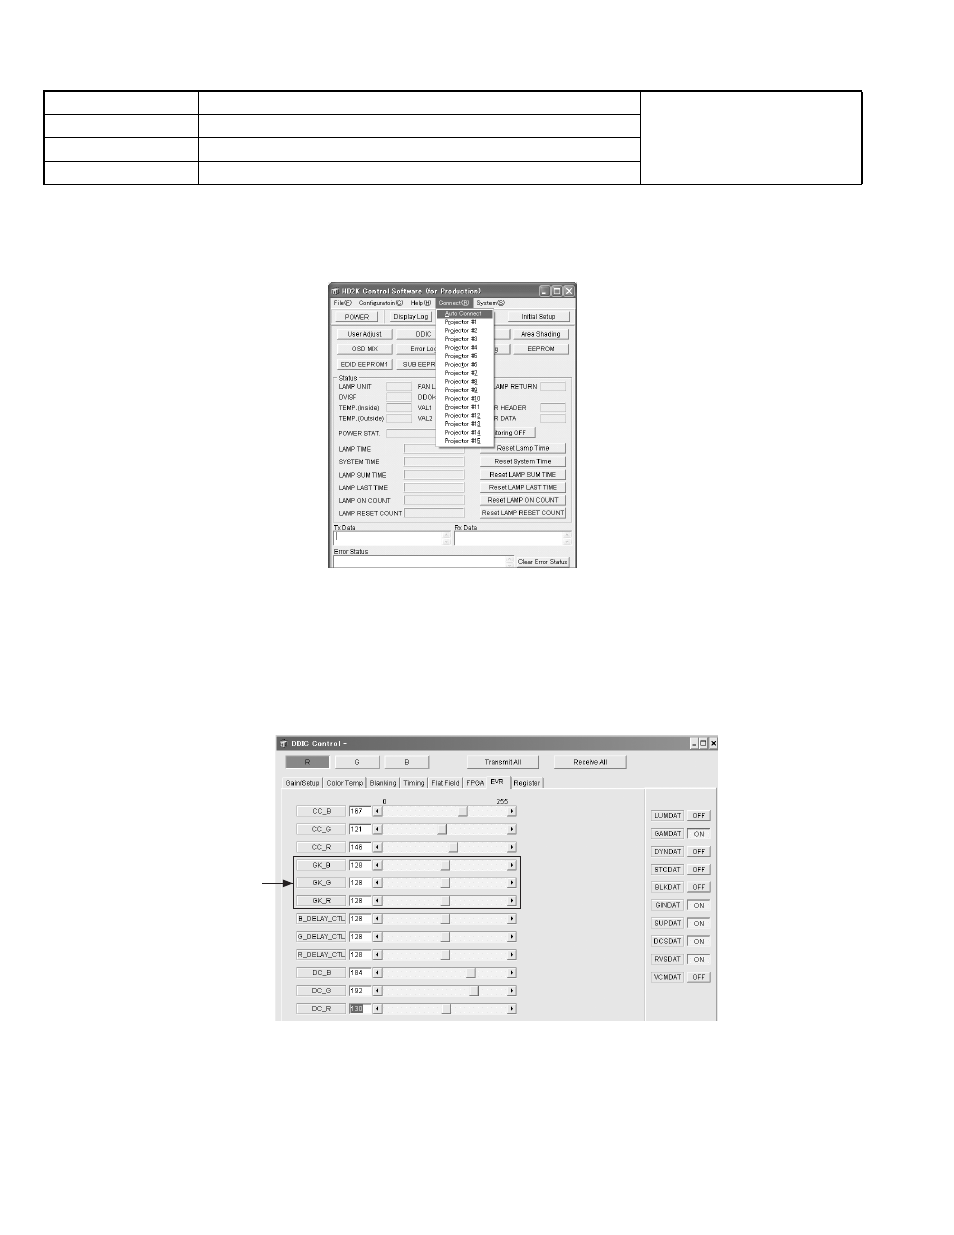
(2) Click [Connect] on the Menu Bar and select [Auto Connect] in the pull-down menu.
Refer to Fig.1. (If [Connection failed] is shown, the connection is FAILED. If no message appears, the connection is
successfully done.
Fig.1
(3) When the system is connected, press the [DDIC] button. This causes the [DDIC Control] screen to be displayed. Subsequent
works are to be performed on this screen.
(4) Press the [Receive All] button at the top right of the screen.
(5) Set [R_MUTE], [G_MUTE} and [B_MUTE] to ON with the [FPGA] tab.
(6) Set Flat Field Level of R, G, and B to all [0]. (All black)
ADJUSTMENT
(1) Move the slider of [GK_R], [GK_G] and [GK_B] with the [EVR] tab to allow the picture frame to be darkened most. Refer to
Fig.2.
Fig.2
Instruments
Signal generator
REPLACING COMPONENTS
z
OPTICAL BLOCK
Test point
Adjustment menu
< DDIC >
Preparation
Completed GAMMA adjustment , SHADING adjustment ,
Adjust here