JVC DLA-HD2KU User Manual
Page 22
1-22 (No.PA019)
4.4.2 DC adjustment
PREPARATION
(1) Connect the PC and Projector, PC and CL200 with RS-232C cables and then turn the Projector ON.
(2) Boot the SPA software.
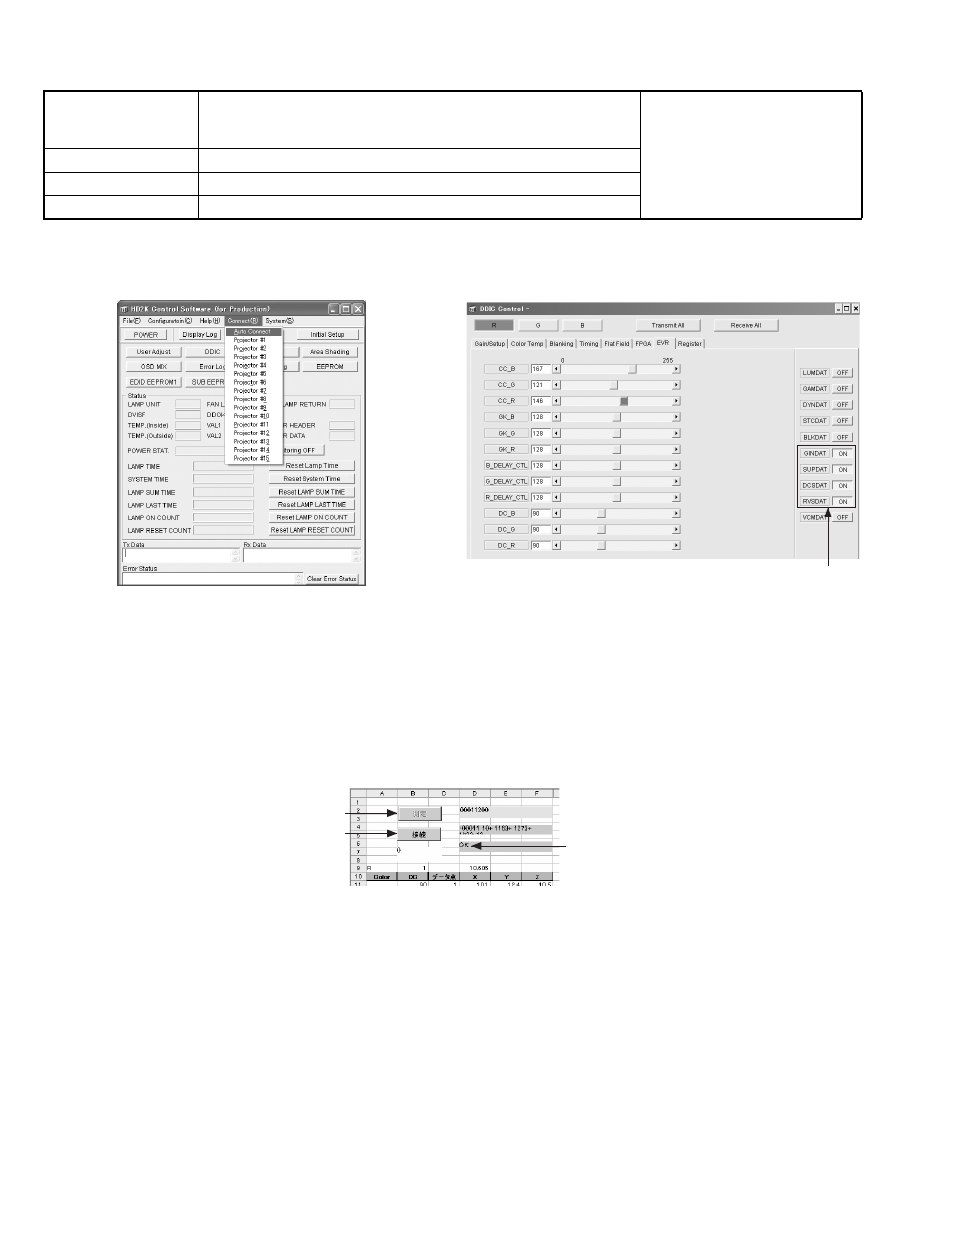
(3) Click [Connect] on the Menu Bar and select [Auto Connect] in the pull-down menu. Refer to Fig.1.
Fig.1
Fig.2
(4) When the connection is completed, press the [DDIC] button. The [DDIC Control] screen will appear.
(5) Press the [Receive All] button at the top right of the screen.
(6) Press the [R] button at the top left of the screen. Of the buttons located at the furthest right of the screen, set [GINDAT],
[SUPDA][DCSDAT] and [RVSDAT] to ON, and the rest to [OFF].
Refer to Fig.2
(7) Click [DisConnect] in the PSA menu to disconnect the connection.
(8) Put the CL200 at 40cm away from the projector lens surface (Screen center) and turn the CL200 to ON.
MEASUREMENT
(9) Open the Gamma adjustment file and click [CONNECT] in the [DC] sheet.
(10) Click [MEASURE] when [OK] is shown. Refer to Fig.3.
Fig.3
(11) When the measurement is completed, click [CONNECT] in step 10) to disconnect the system. Boot the PSA software to
connect the PC and the Projector.
(12) On completion of the measurement, enter the values in red in the [D43], [T43] and [AJ43] cells to [DC_R], [DC_G] and [DC_B],
respectively.
(13) Click [DisConnect] in the PSA screen to disconnect the system. The Gamma adjustment is to be performed next.
Instruments
PSA Software for HD2K
Excel file for GAMMA adjustment
Color-meter (CL-200)
REPLACING COMPONENTS
z
DD SUB1.2 PWB ASS'Y
z
OPTICAL BLOCK
Test point
Adjustment menu
< DDIC > < Gamma >
Preparation
Running the unit enough before adjustment.
Set these parameters to ON
Confirm [OK]
(10)Click here
(9)Click here