Delivery valves – Hale SMR-U User Manual
Page 27
Section 14
Delivery Valves
Ball Valve Type
The ball valve should not be dismantled unless it is functioning unsatisfactorily.
There are two possible faults and the method of correcting them is as follows:
1. Water leaking round the ball
This is due to the O Ring not pressing tightly enough against the ball. Remove the
bolts and spring washers and separate the coupling end tube from the ball valve
housing. Turn the O Ring over so that it presents a new face to the Ball Valve, or fit a
new O Ring. Rub a little Molybdenum Disulphide Powder into the surface of the ball
where it contacts the O Ring. Leave the original washers or the same thickness of
new washers, between the faces of the coupling end tube and the valve housing.
In the case of old valves which have seen extremely arduous service, it may be
necessary to fit a new ball, pivot or valve stem. To do this, remove the screw
securing the valve stem cap to the ball valve housing and lift off the handle
assembly.
Remove the nut on the underside of the valve housing and push the ball pivot pin
towards the centre of the ball. Remove the spring and take out the two half-rings
securing the valve stem. Push out the valve stem and withdraw the ball. Fit the new
part required and reassemble, reversing the above procedure. Use a right angled
screwdriver to hold the pivot pin when tightening the pivot pin nut. Ensure that the
handle is fitted in the correct position. Fit the stem O Ring and ensure that the two
half rings are correctly positioned.
2. Water leaking up the valve stem
If this occurs, remove the handle and stem as in "1" above and fit a new valve stem
O Ring, rubbing a little molybdenum Disulphide Powder into the bore of the valve
stem cap.
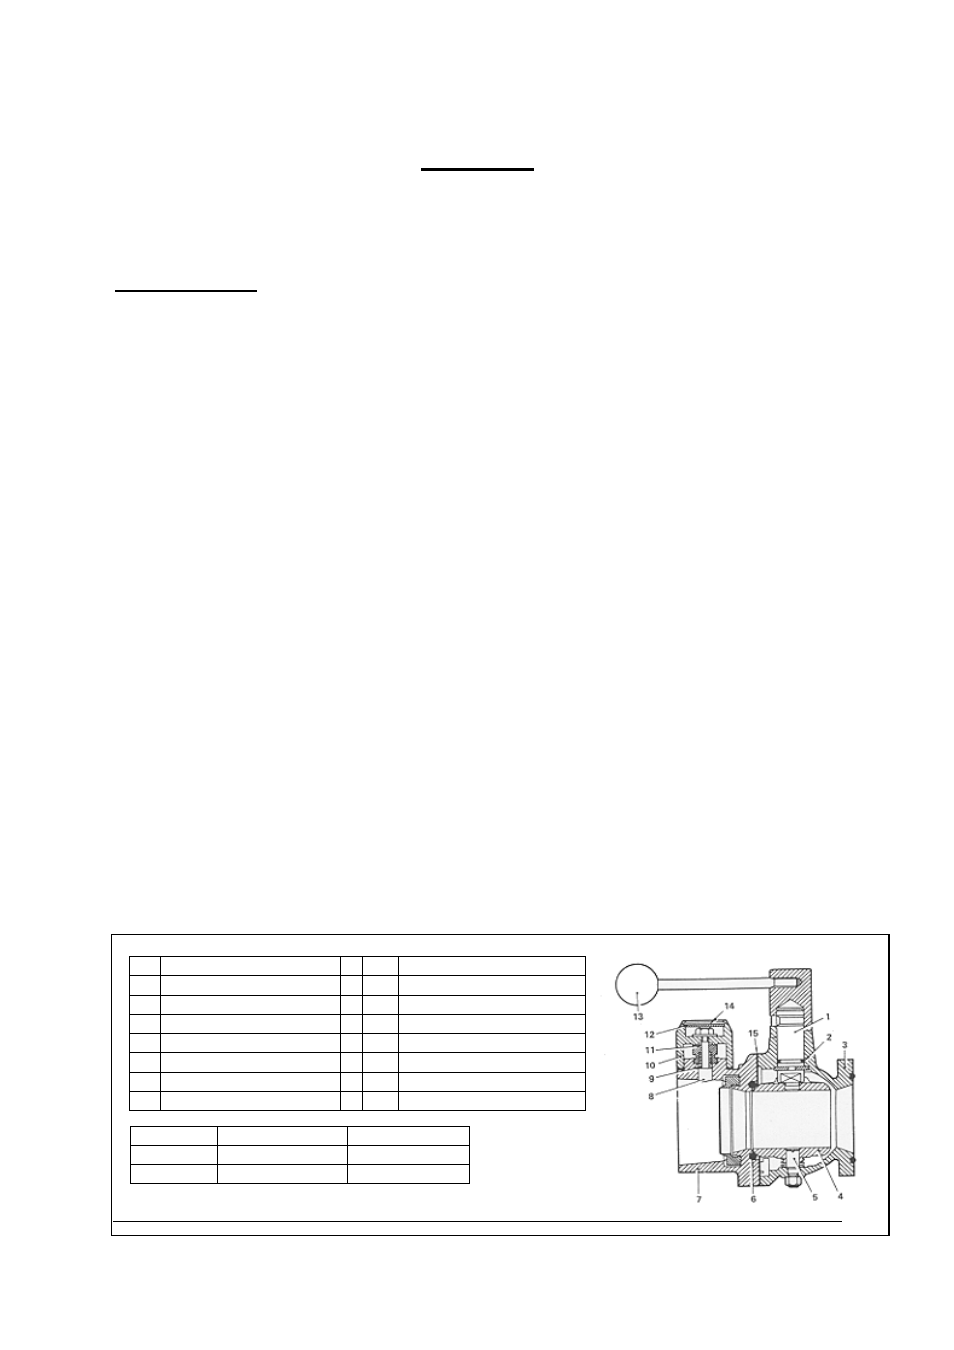
1 Valve
Stem
9 Spring
2 Valve Stem Seal
10 Coupling Release Cap
3 Valve Housing
11 Release Cam
4 Ball Valve
12 Closure Disc
5 Ball pivot and Spring
13 Operating Handle
6 O
Ring
14 Circlip
7 Coupling End Tube
15 Joint Washers
8 Coupling Release Bolt
©Godiva, Warwick
September 2000
wsmaint-Issue2 25-9-02
27
Part Nos Light Alloy I/C Gunmetal I/C
LH TH137 TH153/100
RH TH138
TH154/100