E n how to use the on screen display (osd), Horizont, Smart help – Philips 151AX User Manual
Page 12
12
E
N
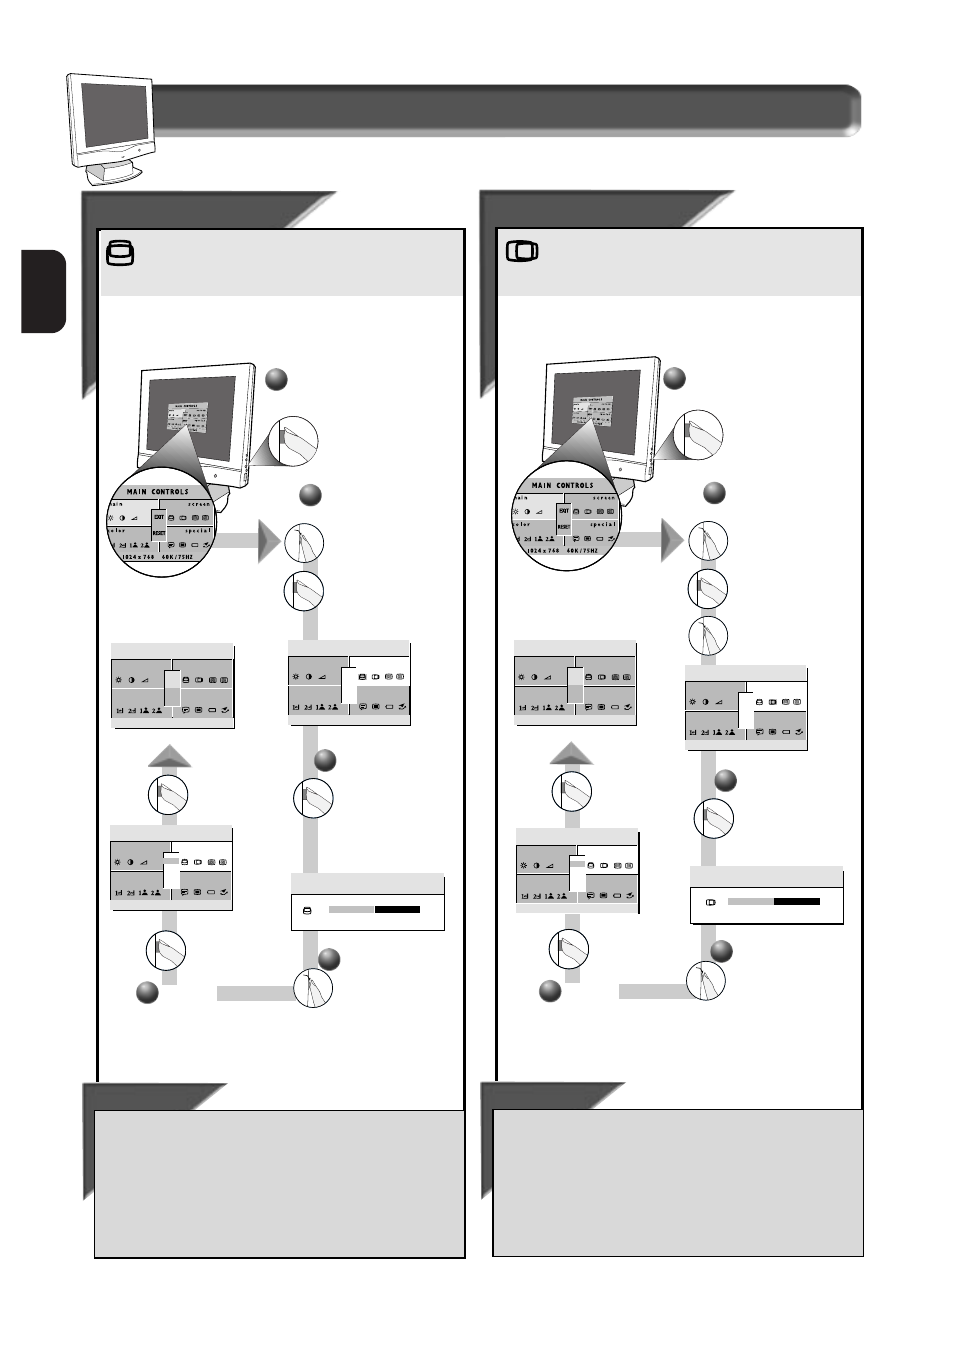
How to Use the On Screen Display (OSD)
Smart Help
After returning to Exit . . .
. . . to continue to Phase Adjustment,
turn the R
OTARY
knob
until S
CREEN
P
OSITION
& Q
UALITY
is highlighted. Next, press the
OSD button. Follow steps 2-5 under P
HASE
A
DJUSTMENT
.
. . . to exit completely,
press the OSD button and choose either
S
AVE
or N
O
S
AVE
in setting mode, then push OSD button to exit
OSD. (See page 18 for other exit options.)
2
2
Press the OSD button.
3
Press the OSD
button to bring up
the H
ORIZONTAL
P
OSITION
screen.
Turn the R
OTARY
knob until the
S
CREEN
P
OSITION
&
Q
UALITY
window is
highlighted. Next,
press the OSD
button. Then, turn
the R
OTARY
knob
until H
ORIZONTAL
P
OSITION
is
highlighted.
1
Horizont
Horizont
al
al
Posit
Posit
ion
ion
V
V
er
er
tic
tic
al
al
Posit
Posit
ion
ion
Vertical Position adjusts the image on your screen either
up or down. Use this feature if your image does not
appear centered.
Smart Help
After returning to Exit . . .
. . . to continue to the Horizontal Position,
turn the R
OTARY
knob until S
CREEN
P
OSITION
& Q
UALITY
is highlighted. Next, press
the OSD button. Follow steps 2-5 under H
ORIZONTAL
P
OSITION
.
. . . to exit completely,
press the OSD button and choose either
S
AVE
or N
O
S
AVE
in setting mode, then push OSD button to exit
OSD. (See page 18 for other exit options.)
Press the OSD button.
I ZONT
HOR
A L PO S I T I O N
5 0%
4
Turn the R
OTARY
knob
until the image is
horizontally balanced.
1
2
2
Turn the R
OTARY
knob until the
S
CREEN
P
OSITION
&
Q
UALITY
window is
highlighted. Next,
press the OSD
button to highlight
Vertical position
Icon.
S c r e e n P o s i t i o n & Q u a l i t y w i n d o w
Horizontal Position shifts the image on your screen either
to the left or right. Use this feature if your image does not
appear centered.
m a i n
r e e n
s c
o l o r
c
c i a l
s p e
7 6 8
10 2 4 x
/ 7 5HZ
6 0 K
RESET
EXIT
I ZONT
HOR
A L PO S I T I O N
3
Press the OSD
button to bring up
the V
ERTICAL
P
OSITION
screen.
T I C A L
V E R
POS I T I ON
5 0%
4
Turn the R
OTARY
knob
until the image is
vertically balanced.
m a i n
r e e n
s c
o l o r
c
c i a l
s p e
7 6 8
10 2 4 x
/ 7 5HZ
6 0 K
RESET
EXIT
T I C A L
V E R
POS I T I ON
Press the
OSD
button to
return to E
XIT
window.
5
Press the
OSD
button to
return to E
XIT
window.
5
m a i n
r e e n
s c
o l o r
c
c i a l
s p e
7 6 8
10 2 4 x
/ 7 5HZ
6 0 K
RESET
E X I T
EXIT
m a i n
r e e n
s c
o l o r
c
c i a l
s p e
7 6 8
10 2 4 x
/ 7 5HZ
6 0 K
RESET
E X I T
EXIT
m a i n
r e e n
s c
o l o r
c
c i a l
s p e
7 6 8
10 2 4 x
/ 7 5HZ
6 0 K
RESET
E X I T O S D
EXIT
m a i n
r e e n
s c
o l o r
c
c i a l
s p e
7 6 8
10 2 4 x
/ 7 5HZ
6 0 K
RESET
E X I T O S D
EXIT