Operation, Watch the connected video source, Change picture format – Philips Signage Solutions V-Line Display BDL4280VL 42" Edge LED Backlight Full HD 700cd-m² User Manual
Page 26: Choose your preferred picture settings, Choose your preferred sound settings, Play multimedia files via local area network, Set up the network, How to use dlna-dmp, Set up the network 4.5.2. how to use dlna-dmp
BDL4280VL
17
4. Operation
NOTE: The control button described in this section is mainly on the
remote control unless specified otherwise.
4.1. Watch the Connected Video Source
See page 11 for external equipments connection.
1. Press
[
] SOURCE button.
2. Press [ ]
or [ ] button to choose a device, then press [
]
button.
4.2. Change Picture Format
You can change the picture format to suit the video source. Each video
source has its available picture formats.
The available picture formats depend on the video source:
1. Press [
] FORMAT button.
2. Press [ ]
or [ ] button to choose a picture format, then press
[
] button.
• {Auto zoom}: Enlarge the picture to fill the screen.
Recommended for minimal screen distortion but not for HD or
PC.
• {Movie expand 16:9}: Scale 4:3 format to 16:9. Not
recommended for HD or PC.
• {Wide screen}: Shows wide screen format content unstretched.
Not recommended for HD or PC.
• {Unscaled}: Provide maximum detail for PC. Only available
when PC mode is selected in the {Picture} menu.
• {4:3}: Display the classic 4:3 format.
4.3. Choose your Preferred Picture Settings
1. While this display is playing video source, press [ ] ADJUST
button.
2. Press [ ]
or [ ] button to choose
Picture style
, then press
[
] button.
3. Press [ ] or
[ ] button to choose an option, then press [
]
button:
• {Personal}: Apply your personalized picture settings.
• {Vivid}: Rich and dynamic settings, ideal for daytime viewing.
• {Natural}: Natural picture settings.
• {Standard}: Default settings that suit most environments and
types of video.
• {Movie}: Ideal settings for movies.
• {Photo}: Ideal settings for photos.
• {Energy saving}: Settings that conserve the most energy.
4.4. Choose your Preferred Sound Settings
1. While this display is playing video source, press [ ] ADJUST
button.
2. Press [ ]
or [ ] button to choose
Sound style
, then press
[
] button.
3. Press [ ] or
[ ] button to choose an option, then press [
]
button:
• {Personal}: Apply your personalized sound settings.
• {Original}: Settings that suit most environments and types of
audio.
• {Movie}: Ideal settings for movies.
• {Music}: Ideal settings for listening to music.
• {Game}: Ideal settings for games.
• {News}: Ideal settings for spoken audio, such as the news.
4.5. Play multimedia files via Local Area
Network
To play files via Local Area Network, you will need:
• A wired home network, connected with a Universal Plug and Play
(uPnP) router.
• Optional: A LAN cable that connects your display to your home
network.
• A media server running on your computer.
• Appropriate settings on your computer firewall to allow you to run
the media server.
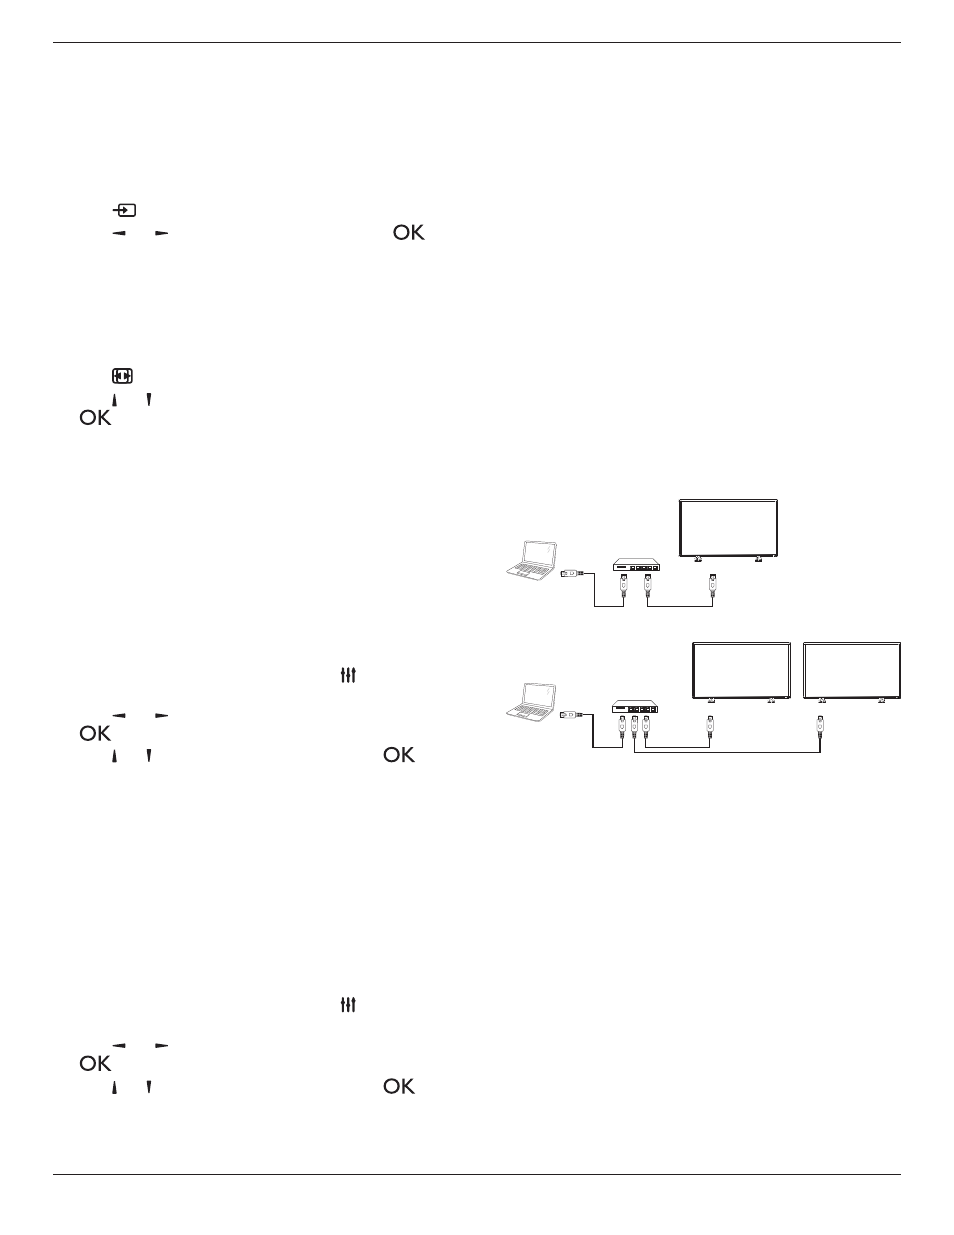
4.5.1. Set up the network
1. Connect your display and the computer to the same home network.
See illustration below to connect your display to a network.
2. Switch on your computer and the router.
• Single display setup:
PC
[RJ-45]
[RJ-45]
ROUTER
• Multiple display setup:
PC
[RJ-45]
[RJ-45]
DISPLAY 1
[RJ-45]
DISPLAY 2
ROUTER
NOTE: If the apparatus does not return to DLNA mode due to
external electrical disturbances (e.g. electrostatic discharge), user
intervention is required.
Set up media sharing
1. Install a media server on your computer to share media files. These
are some media servers:
• For PC: Windows Media Player 11 (or higher) or TVersity
• For Mac: Twonky
2. Switch on media sharing on your computer using the media server.
For more information on how to set up the media server, refer to
the website of the media server.
4.5.2. How to use DLNA-DMP
1. Please connect display and your PC to the same router via RJ-45.
2. Run windows media player. Set stream handling as public sharing.