Ssembly – Broilmaster PCB1-2 User Manual
Page 10
B101586-4-0112
Page 10
9.
For Grill Heads other than R3 Series, continue on to Step 10.
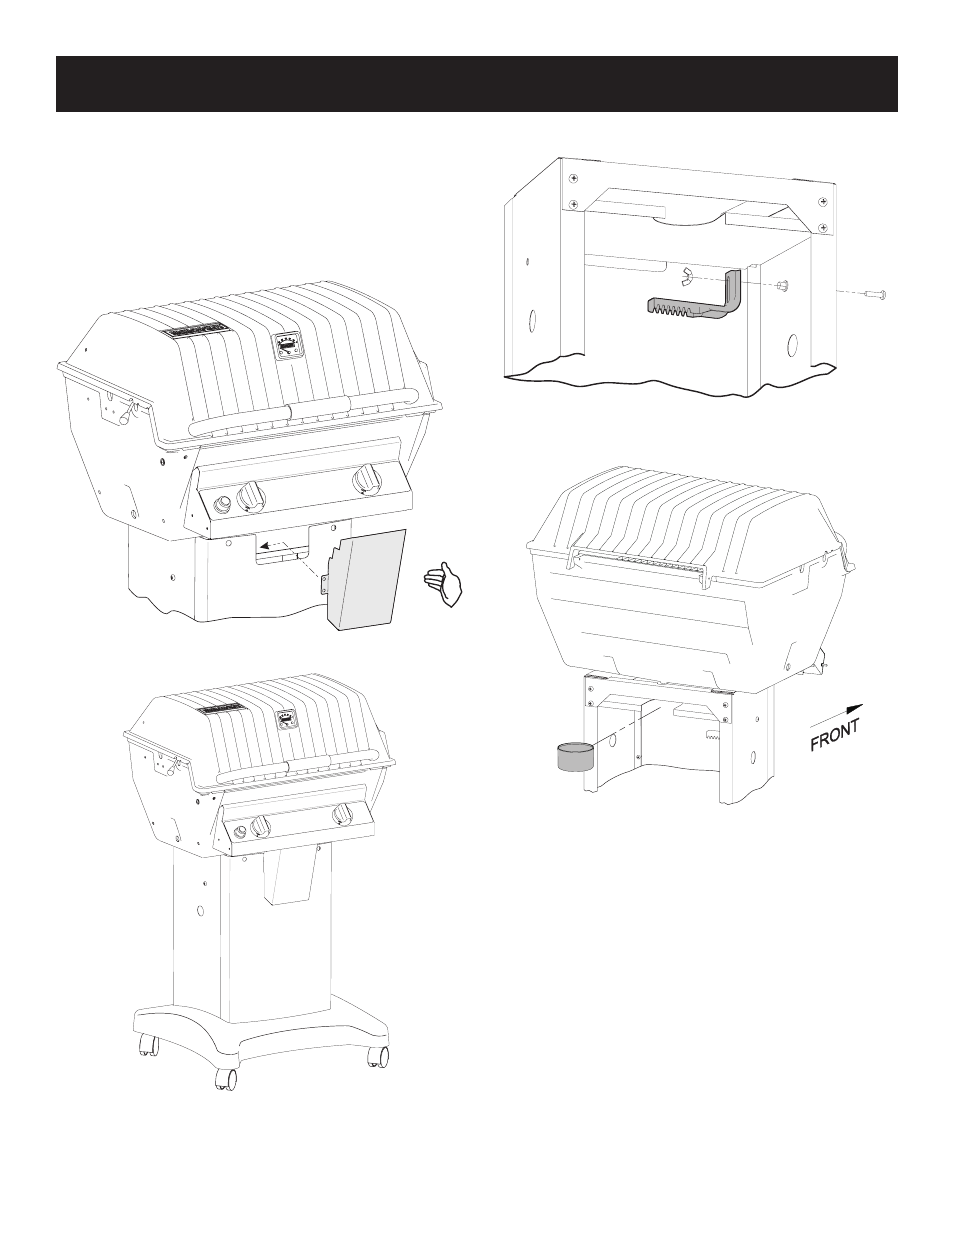
For R3 Series Grill Heads: Press in the two sides of the
Control Housing (provided with Grill Head) and fit it into the
opening under the grill head as shown in Figure 10. Grill
Assembly will look like Figure 11.
Note: It may be easier to insert one side of the control housing
first, and then press in the other side using the cart as a brace
for the inserted side.
Figure 10
Figure 11
C
Art
A
SSEmbly
10. Mount the tank retainer to the cart by using 1/4-20 x 1 1/4 Phil-
lips Truss Head screw and 1/4-20 wing nut.
Figure 12
10. Install Grease Cup by sliding it in the cutout provided in the
shield.
Figure 13
11.
For Stationary Cart Assembly: Slide grill assembly into posi-
tion over holes drilled in Step 1. Secure with three screws (not
supplied). If applicable, route the gas line through the hole and
attach to the grill.