Bushnell Onix 364000 User Manual
Page 25
25
using your oniX400 gPs receiVer : editing text and icons
As long as you are actively using the GPS and pressing buttons (within time
limit set in SafeTrack options (Fig. 49), the screen display will stay active-but
the unit is still in SafeTrack mode.
After a period of inactivity (length of time selectable in SafeTrack options
menu), the Start SafeTrack screen (Fig. 27) will appear.
If you do not want to return to SafeTrack, press OK or Left with “Cancel”
selected.
How to Set or Edit Names for Waypoints, Trails, Map Areas, etc.
(Using the Type Tool)
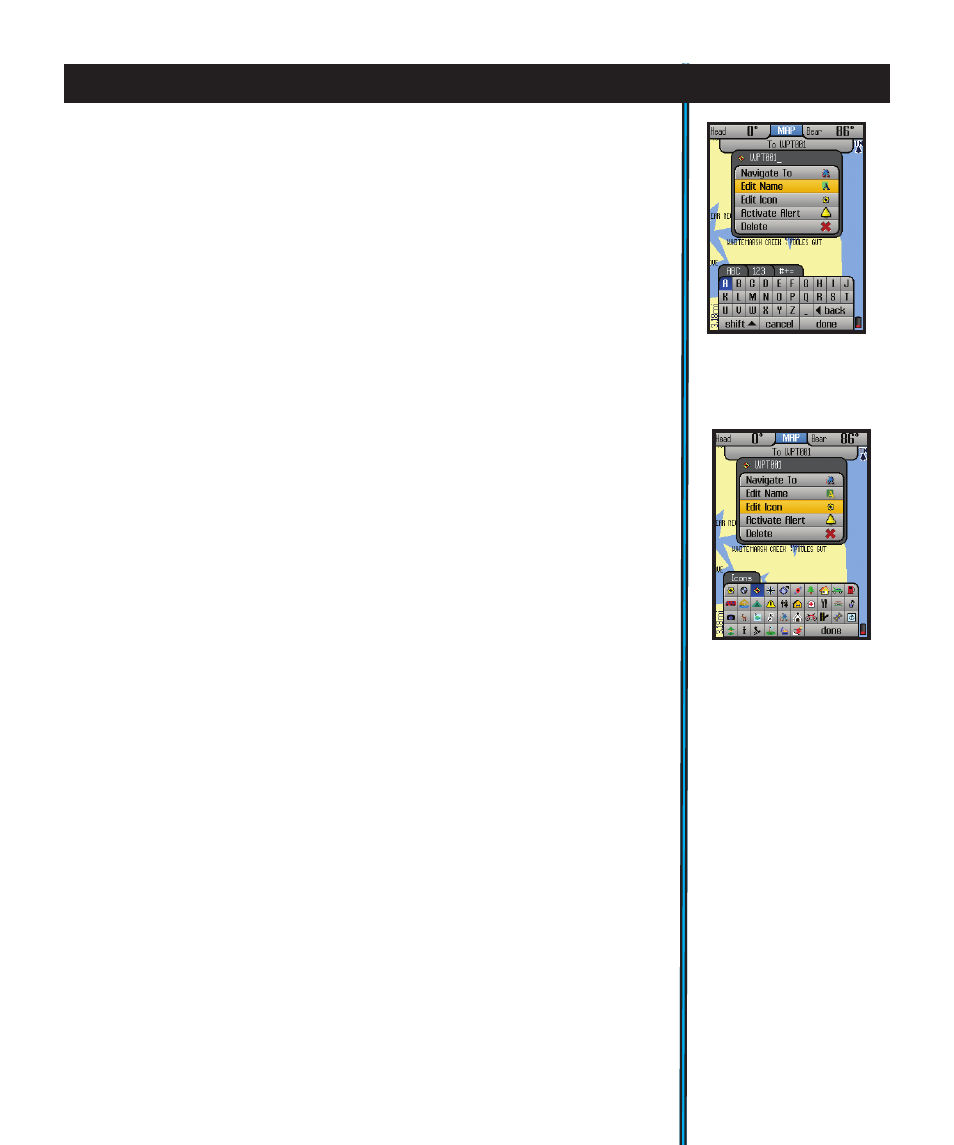
With “Edit Name” selected, click OK to bring up the Type Tool, a “virtual
keyboard” (Fig. 50). This is a multi-function tool that is controlled by the 5-way
button. Your currently selected character is highlighted. Move LEFT/RIGHT or
UP/DOWN to select letters, then press OK to enter your selected character-
you’ll see it appear in the name near the top of the display. Use the LEFT/RIGHT
keys to move around in a row (it “wraps around” when you go past the 1st
or last character in a row), and use UP/DOWN to move through the columns.
The Text Tool automatically switches to lower case after starting a word with
upper case, but you may use “SHIFT”(select, press OK) to change it anytime.
Use “back” to backspace if you make a mistake, or to delete the default “WPT
000” assigned to a new waypoint before starting to “type” your preferred
name for it. To insert a space, select “_”. To switch from letter characters to
numbers or symbols, press the “+” or “-“ buttons (you will see the tabs at the
top of the Text Tool change). Once you are finished creating or editing the
name for your waypoint, trail, etc, be sure to select “done” and press OK to
actually confirm and enter the name in the memory of the ONIX350.
How to Set or Edit Icons
(Using the Icon Menu)
With “Edit Icon” selected, click OK and the display will show a menu of icons
(Fig. 51), or common symbols, that you may choose to represent your waypoint
on the map. If you have previously set up a user profile for a particular type
of activity (for example, camping), the group of icons that appears in the icon
selection menu will be the ones most relevant to that activity. Simply use the
LEFT/RIGHT and UP/DOWN keys to move around the available icons, press
OK to select one (you will see it appear next to the name at the top of the
display), then select “done” and press OK again to confirm and enter the icon,
so it appears on the map along with the name.
Fig 50.
Text Tool-
Editing a
Waypoint Name
Fig 51.
Icon Tool-
Editing a Waypoint
Icon