Bushnell Onix 364000 User Manual
Page 19
19
using your oniX400 gPs receiVer : Waypoints / map areas
unit to scan and lock on to the GPS satellites during the first power up in a
new area-but will be faster when it is powered on again later in the same
area. (See “Reset Data” in the SET Page>GPS options, if you later relocate
more than 300 miles away from this initial area). Once it has locked into the
satellites (ideally, 4 or more), the satellite position icons will stop blinking
and turn green, you are ready to begin using the ONIX. The next step is
your choice-you may go to the NAV or SET page to select options or make
personal settings first, or begin navigating by going directly to the MAP
page.
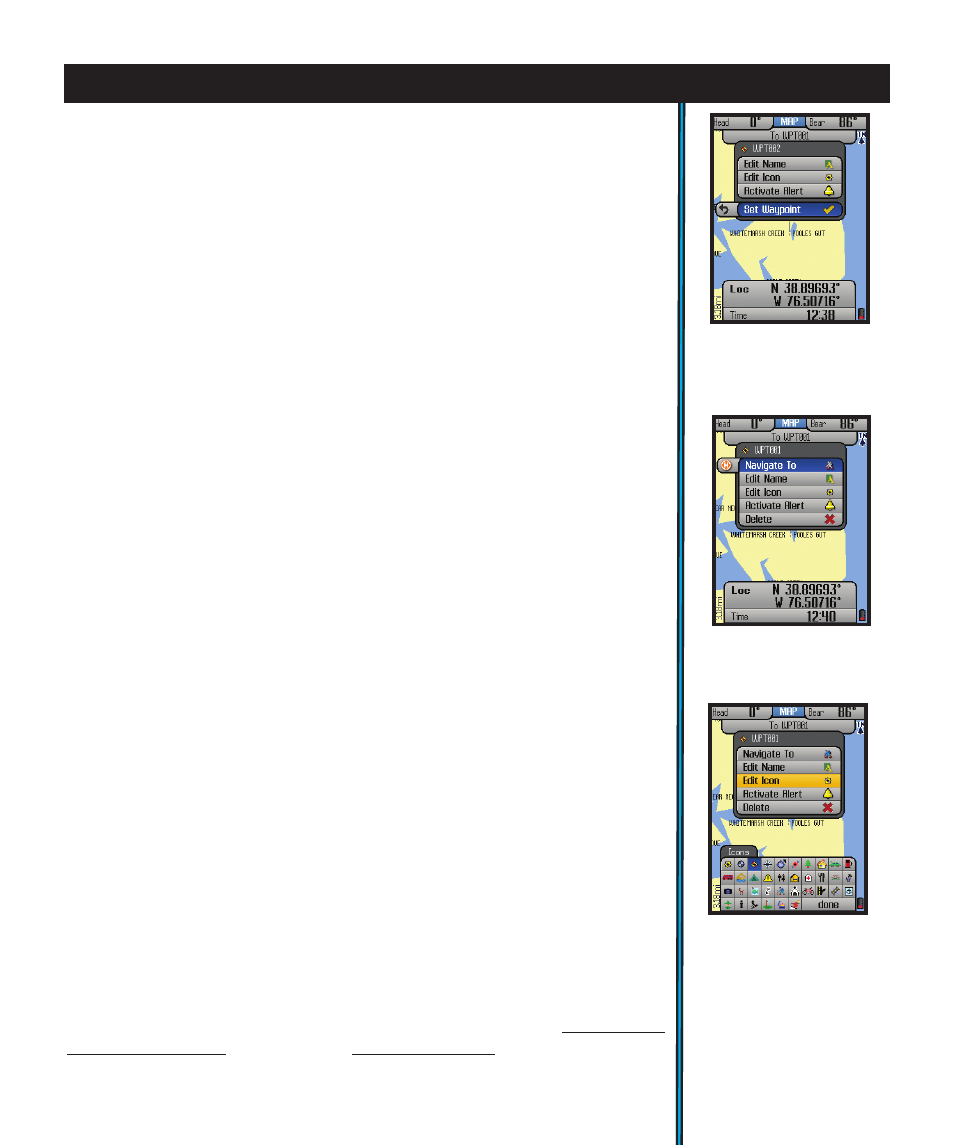
The simplest GPS function is to mark your present location. Any location
that you choose to mark is called a “waypoint”. To set a waypoint at your
current position, just press “OK” (center of the 5-way button). You will see
the Waypoint Menu (Fig. 31), with the default name assigned to the new
waypoint (WPT000, WPT001, etc) shown at the top, with these options
below it: Set Waypoint, Edit Name, Edit Icon, Edit Alert. Since “Set Waypoint”
is already highlighted, simply press OK again to accept “WPT###” as the
name and create a waypoint at your current position. See below for details
on how to edit a waypoint name and icon before setting it-this might make
it easier to find later. Or, you can rename a previously set waypoint, change
its icon, or delete it entirely at any time in the future (Fig. 32). If you choose
not to set the waypoint, or you want to delete the waypoint, simply exit via
the left arrow (press LEFT on the 5-way pad).
To edit the text, arrow up to the waypoint name, then click OK and use the
keypad screen you will see to create a name to replace it (see pg. 25 for
detailed instructions). You can also move down to select the icon, and again
press OK and choose from the available different icons (Fig. 33). Move down
to the alarm icon in the popup window and press OK to turn on the alarm for
that waypoint. The last item in the popup allows you to delete the waypoint
(you will be asked if you are sure, to prevent accidental deletions).
Creating a Map Area (My Map Areas)
A special feature available on the MAP page lets the user define a polygonal
(triangle, square, etc) area of any size, placed anywhere, which can then
be used to simply measure that area (displayed as total square mileage
or footage), help define map and property boundaries, and/or generate
an alert message when the area is either entered or exited. This is done by
placing a minimum of three virtual “fence posts” on the map which are used
to define the limits of the area (Fig. 34, next page). The process for setting
up a custom Map Area is outlined on the next page. More information
about utilizing the “My Map Areas” features can be found at: http://www.
bushnell.com/gps/ by clicking the Product Support link.
Fig 31.
Waypoint
Menu-Press OK to set
new waypoint
Fig 32.
Options for
previous waypoints
Fig 33.
Waypoint
“Edit Icon”