Black & Decker FP1450 User Manual
Page 4
Off:
Processor should be stored in OFF (O) position and unplugged when not in use.
Pulse:
Rotate knob to left and hold for PULSe (P). Use PULSe for short processing tasks.
This lets you control the size and uniformity of the foods being chopped. When
released the appliance will stop.
High and Low:
Rotate knob to the right one step for LOW (1) and two steps for HIgH (2). When
these speeds are selected, the processor will run continuously until the knob is
rotated counterclockwise to OFF (O).
HOW TO CHOP IN THE WORKBOWL
The chopping blade is used to coarsely or finely chop, to mince, mix and puree
foods to a smooth consistency.
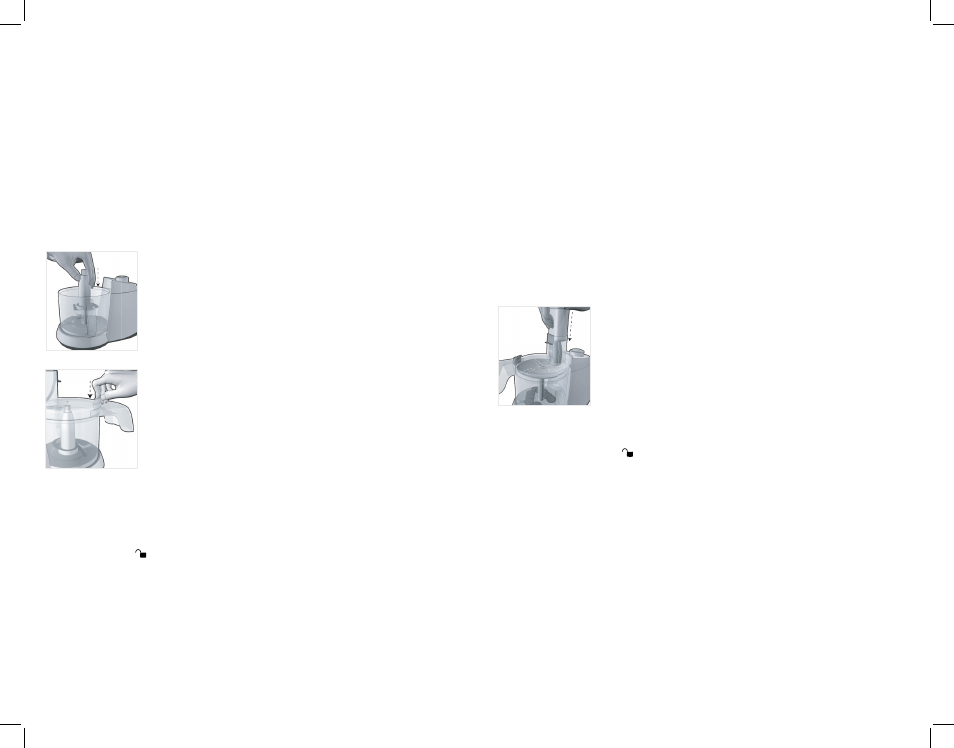
1. Place workbowl into position (
see Illustrations B and C).
2. Hold chopping blade by center shaft and insert onto center
post
(F).
Caution: The blade attachments are very sharp. Use caution
when handling and storing.
3. Place food in workbowl.
4. Place cover on workbowl and lock into place by rotating
cover counter clockwise.
(See Illustration D).
5. Place continuous flow stopper in place on cover
(G).
6. Place food pusher in place in feed chute.
NEVER USE
YOUR FINGERS TO DIRECT FOOD THROUGH CHUTE.
7. Select PULSe (P), LOW (1) or HIgH (2) by turning dial to
appropriate speed.
Note: Process foods no more than a few seconds at a time.
Pulsing produces excellent results and offers greater control.
8. To add food while processor is running remove food pusher and insert food
through the feed chute. Replace food pusher in chute.
Important: Be sure chopping blade has completely stopped spinning before
removing cover from processor.
9. When finished, turn control knob to OFF (O) before removing cover. Twist
cover toward
to remove.
10. Carefully remove chopping blade; unlock workbowl by turning it clockwise
and lifting off the base.
11. Unplug appliance when not in use.
HELPFUL TIPS FOR CHOPPING AND BLENDING:
• The processor works very quickly. Watch carefully to avoid over-processing
foods.
• PULSe (P) offers the best control and results.
• For best results, process foods that are about the same size.
• Do not overload the bowl.
• Never walk away from the processor while it is on.
• Use hot but never boiling liquids.
• Do not process more than 3 cups of liquid at one time.
• To process meat, use no more than 2 cups of ¾-inch cubes and process using
PULSe in 5 second intervals.
HOW TO SLICE OR SHRED INTO WORKBOWL
1. Place workbowl into position
(see Illustrations B and C).
2. Place disc stem onto center post in workbowl.
3. Carefully place slice/shred disc on stem
(see Illustration L).
Caution: The blade attachments are very sharp. Use caution when handling and
storing.
4. Place cover on workbowl and lock into place by rotating cover counter-
clockwise
(see Illustration D).
5. Place continuous flow stopper in place on cover
(see Illustration G).
6. Fill feed chute with food and position food pusher over
food. If desired, use food finger attachment to help direct
food through chute
(H).
7. Select PULSe (P), LOW (1) or HIgH (2) speed; press lightly
but firmly on food pusher to guide food through processor.
Note: Heavy pressure on the pusher does not speed the work;
use the pusher only as a guide. Let the processor do the work.
8. When finished, rotate dial to OFF (O) and wait for disc to stop rotating before
removing cover.
9. Twist cover toward
to remove.
10. Carefully remove slice/shred disc, unlock workbowl by turning it clockwise
and lift off base.
11. Unplug appliance when not in use.
HOW TO USE CONTINUOUS FLOW SIDE CHUTE
Do not use for slicing meats and cheese. Use to slice root vegetables, such as
carrots and potatoes, but do not use for shredding them. these moist vegetables
may clog the chute.
1. Place workbowl into position
(see Illustrations B and C).
2. Place disc stem onto center post in workbowl.
3. Place continuous flow discharge disc on stem.
Note: Be sure to place continuous flow discharge disc in proper position
depending upon foods to be shredded or sliced:
6
5
F
G
H