How to use – Black & Decker FP1450 User Manual
Page 3
4
3
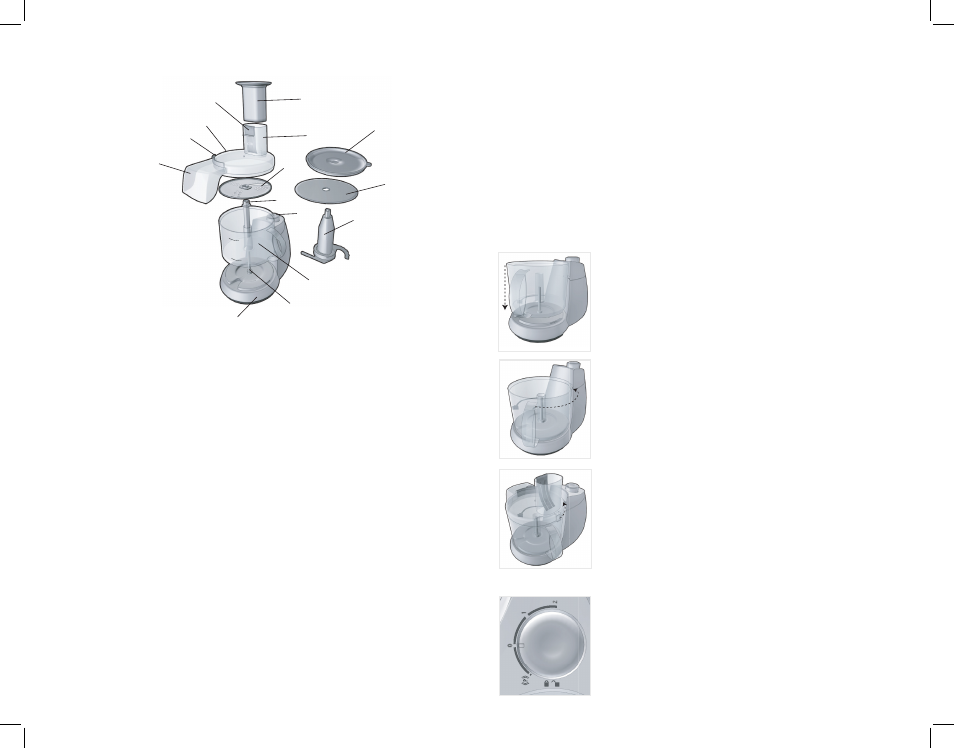
† 1. Continuous flow side chute (Part# FP1450-01)
† 2. Continuous flow stopper, (Part# FP1450-02)
† 3. Cover with feed chute (Part# FP1450-05)
† 4. Food fingers (Part# FP1450-04)
† 5. Food pusher (Part FP1450-03)
† 6. Feed chute
† 7. Slice/shred disc (Part# FP1450-06)
† 8. Disc stem (Part# FP1450-10)
9. Control dial (High/Low/Off/Pulse)
† 10. 8-Cup (1920 ml) workbowl (Part# FP1450-09)
11. Center post
12. Base
† 13. Chopping blade (Part FP1450-08)
† 14. Continuous flow discharge disc (Part# FP1450-07)
† 15. Storage lid (Part# FP1450-11)
† Consumer replaceable/removable parts
Product may vary slightly from what is illustrated.
How to Use
This product is for household use only.
• Remove all packing material and any stickers from the product.
Important: Handle sharp chopping blade and slice/shred disc carefully.
They are very sharp.
• Wash all removable parts as instructed in CARe AND CLeANINg section of
this manual.
• Select a flat, dry clean surface where this unit is to be used.
• Remove tie from cord and unwind.
• Plug unit into electrical outlet.
ASSEMBLING THE PROCESSOR
HOW TO LOCK THE BOWL IN POSITION
1. Place the workbowl over the center post in base with
handle turned to the left on the base
(B).
2. Hold handle and rotate workbowl counterclockwise until it
clicks firmly into place
(C).
3. Place desired blade assembly onto center post. (For
specific blade assembly, see HOW TO CHOP IN THe
WORKBOWL on page 5 or HOW TO SLICe OR SHReD
INTO WORKBOWL on page 6; for continuous flow
operation, see HOW TO USe CONTINOUS FLOW SIDe
CHUTe on pages 6 and 7.)
HOW TO LOCK THE COVER
1. Place cover over workbowl with feed chute to the right and
continuous side flow chute slightly to the back left of the
controls
(D).
2. Hold handle and rotate cover counterclockwise until cover
locks into place.
CONTROLS
Important: For your protection this appliance has an
interlock system. The processor will not operate unless the
workbowl and cover are properly locked in place. (See
illustrations for ASSEMBLING THE PROCESSOR.)
The control is located on the top of the base. Rotate the knob
to select a function
(E).
B
C
D
E
A