Buffalo Technology Buffalo AirStation Pro Intelligent WLM2-G54 User Manual
Page 15
10
8.6
Input Parameters Through the
Client Manager
1. Click the "Management" to open the next
page.
2. Click the "Time Settings" menu on the left
(menu section) to set the current time.
Click Set.
3. Click the "LAN Setup" menu on the left;
then click the "Wireless" menu.
4. Enter appropriate ESS-ID and channel
number. (see previous page)
■ Note: ESS-IDs are case sensitive, up to
32 alphanumeric characters in length.
5. Select WEP Enable box. Enter appropriate
WEP key on line 1. Click Set. Click Set
again.
6. Click the "Network Setup" menu on the
left.
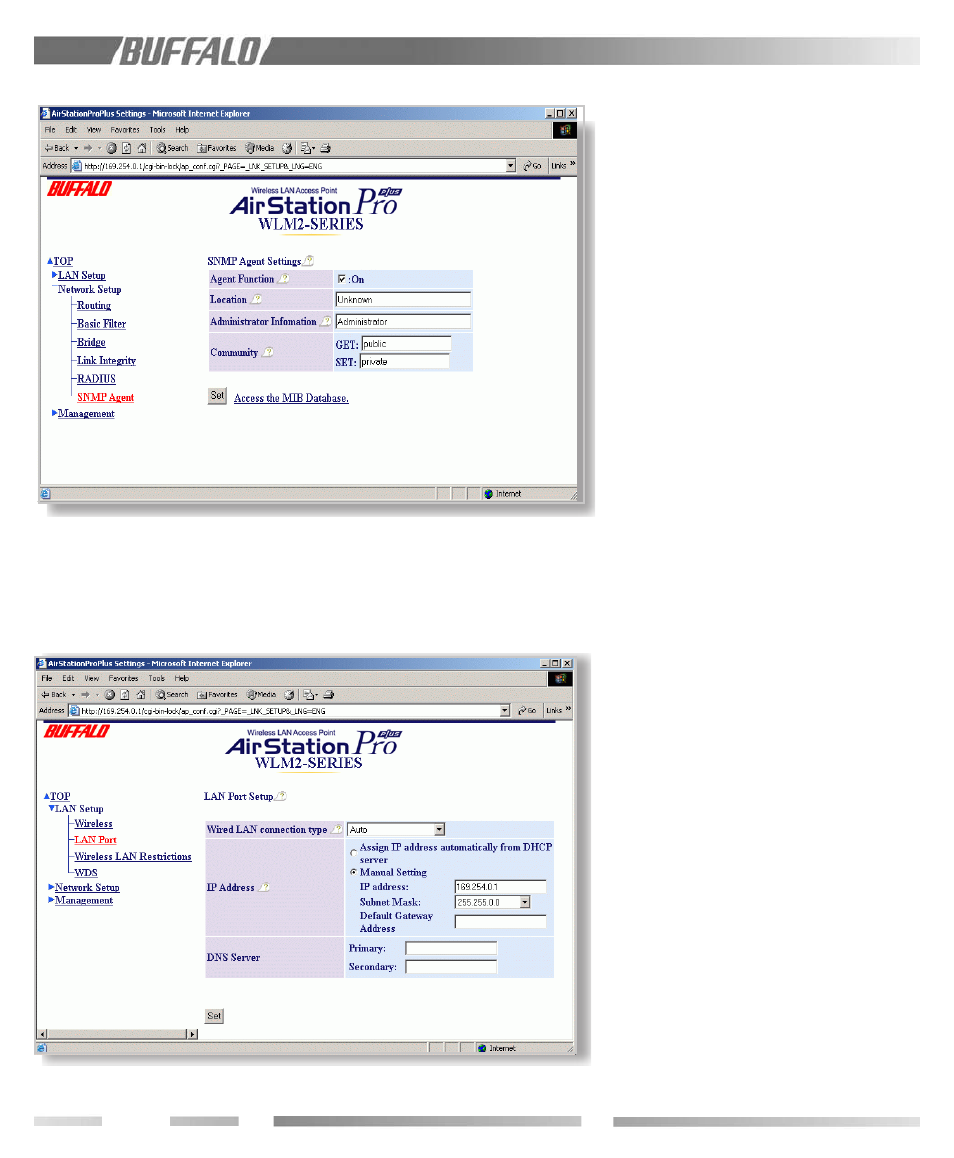
7. If you want to use the Agent Function,
check "On" and input the WLM2-G54’s
location, and Administrator Information.
Click Set.
8. If the WLM2-G54 is operated in a large
network environment, using a pre-
determined name identification system may
be recommended, to help identify the
WLM2-G54 easily. In order to set the
name, click the "Host Setup" menu to open
the basic setup page. Type an appropriate
name in the "AirStation Name" box. Click
Set.
9. On the LAN Port page, you may opt to
obtain the IP address from the DHCP
server or enter a static IP address manually
for the access point. If you are given a
default gateway IP from your ISP, input that
address. If it is not given to you, leave the
box empty. Click Set.
8.7
Input Parameters Through a
Wired PC, Terminal Software
1. Use the serial cable provided to connect
the WLM2-G54 to the PC’s COM port.
2. Start the Hyper Terminal software included
in the Windows OS. Hyper Terminal is a
standard software in Windows but it is
Figure 8.6.7 SNMP Function
Figure 8.6.9 DHCP and manual IP configuration