Section 2 getting started, Loading the battery, Charge your battery – Toshiba Camileo P100 User Manual
Page 10: Inserting and removing an sd card (optional), Getting started
10
EN
Section 2
Getting Started
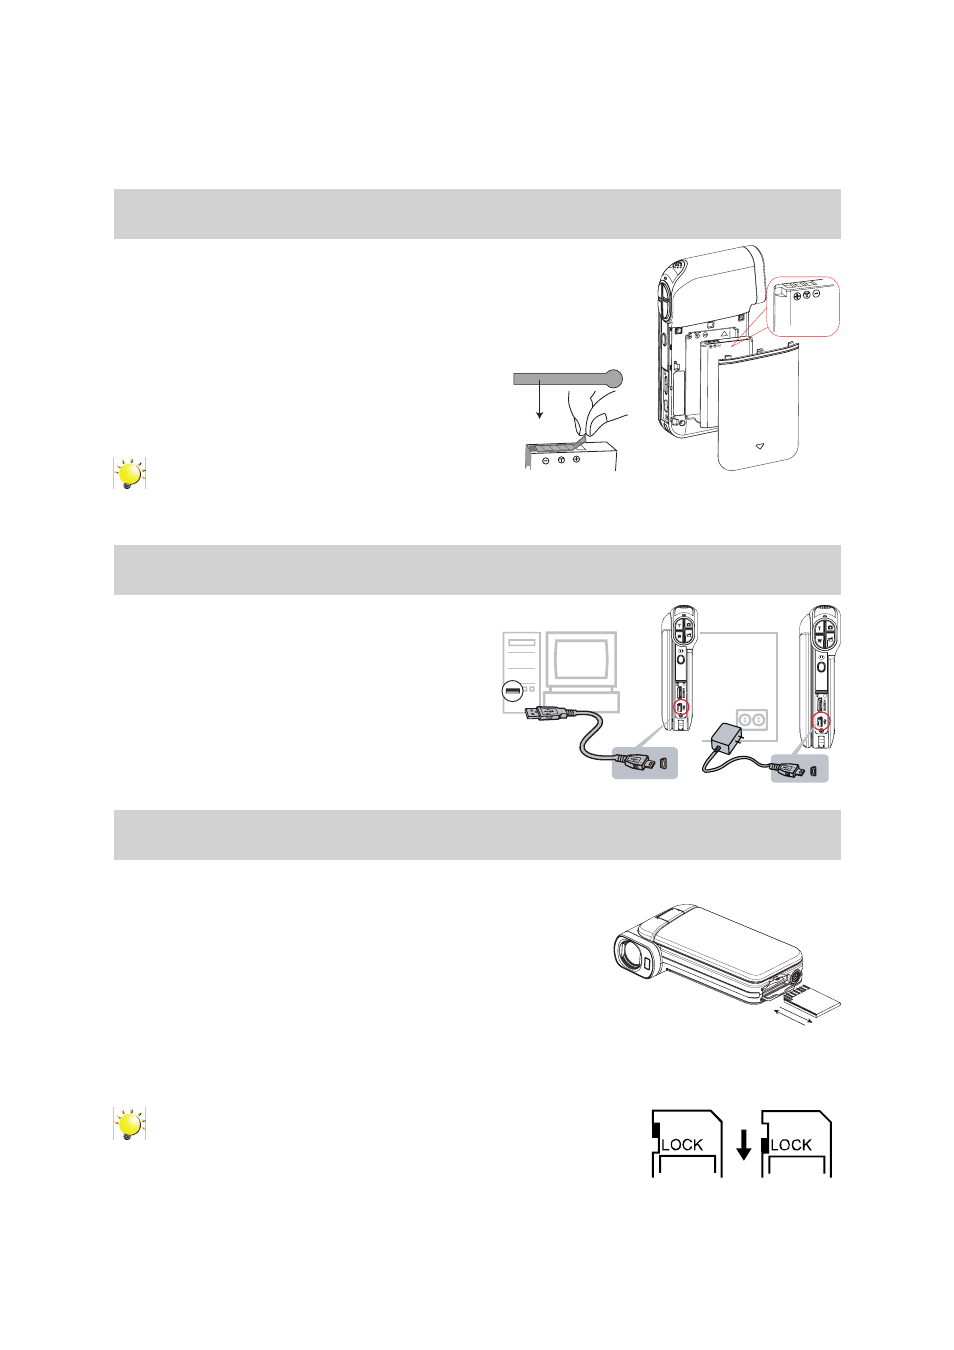
Loading the Battery
Before using the camcorder, users must load the Lithium-ion
rechargeable battery come within the package.
1. Insert the battery according to the correct polarity marks (+ or -).
2. Close the battery cover firmly.
Note
Please take out the battery from the camcorder and remove the insulator on the battery
connection before use.
Charge your battery
You must use the supplied AC charger or the USB
cable. The camcorder must be turned OFF. The
blinking light confirms the camcorder is currently
charging, and the light becomes constant after
the charging is completed. In AC charging Mode,
the light will turn itself off automatically after 3~5
minutes. The full charge time is about 3 to 4 hours.
(Actual charging time may vary. It depends on the
battery conditions.)
Inserting and Removing an SD Card (Optional)
The camcorder comes with an internal memory which allows you to
store photos and videos. You can expand the memory capacity by
using an optional SD memory card.
1. Insert the memory card into the slot. Please refer to the figure
on the right side.
2. To remove an installed SD card, press the card inwards to
release it.
3. When the card pops out, gently remove it from its slot.
4. Recommended memory capacity: 1GB or above.
Note
• When a memory card is fitted, videos/photos are saved
on the card rather than on the built-in memory.
• Protecting Data on an SD Card: SD Card is read-only
when it is locked. No photos or videos can be recorded
when the SD card is locked. Make sure the lock is on
the writeable position before recording any media.
Writeable
position
Write-Protected
Position
REMOVE