Connecting the system cable connecting the power, Connecting up 1, Connecting the power – Pioneer CT-L11 User Manual
Page 4: Connecting the system cable, Ribbon cables
4
En
Connecting Up
1
Connecting the power
1 Plug one end of the supplied power cord
into the AC INLET.
2 Plug the other end into a household
power outlet.
Connecting the system cable
If you don’t also own the optional MD recorder, this to
the CD tuner or DVD/CD tuner unit. If you want to
connect this unit and the optional MD recorder, connect
this unit to the MD recorder.
The CT-L11 connects directly to the XC-L11 CD (or XV-
DV77/DV88 DVD/CD) tuner or MJ-L11 (MD recorder). If
you are setting the whole system up for the first time, be
sure to also refer to the XC-L11 or XV-DV77/DV88 and
MJ-L11 manual for full installation and connection
details.
Important
Before making or changing any rear panel connections,
make sure that all the components are switched off and
unplugged from the power supply.
Note
The following illustrations are for the CD tuner rear
panel only. However, connections for the DVD/CD tuner
are the same.
•
Connect the cassette deck system cable to
the CD tuner or DVD/CD tuner or MD
recorder.
On the CD tuner and DVD/CD tuner, the socket is
labelled
FROM
MODEL
MJ
-
L11
OR
CT
-
L11
.
On the MD recorder, the socket is labelled
FROM
MODEL
CT
-
L11
.
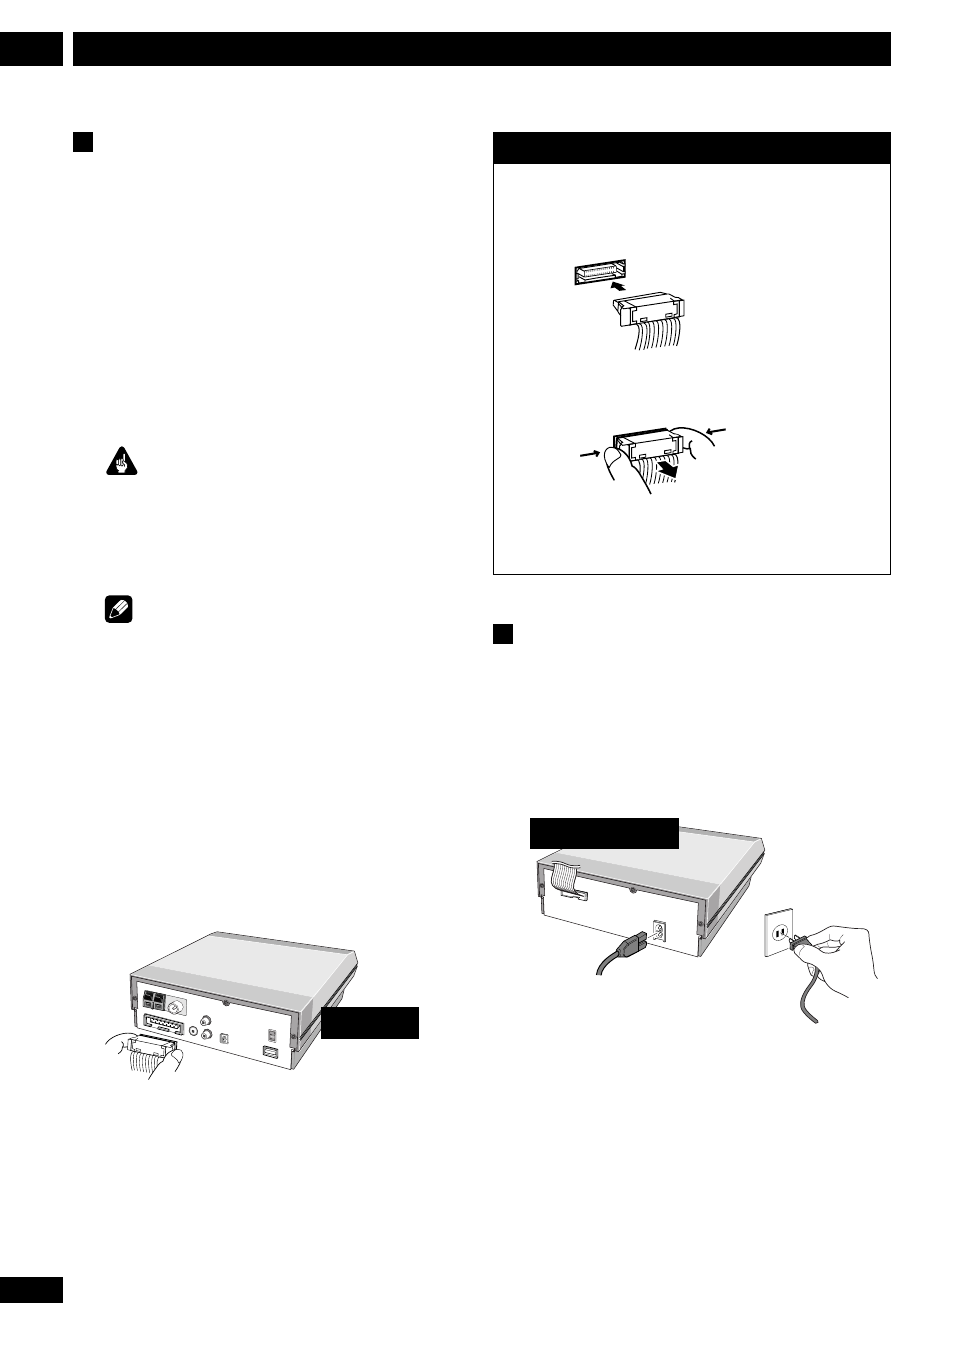
CD tuner
To insert, hold the connector and push firmly into the
socket until you hear it click home.
To remove, hold the connector securely on either side with
thumb and forefinger and pull out from the socket.
Ribbon cables
IMPORTANT: Never connect or disconnect the system
ribbon cables while the power plug is connected to the
wall outlet. Doing so may damage the unit.
Cassette deck