4 release the scanner lock, 5 install the power cord, Release the scanner lock – Brother DCP-8040 User Manual
Page 7: Install the power cord, Step 1, Setting up the machine, 4release the scanner lock 5 install the power cord
4
Setting Up the Machine
3
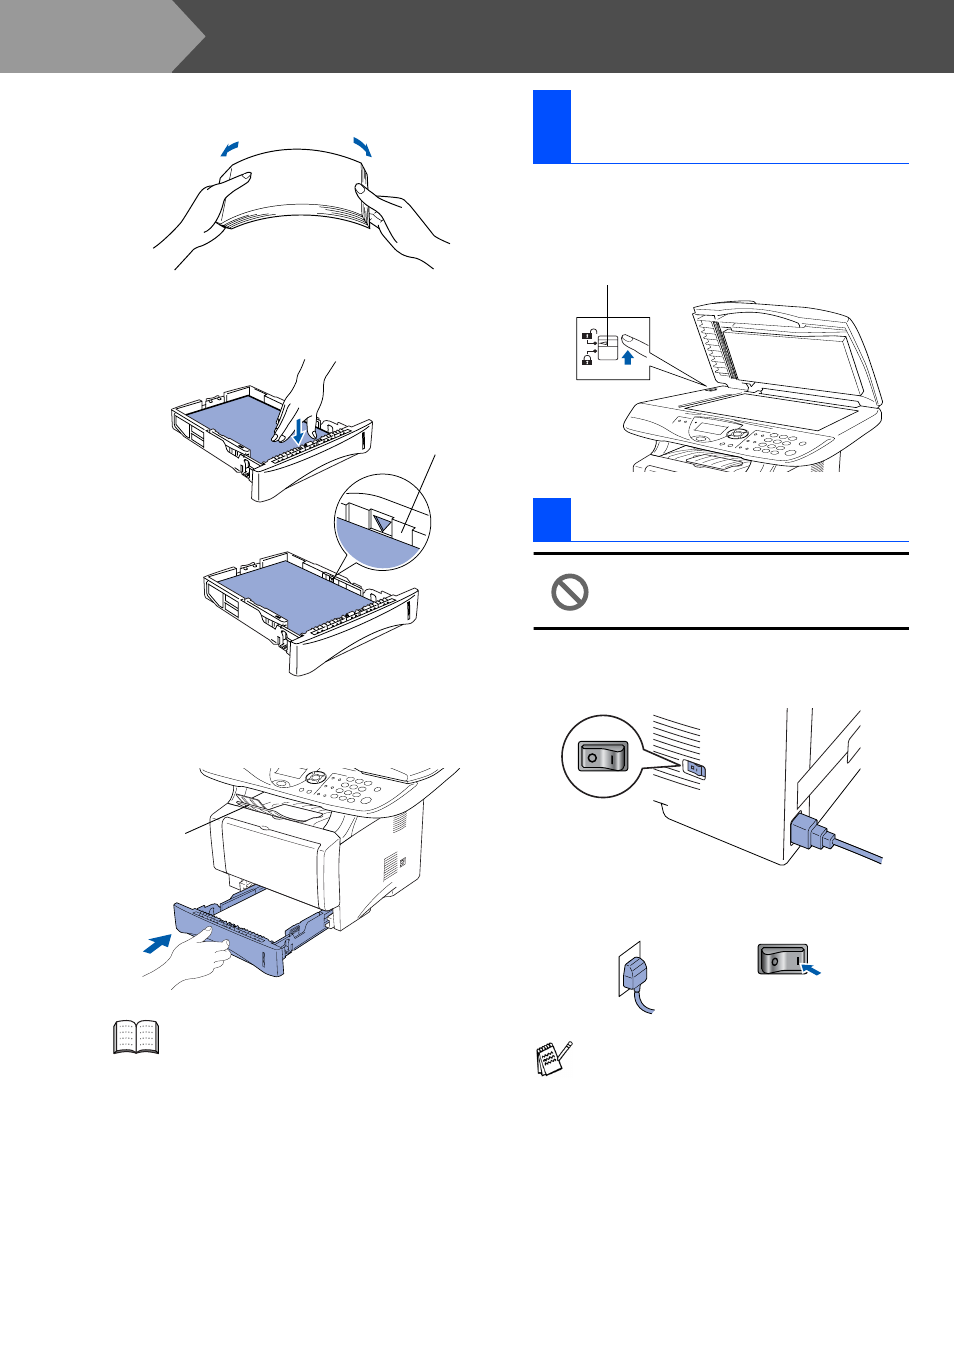
Fan the stack of paper well to avoid paper
jams and misfeeds.
4
Put paper in the paper tray.
Check that the paper is flat in the tray and
below the maximum paper mark.
5
Put the paper tray firmly back in the DCP and
unfold the Support flap before you use the
DCP.
1
Push the lever up to unlock the scanner.
(The gray scanner lock lever is located at
the back left under side of the document
cover.)
Do not connect the Parallel or USB
cable yet.
1
Make sure that the power switch is off.
Connect the AC power cord to the DCP.
2
Plug the AC power cord into an AC outlet.
Turn the power switch on.
For details on supported paper
specifications, see “Paper” in Chapter 2 of
the User’s Guide.
Up to here.
Support
Flap
4
Release the Scanner
Lock
5
Install the Power Cord
If
Check Scan Lock
appears on the LCD,
immediately release the scanner lock and
press Stop/Exit.
Scanner Lock Lever
Step 1