Vollrath F131 User Manual
Page 16
Owner’s Manual #513674 Rev.2
10
E131I2 & F131I2 Model Machines
B.
Using sanitizing solution and the large barrel
brush provided, sanitize the freezing cylinder by
dipping the brush in the sanitizing solution and
brushing the inside of the freezing cylinder.
NOTE
Do not let sanitizing solution sit overnight in the
freezing cylinder.
C.
Remove the drip tray by pulling from the front
panel. Clean and replace the drip tray.
3.7 ASSEMBLING MACHINE
To assemble the machine parts, refer to the following steps:
NOTICE
Petrol-Gel sanitary lubricant or equivalent must be
used when lubrication of machine parts is specifi ed.
NOTICE
The United States Department of Agriculture and
the Food and Drug Administration require that lubri-
cants used on food processing equipment be certi-
fi ed for this use. Use lubricants only in accordance
with the manufacturer’s instructions.
A.
Assemble all o-rings onto parts dry, without
lubrication. Then apply a thin fi lm of sanitary
lubricant to exposed surfaces of the o-rings.
B.
Install the rear seal o-ring. Lubricate the outside
of the rear seal o-ring with sanitary lubricant.
NOTE
Do not put Petrol-Gel directly onto the auger shaft.
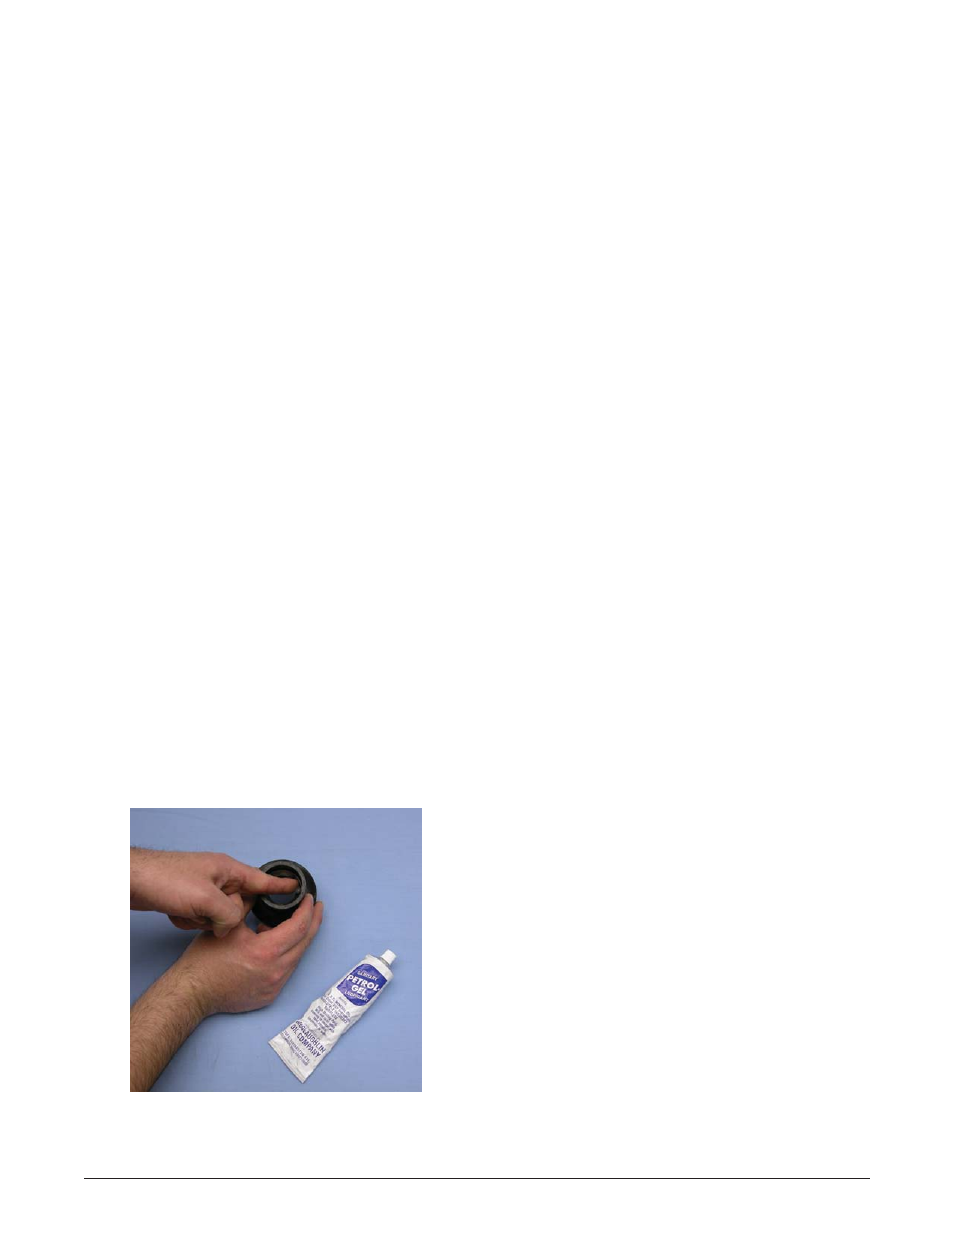
C.
Lubricate the inside metal surface of the rear
seal and install it onto the auger shaft. DO NOT
lubricate the outside of the rear auger seal (Fig.
3-6).
D.
Lubricate the hex drive end of the auger with a
small amount of spline lubricant. A small container
of spline lubricant is shipped with the machine.
E.
Screw the springs onto the studs in the plastic
fl ights. The springs must be screwed into the
fl ights completely to provide proper compression.
NOTE
Make sure the rear of the freezing cylinder is clean
and dry before installing the auger shaft. If the
freezing cylinder is dirty or if there is moisture, the
freezing cylinder may leak at the rear seal.
F.
Install the two plastic fl ights onto the rear of the
auger and insert it part way into the freezing
cylinder.
G.
Install the remaining plastic fl ights, push the auger
into the freezing cylinder and rotate slowly until
the auger engages the drive shaft.
H.
Apply a thin layer of sanitary lubricant to the inside
and outside of the auger support bushing. Install
the bushing onto the auger support and install the
auger support into the front of the auger. Rotate
the auger support so that one leg of the support
points straight up.
I.
Apply a thin layer of sanitary lubricant to the
o-rings on the spigot body and install the spigot
body through the bottom of the front door.
K.
Apply a thin fi lm of sanitary lubricant to the door
seal o-ring and fi t it into the groove on the rear
of the front door.
M.
Place the front door assembly on the mounting
studs and the push front door against the machine
carefully.
N.
Secure the front door to the machine by placing
the knobs on the studs and tightening until fi nger
tight. Do not overtighten. A proper o-ring seal can
be observed through the transparent front door.
3.8 SANITIZING
Sanitizing must be done after the machine is clean and
just before the machine is fi lled with mix. Sanitizing the
night before is not effective. However, you should always
clean the machine and parts after using it.
NOTE
The United States Department of Agriculture and
the Food and Drug Administration require that all
cleaning and sanitizing solutions used with food
processing equipment be certifi ed for this use.
Figure 3-6 Lubricate Rear Seal