Quick-start guide – Cirrus Logic CRD42L51 User Manual
Page 3
DS679RD1
3
CRD42L51
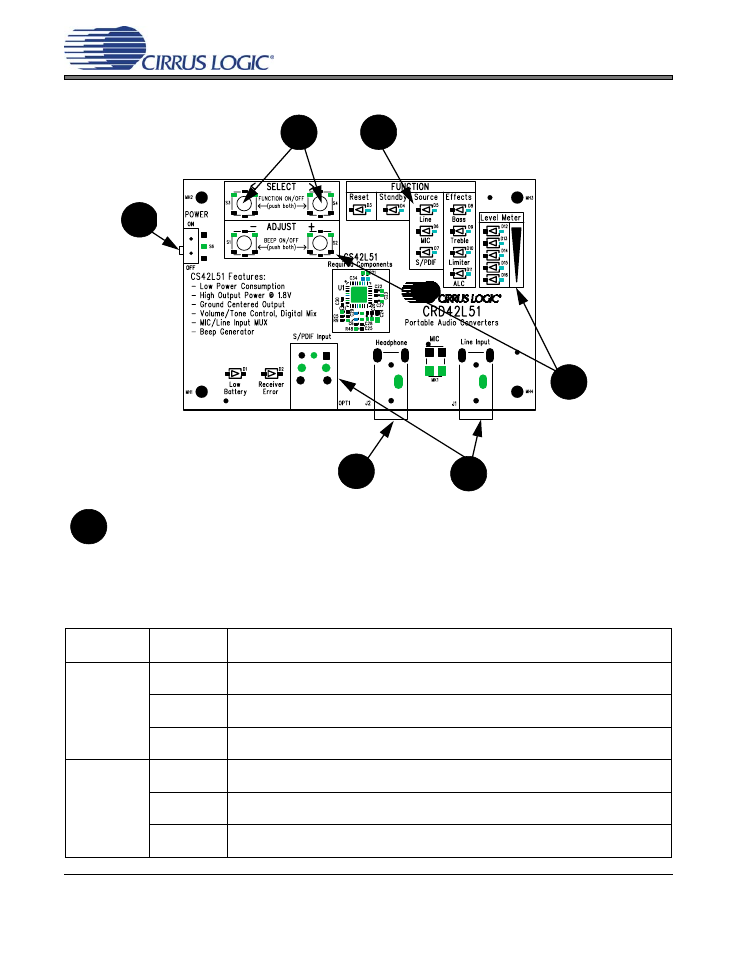
1. QUICK-START GUIDE
Pushbutton
Control
Key Press
Description
SELECT
<
(only)
Left/Up Navigation - Shifts the focus between functions. A blinking LED indicates which func-
tion has received focus.
>
(only)
Right/Down Navigation - Shifts the focus between functions. A blinking LED indicates which
function has received focus.
< AND >
(simultaneously)
Enables/Disables the function that is in-focus. When the selected function is enabled AND
in-focus, the associated LED blinks ON, periodically, with a longer duty cycle.
ADJUST
-
(only)
Decreases the volume level of the function that is in-focus.
Increases the threshold level of the ALC/Limiter when either is in-focus.
+
(only)
Increases the volume level of the function that is in-focus.
Decreases the threshold level of the ALC/Limiter when either is in-focus.
- AND +
(simultaneously)
Enables/Disables confirmation/error beeps.
3
4
5
6
2
1
7
3. Switch the power
switch to the ON po-
sition.
(NOTE: 1 AAA
battery, installed on the
back side, is required.)
The Reset Function will
activate. No selections or
adjustments can be
made while Reset is on.
4. Push both SELECT buttons simulta-
neously to turn off the Reset function.
The board will enter Standby for a moment and
then automatically activate the Line function.
5. Use any one of the SELECT buttons to navigate
between and shift the focus to select functions.
To turn selected functions on or off, push both SELECT but-
tons simultaneously. The assocated LED will turn on or off.
6. Use any one of the AD-
JUST buttons to control
the volume/ threshold
level of each Source/Ef-
fects that receives focus.
The Level Meter will briefly
display a pre-defined gradient
that represents the volume/
threshold level in dBs. The op-
timal/default level flashes for a
few seconds.
2. Connect the desired inter-
face.
Apply up to 2 Vrms to the Line
Input. For smaller signals, enable the
ALC function for automatic level con-
trol (up to +12 dB analog gain). For dig-
ital source, connect optical cable to
S/PDIF Input
1. Begin by connecting 16
Ω
or 32
Ω headphones.
7. Speak into the microphone or activate the exter-
nal S/PDIF or Line player to begin evaluation.